Decorative fireplaces are becoming more and more popular. With their help, in an ordinary city apartment, a bar, in a small country house, you can add a share of romance and comfort. In addition, the construction of a decorative fireplace requires a minimum of time, materials and absolutely no need to disassemble the ceiling, roof and floor for heavy brickwork. And if the appearance or location gets boring, then there is always the opportunity to change them without much effort and expense.
Content
We start designing a decorative fireplace
A copy of a wood-burning fireplace is made in natural size, based on the volume of the room and interior design. A drywall fireplace is best placed in a corner or near a wall. If desired, the mantelpiece can be turned into a stand for books, antique clocks, a collection of plates or the like. And arrange an imitation of a chimney as a place for paintings. Candles are often lit in the firebox, filling it with warm, soft light.
Classic fireplace consists of the following elements:
- firebox (the part where candles and decorative elements will be placed);
- portal (framing, front part of the fireplace);
- chimney;
- fireplace mantel;
- firewood (located under the firebox, will serve to store logs or other decor);
- fireplace grate (additional decoration of the structure, its presence is optional).
Based on this list, we are working on a sketch.
An ideal sketch is a three-dimensional image and three drawings made on a computer, reflecting top, side and frontal views of the structure, supplemented with the necessary dimensions and indicating the location of the frame. At the same time, it is advisable to make several volumetric sketches in order to subsequently choose the most successful one.
After the drawing is selected, we proceed to the assembly of the layout. We cut out the details from ordinary cardboard or polystyrene, gluing them with tape. We put the layout in the place where the fireplace will be. If necessary, we make adjustments by changing the location or size of the elements.

We purchase materials for construction
To work, you need to purchase, rent or ask friends:
- drywall or gypsum fiber (optimal thickness 9 or 12.5 mm);
- metal profile (guides and rack profiles);
- self-tapping screws and dowel-nails;
- sickle ribbon;
- putty;
- screwdriver;
- auxiliary materials: spatula, peeling planer, sandpaper, drywall cutting knife (or electric jigsaw), circular saw (if there is a need to cut round holes), metal scissors, building level, chalk, tape measure.

Frame assembly
- Marking work: We check the evenness of the walls with a building level. We markup taking into account the width of the profiles and drywall sheets.
- Working with a metal profile
Since fire safety measures in the construction of a decorative fireplace do not need to be observed, installation can be started without building a foundation and using heat-insulating materials. We fasten guide profiles to the floor, previously cut to the required length.

The standard length is usually three to four meters, the shape is U-shaped, in the center there is a groove for easy centering. We get the base of the future fireplace.
We insert rack profiles. They have corrugated walls, C-shaped edges. We check the verticality with a plumb line. The profiles are fixed to the wall with dowel-nails every 20-30 cm.


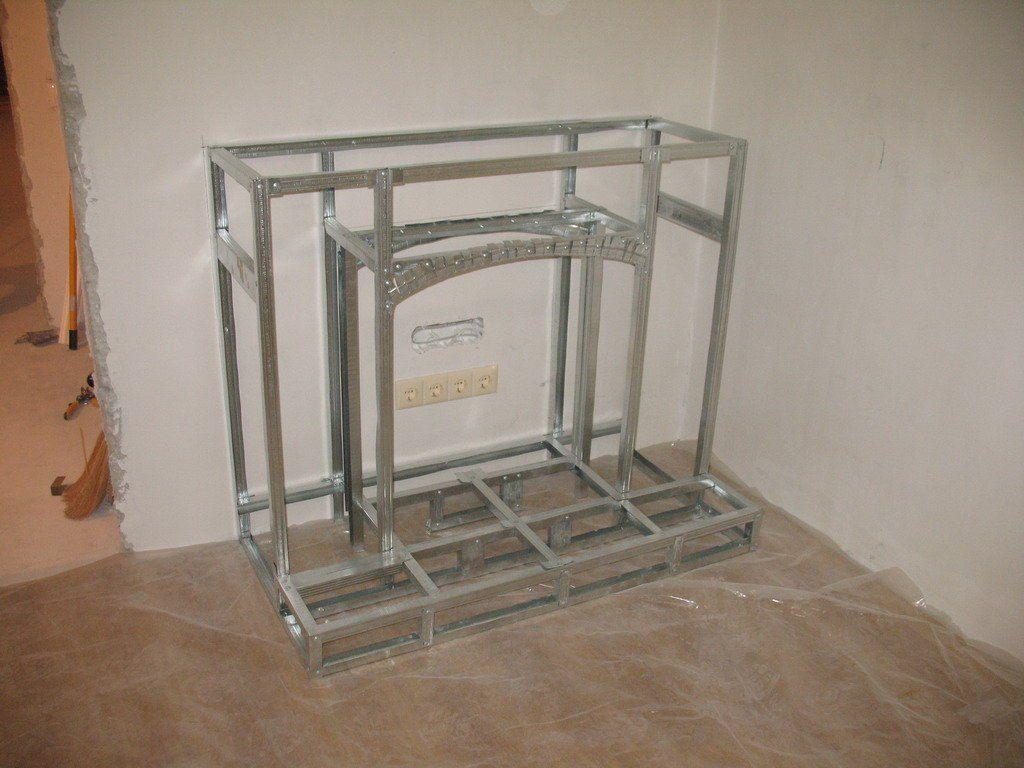


In order to increase the structural strength, we mount jumpers (short sections of rack profiles or wooden blocks). Gradually moving up, we collect the entire frame of a decorative fireplace, from the base to the chimney analogy.
Video training on how to mount profiles
Sheathing the profile with drywall
It is advisable to keep drywall sheets indoors for several days so that they dry out and reach room temperature. For installation, we use special self-tapping screws (for working with plasterboard), screwing them so that the head is recessed into the drywall by 1 mm.
We mount the largest parts first. To cut them out, we make markings using drawings and a layout.
GKL cutting is carried out on a flat surface. According to the markup, a rule (ruler) is applied to the sheet and we cut through the top layer of cardboard. After that, we press on the drywall, breaking it along the cut line, carefully turn the sheet over and cut the cardboard on the other side. We process the edges with a planer and fine sandpaper.
On the seams with a spatula we apply a layer of gypsum putty, a sickle tape and again a layer of putty.
To bend the GKL, we make many holes with an awl or a needle roller, moisten the top layer of cardboard with water, fix the sheet and, after drying, mount it on the frame.
If the room has high humidity, it is planned to paint with water-based paints, or there is a possibility of moisture getting on the surface, it is advisable to apply a layer of waterproofing primer.
Decorative fireplace trim
Perhaps the most important and painstaking part of the work. When choosing materials for decoration, you should carefully select the color scheme and check their quality.
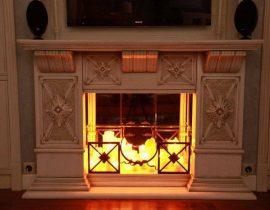
For decorating the firebox, ceramic tiles, a mirror are most suitable, but decorative plaster, wallpaper, and a painted surface also look good.
Finishing the firebox with ceramic tiles
1. Choose ceramic tiles. It can be with or without glaze, square or rectangular, plain or patterned. In this case, a large tile can be cut into pieces of a smaller size. To do this, use a tile cutter or grinder.
2. The first stage of drywall preparation is a mandatory primer.
3. Next, knead the elastic tile adhesive (cement-based adhesive) and get to work.
4. Apply the adhesive mixture to the tile with a spatula. Level with a notched trowel. The layer should not be thicker than five millimeters. We start laying out the rows from any of the lower corners. We insert special crosses between the rows to achieve the same thickness of the seams. Be sure to check the correctness of the rows with a building level and make sure that the mixture does not fall on the front side of the ceramic tile.
5. After the adhesive has dried (it is advisable to wait a few days), we overwrite the seams.We cut off the protruding sections of glue with a knife, clean the seams with a soft, damp sponge. We apply the grout from a confectionery syringe or with a thin brush. Wipe off the excess with a thick sponge.
In the same way we trim the firewood.
Some masters use liquid nails instead of tile glue when decorating a fireplace. This greatly speeds up the process.
We make finishing of the portal
Together with a tiled firebox, a portal made of artificial gypsum stones and a smoothly painted surface is perfectly combined. The portal frame can be made of wood or use the same ceramic tiles.
Coloring pre-primed drywall surfaces are produced with water-based solutions. The first layer is worn with a brush, the next - with a soft roller. Each layer must be allowed to dry. Matte paint in light shades looks good in any light.
Artificial stones are made by hand from gypsum. To do this, use a silicone mold lubricated with petroleum jelly. Pour gypsum diluted to the consistency of thick sour cream into it, level the surface with a spatula and after 15-20 minutes take out the finished materials.
In order for the stones to acquire color, coloring pigments are added to the solution or the surface of the finished stones is varnished, then painted.
The technology of sticking artificial stones on a decorative portal is akin to tiles. The only difference is that they begin to lay out the tiles from below, and the stones are first laid out on the floor, numbered, and only after that they are fixed from top to bottom on the fireplace.

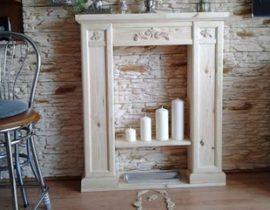
mantelpiece made from solid board. If you want the effect of naturalness, then we artificially age the surface, cover it with a stain, or simply choose an untreated coniferous board from coniferous species.
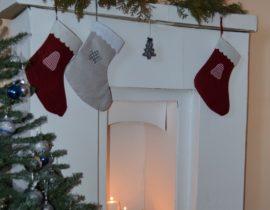
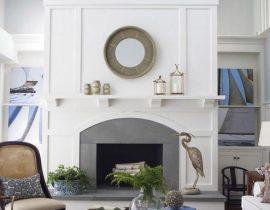
We decorate the finished fireplace with candles, install clocks, decorative porcelain, figurines on the mantelpiece, and put a few birch logs in the woodshed. A decorative plasterboard fireplace is ready. Unfortunately, a real fire cannot be made in such a fireplace, but even without this, the interior is transformed for the better.