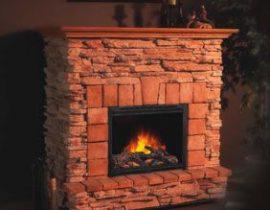
The dream of having a fireplace at home accompanies many throughout life. Even the thought is pleasant that someday in your own house it will be great to sit near the fire, enjoying the play of the flame. But these dreams do not always come true.
cardboard fireplace
Living in an apartment, it is impossible to build a real fireplace in it, and an electrical appliance costs not cheap. Therefore, many come up with their own models made of drywall or even ordinary boxes. We will tell you how to make a natural cardboard fireplace with your own hands, which is really indistinguishable from the real one, the emphasis is only on one hundred percent similarity with the original, read carefully and you will succeed!
There are many different options, more complex and very simple, but it is very important to treat the work Seriously, do everything carefully and take your time, carefully consider every detail. Only then can you get the desired result.
Content
Preparation for work
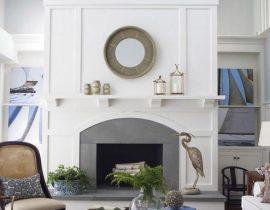
- Thinking this under the tree, determine the area where it will be located. It is best to place the fireplace in a place that seems empty and there is nothing to force it. For example, a wall where you can’t put a wide piece of furniture, and a narrow fireplace portal will come in handy. Another variant — corner fireplace. It will help close an unsightly corner and become a convenient additional shelf.
- Further you need to determine the size of the future work. This is done with taking into account the area of the area of \u200b\u200bthe room where it is planned to put it.
- next step goes creation of fireplace sketch drawings in two versions, the first will be a drawing with the specified dimensions, and the second — with finishing touches. Remember that decorating a building can be called the main process in this work. It doesn't matter what the frame is made of. — main decorate it in such a way that no one could even imagine that the fireplace is made of ordinary corrugated cardboard.
Materials and tools
Now you can proceed to search for materials for this product. To "build" such a structure you will need:
- The first thing to find — this is a large cardboard box, for example, from under the refrigerator or from under other large household appliances. This material cost gift to you.
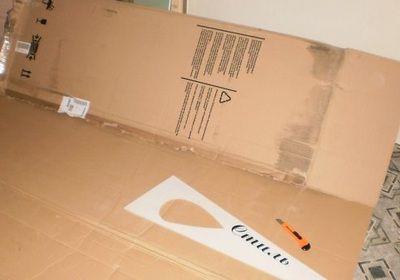
Ordinary packaging box from the refrigerator
The only difficulty will be finding a large piece of material. If you are not going to purchase a large item packed in such a box in the near future, then you can contact your friends or acquaintances.
Another option, more troublesome but affordable, could be arrangement with a happy purchaser of a refrigerator (washing machine, etc.) right in the store that you pick up he has the package, as soon as it is no longer needed. In general, with a strong desire, you can always find a way out.
- Need to buy glue PVA, because you can't do without it.
- Polymer glue will be needed for gluing decorative elements.
- Water-based paint for covering finished, already glued structures.
- Transparent varnish, preferably — water based.
- Coloring additives of the desired color for water-based paint.
- gold paint for coloring decorative elements (optional).
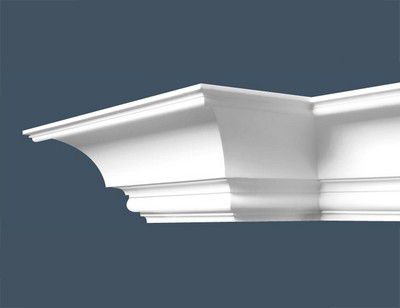
Styrofoam or polyurethane molding profiles will decorate the fireplace
- Styrofoam ceiling moldings — their length must be calculated according to the height and length of the planned fireplace. Moldings and corners, which are also needed, can be decorated with carved stripes, or they can have a relief pattern. You can choose these decorative ornaments according to your taste. In addition to them, you can purchase items imitating stucco and small columns with capitals.
- Set of brushes + sponge.
- Masking tape.
- A simple pencil, tape measure, long ruler, paper knife.
All of these materials can be purchased at a hardware store or office supply store. Naturally, you will spend some amount on them, but it will not be so large as to affect the family budget.
Making a fireplace
Based on the sketch and the selected dimensions, it is necessary to draw the details of the fireplace on the spread cardboard. It consists of three parts: base, portal, top shelf.
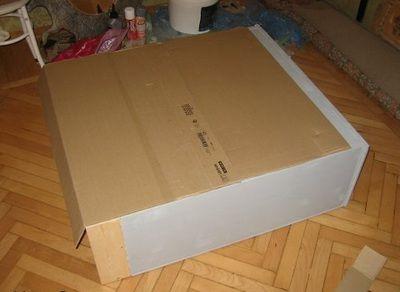
The foundation
The base should have a width of 5—7 cm wider than the overall thickness of the fireplace, and in length — about, on 10—12 cm more than the width of the future building.
A rectangular box with arranged inside is cut out and glued with masking tape. her for rigidity ribs from several pieces of cardboard glued together. The photo shows the inside of the base.
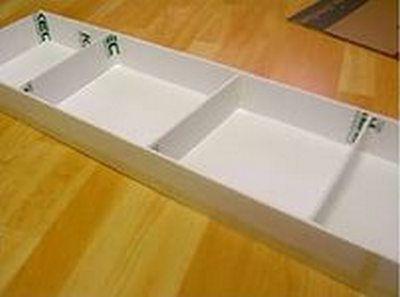
Fireplace base with stiffeners
Immediately you need to decide how portal fireplace will be attached to the base.
- It can be installed inside her, fixed to the walls and bottom, and then the open space around the portal will be sealed.
- Or the box is sealed completely, and the portal is fixed with adhesive tape on her surfaces.
Depending on which variantnt dlI’m more convenient for you, and this is how the base will be glued: a box sealed tightly, or left in the form shown in the photo.
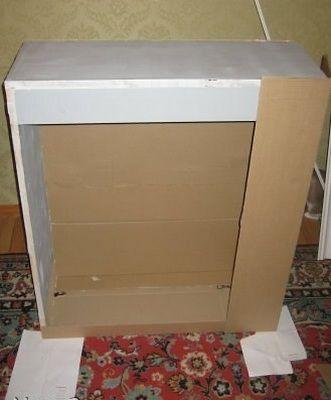
fireplace portal
The fireplace portal can also be made in different ways: with a solid back wall or frame, but in given case, the first option will be considered.
Future fireplace portal - rear view
The front of the fireplace can be made from individual strips or from a single sheet of cardboard from which the middle part is cut. She will imitate a firebox. If the firebox is cut from a single piece of cloth, her you need to accurately mark and draw, then make an incision along her top, and then mark the middle of the cut and cut evenly to the very bottom. You get a kind of window, the edges of which will form the inner side walls of the furnace. They must be fixed to the back wall with construction tape.
Installation of the front part of the portal
The ceiling of the firebox is cut out separately, according to previously taken dimensions. It is also fixed to the back and side walls with adhesive tape.
Bonding base and portal
On the lower base of the fireplace, the middle is indicated, from her measure equal distances in both directions according to the size of the portal. Further according to these marks, a prepared portal is installed and fixed to the base with construction tape.
Upper mantel
The mantelpiece can be left as the top of the box, but placed on her above heavy vase will not work, so it's better to do her more tough. For this, cut out three four identical details — they can be slightly larger than the thickness of the fireplace portal or exactly the same width.
These parts are glued together in thickness using PVA glue, and sent under heavy press. When the panel is dry, it will have sufficient rigidity, and her planted on top of the portal on polymer glue.
All seams of the portal and the base must be glued with masking tape, it is thin, paint fits well on it, and it will hold all the details together perfectly.
decoration
next step goes decoration. it — the most pleasant work, as the fireplace begins to transform and acquire a “marketable” look.
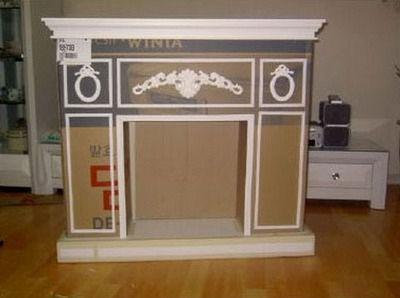
Decorating a fireplace with polymer parts ...
- The fireplace mantel is framed by a wide molding. Narrow neat polystyrene strips can be distributed in different ways. Also stucco elements are used if they you provided. After sticking them, the fireplace will change. Moldings and decorative elements are fixed with polymer glue.
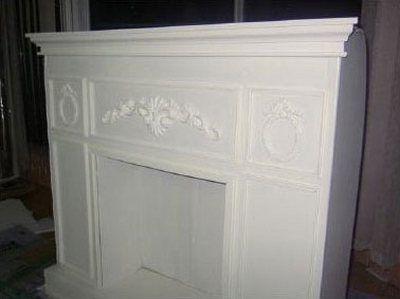
and coating it with water-based paint
- Further should more more interesting process — the whole structure is covered with a soft brush with white emulsion paint. In places where stucco is fixed, you can paint over with a sponge or a thin brush. The result is an amazing snow-white design.
Further decoration of the fireplace will depend on your imagination. — it can be left snow-white, or you can tint it with the chosen color water emulsion and impose a tone on the stucco elements. If desired, they can also be gilded.
- Then a colorless water varnish is applied. Surfaces covered with it can be easily tidied up — enough to brush off the dust.
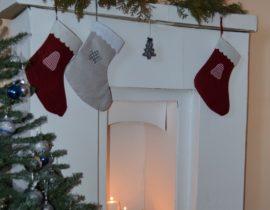
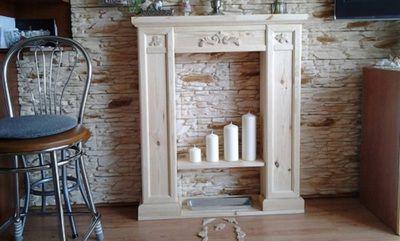
- After completion of the work, the fireplace is installed in the place intended for it and decorated with a flowerpot or certain the number of candles. Can you think of something his, original and exclusive. Feel free to get down to business and create.
Fireplace accessories
An interesting solution would be to put a few fake logs in the firebox, which can easily be made from the same corrugated cardboard.
- They are made very simply. — the cardboard is folded into a tube of the desired thickness and glued with masking tape, or its edge is smeared with polymer glue and pressed well. Such "logs" need to be made several pieces, and they should have different thicknesses.
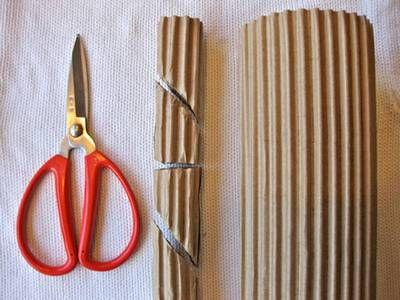
The simple process of making "firewood"
- Then curl up more several tubes, thinner, and cut into pieces that will play the role of knots.
- Next manipulation — fitting "knots" to a cardboard "log". They are also glued to polymer glue.
- When all "logs"will be ready and the glue will dry completely, you can start decorating them with emulsion paint and gouache.
- «Logs» can be tinted to match any kind of wood and painted the way you like best. In this variant it isbirch logs."
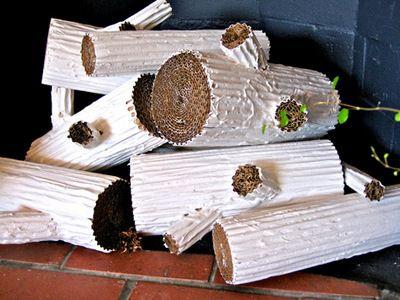
"Birch woodpile" is ready
- It should be noted that "firewood" can be of a different shape., for example triangular or square. In this case, do not have to make “knots”, but you also need to color them under “chopped firewood”.
This accessory will perfectly decorate your fireplace and give it naturalness.
How to make a fireplace with your own hands from cardboard - video lesson
Starting this creative process, do not be afraid to spoil something.You need to turn on your imagination and act boldly, but carefully. Perhaps, in the process of creativity, completely unexpected ideas will come to you, and then your fireplace will not be like any other. You can be proud of your ingenuity and exclusivity. After all, if you made a fireplace with your own hands, and did not buy it in a store, you will look at it in a completely different way and your attitude towards it will be completely different. In any case, do not be afraid to experiment, cardboard is not the heaviest material and you can make anything out of it!