Corner fireplaces from drywall take up very little space, while simultaneously performing their aesthetic function.

The cost of such a structure is relatively low. For construction, you need to stock up on the necessary materials and tools, patience, accuracy and a sketch of the future fireplace. The nice part about building is that there is no need to dismantle the floor and pour the foundation, since a drywall fireplace is light enough that almost everyone can do it!
Content
Varieties of drywall fireplaces
- Symbolic false fireplaces. They are more like a picture imitating a fireplace portal. The simplest option, but capable of performing only a decorative function in the interior.
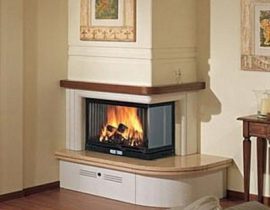
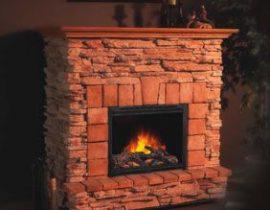
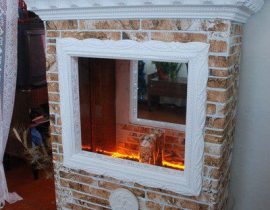
- Conditional false fireplaces. This includes a frame (portal) for electric fireplaces. That is, the structure protruding from the wall is intended for the constructive conclusion of the electric fireplace screen into it. It can be combined with a solid mantelpiece and adjacent firewood imitation.
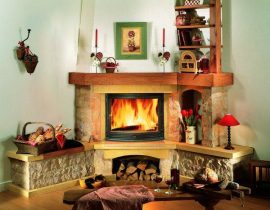
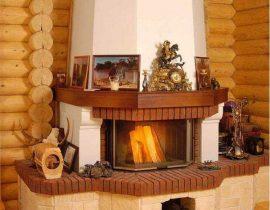
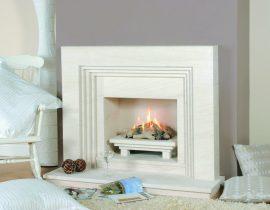
- Authentic fireplaces or outdoor biofireplaces. In such structures based on a metal frame and drywall, there is an imitation of a real firebox, inside which the flame of a bio-burner burns, you can light candles and decorate the interior of the firebox with artificial heat-resistant firewood and stones. A decorative damper (for example, forged) gives even more "naturalness" to the fireplace.
Plasterboard fireplace design
First of all, we determine the amount that can be allocated for the construction of a drywall corner fireplace.

Before proceeding with the design of the drawing, it is advisable to make markings on the floor and walls corresponding to the position of the future fireplace, its actual dimensions. Then measure each line with a tape measure and transfer them to paper. The fireplace portal can have both straight and curved lines. Drywall lends itself perfectly to bending.
In order to visually bring the fake fireplace as close as possible to the real, wood-burning one, you should adhere to the proportions. The ratio of height to width is about two to three. The depth of the firebox (hearth) is taken in proportion to its height, approximately one to two or two to three.
When calculating, it is necessary to take into account the thickness of the drywall sheets. The best option is 9 or 12.5 mm.
On checkered sheets, we build a front view and a top view (if necessary, a side view). We note the overall dimensions and dimensions of each element. At the same time, we indicate the position of the frame on the drawing (guides, jumpers, etc.).
Ideally, to check the correctness of the calculation, a cardboard fireplace model is built. Thus, it becomes possible to correct defects, change the shape of the fireplace parts or even move it to another corner of the room.

Assembling the frame of a raised fireplace
For the frame, we need guide profiles and rack. Both are made from galvanized steel. The guide profiles are shaped like the letter "p" and are distinguished by corrugated walls (to increase rigidity). Rack profiles have a special strip in the center, which is necessary for ease of installation and centering of self-tapping screws and dowels.

- - First of all, on the floor and walls we check the accuracy of the markup (using a plumb line and a building level).
- - Then we cut out pieces of profiles of the required length with scissors for metal. If there are parts with a radius, the metal profile must be cut (every centimeter) and gently bent.

- - We first lay out the profiles, then fasten them to the floor with self-tapping screws. To fasten the rack profiles to the wall, we use dowel-nails. The distance between self-tapping screws (similarly, dowel-nails) should not exceed one meter.
- - To strengthen the structure, wooden slats made of coniferous wood are often used. This is useful in rooms with low humidity.
- - Jumpers (to increase the strength of the structure) are cut out of the rack profiles and fastened with self-tapping screws.
Important! When assembling the frame, it is imperative to pour a concrete cushion. The height is taken from 20 to 30 cm, and the length and width are calculated based on the dimensions of the base of the fireplace, adding to this value 20-30 cm on each side. This is necessary when the floor surface is not even enough and for additional protection against fire.
GKL preparation for cladding a corner fireplace

For cutting drywall we take a knife (ordinary clerical or specially designed for GKL sheets), a rule (for example, a flat board or a meter ruler) and cut a cardboard layer on one side.Then we turn the sheet over and cut a layer of cardboard, respectively, on the other side. To break off the drywall, lightly press on it. If there are irregularities, we eliminate them with a peeling planer.
For cutting parts with a radius use a hacksaw or jigsaw. After sawing, we clean the bumps.
If you need to cut perfectly round hole, then it is best to use a jigsaw with special nozzles, an electric drill with a crown nozzle or a circular saw (circular drill).
What to do if necessary bend drywall sheet? To do this, we measure and cut off a piece of drywall of the size specified by the drawing, lay it face down and make many shallow holes with an awl. An alternative to the awl is a roller with spikes. We impregnate the GKL with water so as not to wet the bottom layer of cardboard. When the gypsum layer is sufficiently soaked, bend the sheet and fix it. After the moisture evaporates, the drywall will finally take the desired shape.
Sheathing the frame of a corner decorative fireplace

We sheathe the firebox with heat-resistant materials. To do this, we lay a layer of mineral wool and fasten metal plates with self-tapping screws. On the panel, be sure to apply heat-resistant varnish or paint.
If you plan to place a mirror on the rear panel of the firebox, then it is better to protect it with a layer of heat-resistant glass (if the fireplace is small, the glass from the oven door will do).
The fastening of the prepared drywall parts to the frame is carried out with “gypsum-metal” self-tapping screws, screwing them in every 20-25 cm (it is better to use a screwdriver).
Self-tapping screws are slightly "recessed" in the GKL, by about 1 mm, in order to subsequently ensure the convenience of puttying.

Each self-tapping screw must fasten the drywall sheet and the metal profile and go into the profile by at least 1 cm.
putty process
Putty is applied to achieve a perfectly smooth surface.
Bred to start primer and apply it to drywall with a soft roller. The primer provides the best adhesion of materials. It can be applied before each layer of putty.
Putty in the first place applied with a spatula to the heads of self-tapping screws recessed into drywall. This is done only after the primer has completely dried. The composition is leveled, and after it dries, the irregularities are cleaned with a fine sandpaper.

Vertical drywall joints in order to avoid the appearance of cracks, they are reinforced with a sickle - a reinforcing fiberglass tape. They fix it like this: put a layer of putty on the seams, lay a layer of tape and instantly close it with another layer of the same putty.
Horizontal seams processed in much the same way. The only difference is that before applying putty and sickle, a layer of cardboard is removed from the sheet with a knife. However, if the fireplace is completely puttied, then there is no need to trim the cardboard layer.
Gypsum board fireplace mantel
We cut out the fireplace shelf from a solid, fairly wide board and fasten it with screws to the wall and to the frame of the false fireplace. If the board is artificially aged, this will add a special charm to the fireplace. The final stage is the application of paint or stain to the surface of the mantelpiece.
Fireplace finish
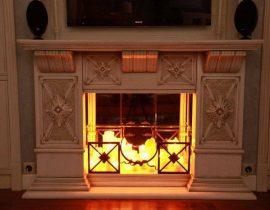
Finishing the front of the fireplace should fit into the design of the room.Since the drywall corner fireplace is one way or another the object that is first of all paid attention to when entering the room, a few curly details will be quite appropriate. But it is important to remember the sense of proportion, not overloading the composition with numerous columns, pilasters and massive elements.
Important! Before covering the entire surface of the fireplace with paint, wallpaper, plaster and gluing decorative elements, attach them to the walls of the fireplace, securing with pieces of double-sided tape. Or paint a small area of the fireplace, and look at the integrity of the composition. This will save material, time and effort in case of an unsuccessful choice of colors or structure of materials.
Video of the process of plasterboarding the fireplace