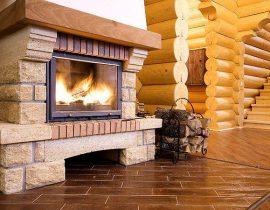
Biofireplace is a modern replacement for wood-burning fireplaces with the possibility of installation in an apartment or office. Biofireplaces have a lot of advantages: there is no need to install a chimney and logs, compactness, the ability to see a live flame, ease of maintenance, environmental friendliness, safety, aesthetic appearance, no soot and soot.
Refueling is carried out only when the flame is extinguished.
But such pleasure is very expensive. We suggest you make a biofireplace with your own hands, it's really simple, it won't take you much time and will significantly save your budget!
Biofireplaces are not recommended for use in bathrooms and rooms with an area of less than sixteen meters (per burner).
For ignition of biofireplaces I use special lighters.
Matches and newspapers are not safe to use for this purpose.
Content
Types of biofireplaces
Before you start manufacturing a biofireplace, you need to decide on its type (location in the room).
- Desktop – miniature imitation of fireplaces.The flame burns out behind a protective glass screen. Forms and designs are very diverse.
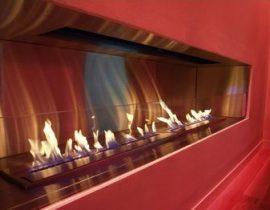
- Wall biofireplaces are made of metal, the front part is also protected by glass. The size usually does not exceed a meter.
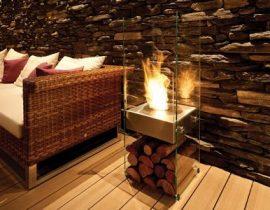
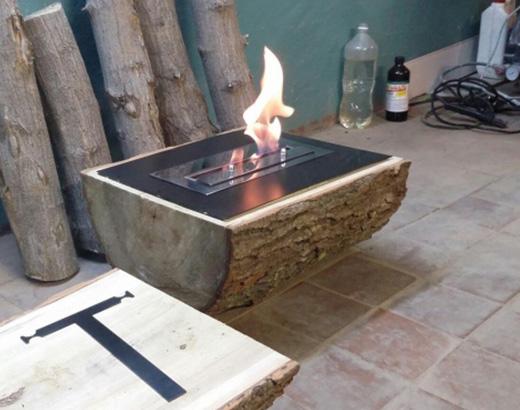
- Outdoor bio-fireplaces can imitate classic wood-fired ones or be of a non-standard shape. Such biofireplaces are located in niches on the floor, in the corners of the room (including embedding in a corner).
The number of burners (fuel blocks) in biofireplaces can be very different: from one to five or ten pieces, depending on the size. And given the fact that you are going to do everything do it yourself - you can determine the required number of burners and the power of each individual unit yourself!
Type of fuel that can be used in a biofireplace:
- bioethanol
- gel-like.
The second is less successful, since combustion products remain.
The volume of the fuel block can be very different, it is recommended to make each individual block no less than 60 ml and no more than 5 liters.

Fireplace control can be:
- manual (flame intensity is controlled manually by a valve);
- automated (remotely using the control panel).
Video - Automation for combustion control Jotul ERS
We make a desktop biofireplace with our own hands
A miniature fireplace is assembled by hand from inexpensive materials within a few hours. The simplest form is with a square or rectangular base.
Materials for work:
- glass;
- glass cutter;
- silicone sealant for glass bonding;
- stainless steel mesh;
- steel box under the base of the fireplace;
- wick (cord);
- bioethanol (fuel);
- a metal cup - a container for fuel;
- heat-resistant stones and non-combustible composite materials.
Step-by-step instruction:
1. We make a calculation.
The distance from the burner to the side windows should be more than 15 cm. The same distance is accepted if there are two or more burners. The number of burners is not more than 1 pc. for every 16 m2 premises.
2. According to the dimensions of the box and the calculations, we cut out 4 rectangular glasses. Using silicone sealant, we connect the glasses together. We fix the result with props and leave for a day until completely dry.

 3. Pour fuel into a metal glass and place it on the bottom of a metal box (if there is more than one burner, then the glasses are installed at a distance of 15 cm from each other).
 4. Cut out 1-2 rectangles from the metal mesh (with metal scissors) corresponding to the size of the box. We lay them down. For reliability, you can grab the corners by welding.
5. Cut out 1-2 rectangles from the metal mesh (with metal scissors) corresponding to the size of the box. We lay them down. For reliability, you can grab the corners by welding.
6. We twist the wick, put it in a glass. We pour bioethanol.

7. We decorate the grid with heat-resistant stones, ceramic logs and other non-combustible materials. The stones present will additionally distribute the heat from the burner over the entire area of the future biofireplace.

8. We install the dried glass on the box, having previously cleaned the silicone that has come through from the seams.
It is impossible to paint and paste over the box from the outside and, moreover, from the inside, since the paint can not only emit toxic fumes when heated, but also catch fire.
You can simplify the task and use only two glasses installed parallel to each other. They do not have to be glued together with a sealant, but it will be necessary to carefully fix them in a metal box strictly vertically.
In the presence of a flask with a round cross section, you can make a biofireplace in the shape of a glass.
For work you will need:
- glass flask without a bottom (diameter not less than 30 cm);
- clay pots or a metal round jar with thick walls (the size must match the size of the flask);
- heat-resistant pebbles or sand;
- metal grid;
- metal scissors;
- metal glass for the burner, wick, fuel.
Fireplace assembly procedure:
- we install a glass flask in a cache-pot;
- in the center we place the assembled burner (a glass with fuel and a wick);
- around the burner we fall asleep small pebbles or sand;
- we cover the burner with two layers of metal mesh, cut to the diameter of the cache-pot (using metal scissors);
- we lay a layer of heat-resistant decorative stones or other elements on the grid.

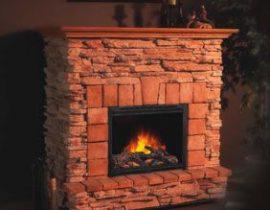
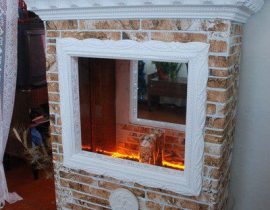
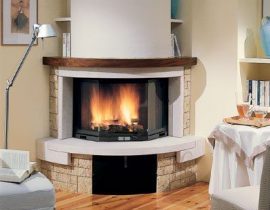
Floor biofireplace
If a small portable bio-fireplace does not inspire confidence in you, and the place in the room allows you to get a decent-sized wall or corner analogue of a wood-burning fireplace, we recommend that you make a drywall niche for a bio-fireplace, for this follow these instructions:
Materials for work:
- drywall (non-combustible);
- metal profile (guides and rack profiles);
- ceramic tiles for finishing the firebox;
- self-tapping screws for metal and self-tapping screws with a countersunk head, dowel-nails, tile adhesive (heat-resistant), insulating materials, putty, building level, tape measure, screwdriver, metal scissors, drywall knife;
- material for the future mantelpiece;
- decorative elements for decorating a floor biofireplace.
Fireplace assembly steps:
- We determine the location of the structure and draw a sketch of the future structure on squared paper (observing the proportions and marking the dimensions).
- Frame assembly
- we apply markings on the floor and on the wall;
- according to this marking, we fasten the guide profiles (previously cut to the required length);
- we insert rack-mount profiles into the guide profiles, fasten them with self-tapping screws;
- we check verticality with a plumb line;
- we fasten the profiles to the wall on the dowel-nails;
- racks for structural reliability are fastened with jumpers;
- if the fireplace has arcuate lines, we cut the profile with metal scissors and bend it according to the drawing;
- we lay insulating material in the walls of the structure (for example, pressed basalt wool).
Sheathing biofireplace
We draw markings on sheets of drywall and use a knife to cut (we make an incision on one side and break a sheet of drywall). We screw in the screws every 10-15 cm, slightly sinking them. We apply plaster putty.
We finish the walls and bottom of the firebox with ceramic tiles (using hot glue). At the bottom of the firebox, it is imperative to leave a recess into which the burner will subsequently be installed.
We sew the seams. We proceed to the installation of a mantelpiece and decorative elements (pilasters, stucco, finishing stones, ceramic tiles, mosaics, wooden elements). Heat-resistant stones and artificial logs can be placed inside the fireplace, which will add aesthetics to the biofireplace.
For additional protection, it is advisable to install a heat-resistant glass or forged grate.
Biofireplace burners
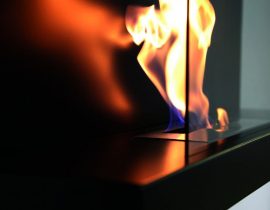
The essence of a biofireplace is the burning of biofuels in a special burner. The simplest of them is a metal glass with a wick. But it is impossible to control the flame in such a burner. Mono purchase a factory version, but the price will be from four to sixty thousand rubles and more.Doing it yourself is much cheaper.
Video - do-it-yourself biofireplace burner
Fuel block with valve
Sheet metal is used for such a burner. It is cut out with a grinder or metal scissors, fastened by welding. Inside the burner there can be one chamber or two, connected by perforation. Sometimes mineral wool is placed inside. In this case, combustion occurs not of the fuel itself, but of its vapors.