The fireplace in the house is not only a source of heat, but also a design element that makes it unique. Even a small living room is transformed, it becomes cozy if you install a hearth with a living flame in it.
Corner fireplace - photo
Of course, the construction of a fireplace requires skills and free space, but these issues are solvable: a brick corner fireplace will take up very little space, anyone who is at least a little familiar with brick laying can fold it.
The fireplace masonry technology is described in detail in the article, it also contains drawings of corner fireplaces with minimum dimensions and ordering.
A corner fireplace in the interior of a private house is not only a decorative element, it serves as a source of additional heating. The fireplace gives off the main part of the heat during the active burning of firewood in the form of thermal radiation from the flame, so it can be used to quickly warm up the room. Since the draft in the fireplace is created by sucking air from the room, it is necessary to take care of good ventilation in advance.
Content
Necessary materials
In order to fold do-it-yourself corner fireplace, you will need:
- Refractory fireclay bricks - 100 pieces;
- Red solid brick - 200 pieces;
- Clay mix for masonry or oily red clay - 2-3 bags;
- Sand river coarse-grained sifted - 3 bags;
- Cement M400 - 50 kg;
- Metal corner with equal shelves 75x75 mm - 2 pieces of 750 mm each;
- Sandwich pipe for the chimney - along the length of the chimney.
In addition, if the fireplace is installed on a separate foundation, concrete, rebar and formwork boards will be needed, as well as sand for a sand bed.
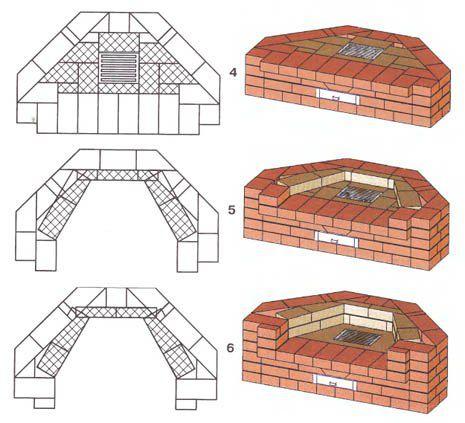
Corner fireplace: photo and masonry scheme
Ordering is a diagram of the sequential laying of a corner fireplace (brick by brick), depicting the sequence of laying and the type of brick used in each row. The diagram also shows the overall dimensions and indicates the installation location of all auxiliary elements.
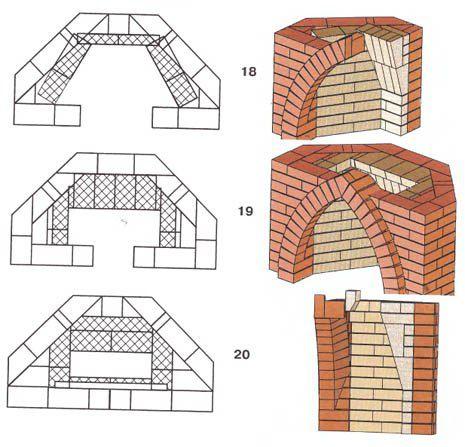
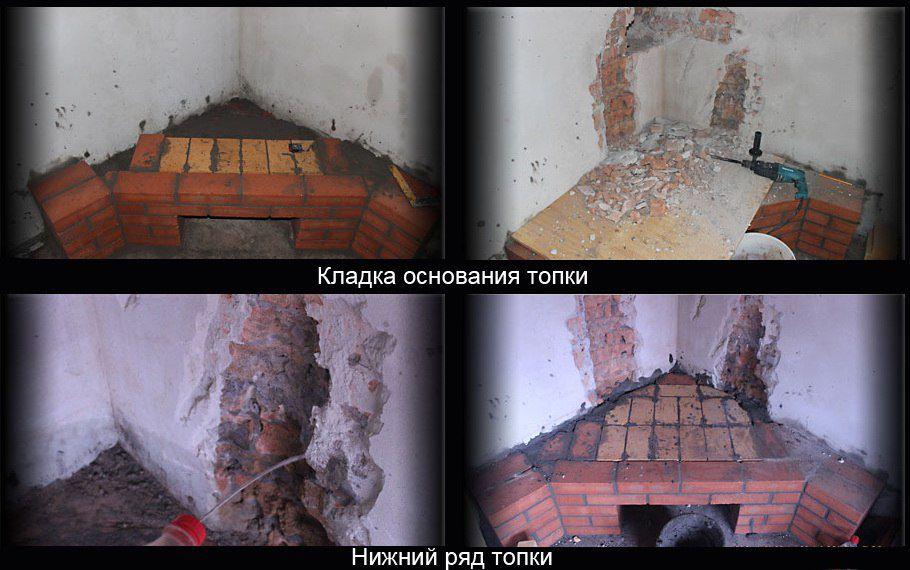
- The base of the fireplace and the ash pan are made of ordinary solid bricks. This part of the fireplace does not heat up when fired, so there is no need to use more expensive refractory bricks, it is only needed for the inner surface of the firebox. The base of the fireplace consists of three rows. Bricks that need trimming are cut with a grinder and a stone circle. In the second row, an ash pan is installed in the center of the base, the third row covers it in the front, in the center there is an ash hole, which is closed with a grate.

We lay out the base of the corner fireplace
- In the fourth row, they begin laying the base of the firebox made of fireclay bricks - in the diagram it is indicated in a lighter color. The fifth and sixth rows form the beginning of the walls of the firebox and the fireplace itself. The outer walls of the fireplace are laid out from ordinary red brick.
We start laying out the firebox
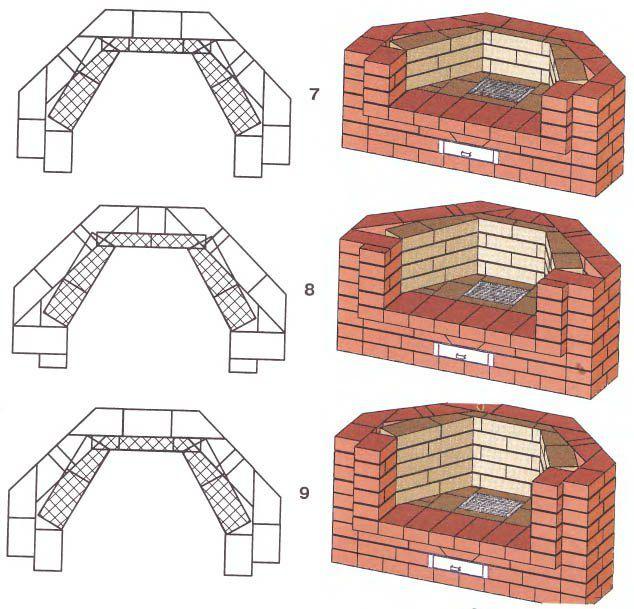
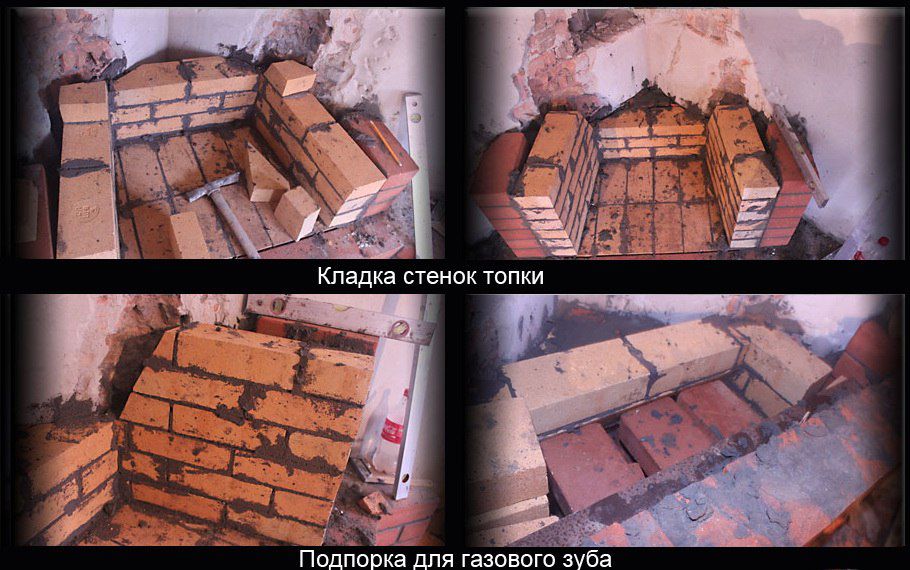
- From the seventh to the ninth row, they continue to lay out the firebox and the walls of the fireplace.
We continue to lay out the firebox and the walls of the corner fireplace
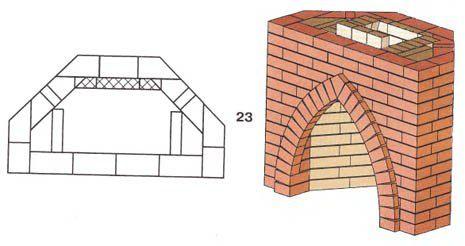
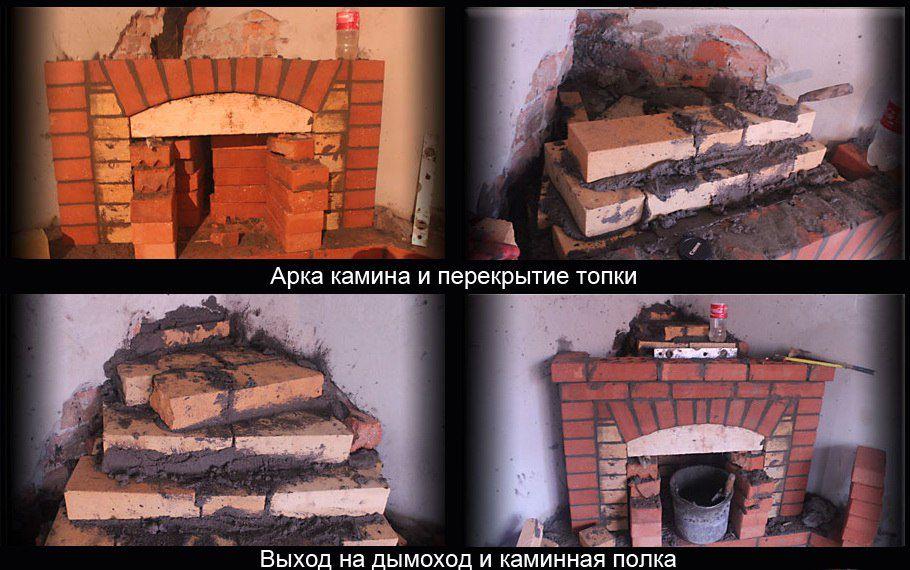
- After laying the firebox, it is necessary to erect a fireplace arch.It is made of red brick according to a pattern - an arc of the desired shape, made from any durable board. Bricks are laid at an angle of several degrees to each other, achieving uniform seams. It will be possible to remove the template after the solution has set.
We build the arch of the corner fireplace
- After the arch is completed, a gas tooth begins to form - the back of the furnace vault made of fire-resistant bricks cut at an angle of 20 degrees. reverse draft and smoke ingress into the room. The outer walls are laid out from ordinary red brick, adjusting it and cutting it if necessary.
We lay out the back of the arch of the firebox
- They continue to form a gas tooth from fireclay bricks, while laying out the outer walls from ordinary red bricks.
Laying out the outer walls of the fireplace
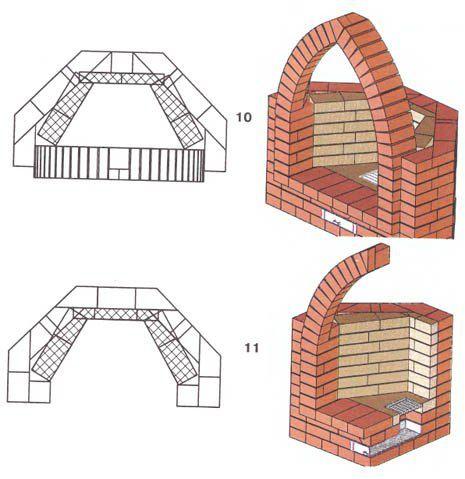
- The formation of the vault is completed at the level of the upper part of the arch, while leaving a hole for the smoke to escape into the chimney.
We finish the formation of the vault at the level of the upper part of the arch
- Start laying the chimney from fireclay bricks placed vertically. The back wall of the fireplace is still made of red brick.
We begin laying a chimney from fireclay bricks
- Perform the first row of overlapping the fireplace insert.
We carry out the first row of overlapping the fireplace insert
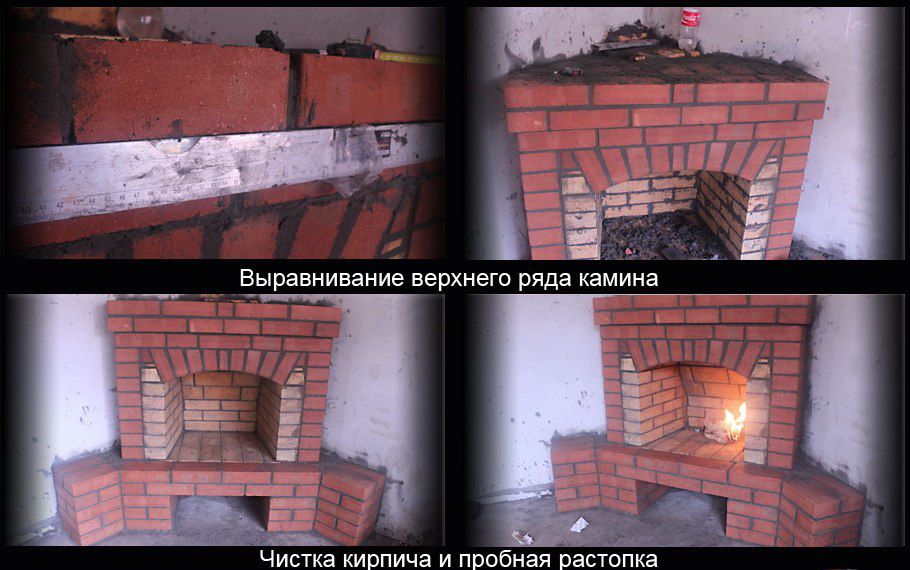
- The fireplace insert is covered with a narrowing of the chimney and a smoke damper is installed.
Installing a smoke damper
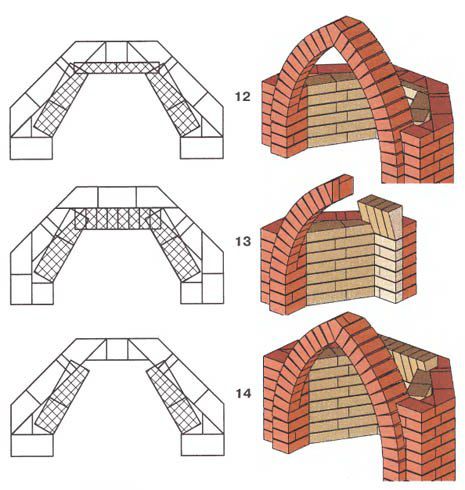
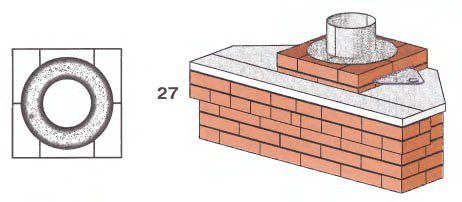
- A row of bricks is installed and a platform is attached to it for attaching a chimney sandwich pipe.
We fix the platform for attaching the sandwich pipe to the corner fireplace
- If you follow this instruction, you will be 100% able to lay out a corner fireplace with your own hands, without the involvement of professional stove-makers. At the same time, it is important to properly complete the foundation, prepare the brick and masonry mortar.


Foundation for a corner fireplace
A corner brick fireplace is a very heavy structure, and taking into account the cladding, its weight can be about a ton. Permissible load on reinforced concrete floor slabs - no more than 800 kg per square meter. Therefore, for a fireplace installed on a floor slab, it is necessary to make a base that redistributes its weight with an area of at least 2 m2. The corner fireplace, which is much smaller in size, can be placed on floors without prior preparation.
If the floors in the house are wooden, a foundation is required for the fireplace. It is made of monolithic concrete with reinforcement. The foundation of the fireplace should not have a rigid connection with the foundation of the house., otherwise, with seasonal movements of the soil, its deformation is possible.
Foundation pouring technology:
- They level the soil under the foundation of the fireplace, fill it with sand and lay a layer of waterproofing. This is necessary to exclude the capillary rise of moisture from the soil, due to which the brick may be saturated with moisture and its destruction during temperature changes. As a waterproofing, you can use a double layer of roofing material.
- Perform formwork from boards or plywood panels. Formwork can be removable and fixed. The geometric dimensions of the foundation should be 20 cm larger than the fireplace area in each direction.
- Reinforcing bars with a diameter of 10-12 mm are laid in the form of a grid with a step of 15-20 cm. At the intersections, the reinforcement is knitted with wire.
- The formwork is poured with concrete grade M200-M250 flush with the floor level in the house, the concrete is punched with a deep vibrator and the surface is leveled.
- They wait for the concrete to mature for 3-7 days, depending on the air temperature - the warmer, the faster the concrete gains critical strength, after which it can be loaded and a fireplace laid.
masonry mortar
In order to lay out a corner fireplace, a heat-resistant clay-based masonry mortar and a conventional cement-based masonry mortar are required. Those parts of the fireplace that carry the greatest mechanical load, but practically do not heat up during the combustion process, are placed on the cement mortar: the base of the fireplace and the firewood, as well as the upper row of floors and the lining of the upper part of the chimney. The firebox is placed on a clay mortar, which is baked at high temperatures and acquires the hardness inherent in ceramics.
Preparation of cement mortar:
- Mix 1 part of cement with water using a construction mixer to the consistency of liquid sour cream.
- Gradually introduce 2 parts of sifted coarse sand and 1 part of clay, continuing to stir. Clay is added so that the solutions do not differ in color, if you plan to finish the fireplace lining later, clay can be omitted.
- Knead the solution until smooth. It should be thick enough and not run off the trowel or shovel.
- Laying begins immediately after kneading, since after setting and re-mixing, the cement mortar loses its properties.
Clay mortar preparation:
- Clay mixture or greasy clay is diluted with water to the state of liquid sour cream. The litter that has floated to the surface is removed. Stand the resulting mixture for 12 hours.
- Add sifted quarry sand in small portions, constantly stirring the solution, until it practically stops sticking to the spatula or shovel. It is important to catch this moment and not add too much sand - if the solution lags too easily from the spatula, you need to add some clay again.
- Clay mortar retains its masonry properties for quite a long time, the main thing is not to allow it to dry out. Hardening of the clay solution occurs during its sintering. To speed up setting, you can add up to 10% cement to the mortar.
Corner fireplace masonry technology
Laying begins after the preparation of the foundation. They mark the contours of the fireplace on the floor according to the drawings, prepare masonry mortar and bricks, as well as a large container with clean water for soaking it. In addition, for cutting bricks, you will need a grinder with a cutting wheel for stone and a mason's tool: a trowel, a pickaxe for fitting bricks, a mallet with a rubber head for leveling the masonry, a level and a plumb line, and a tape measure.
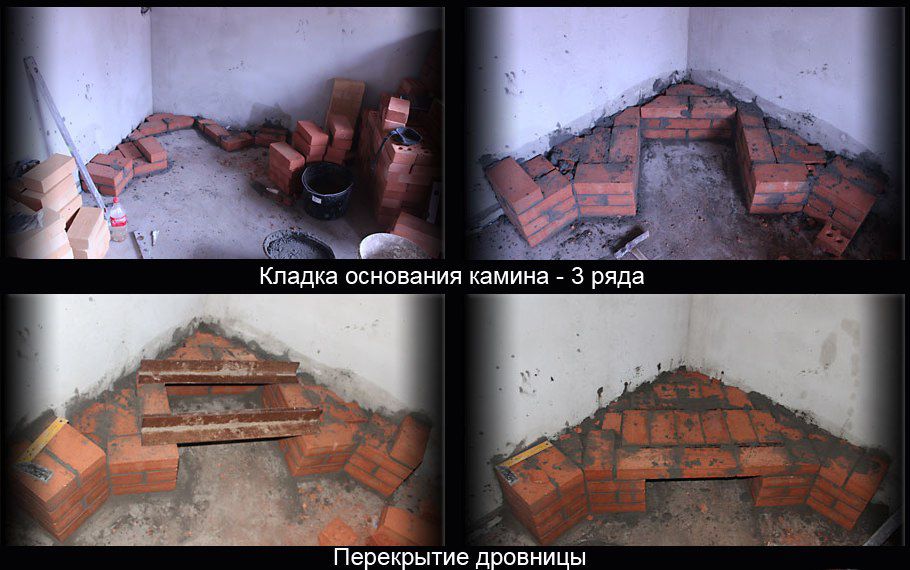
- Soak a portion of red brick for 2-3 minutes in clean water to remove air and dry the masonry more evenly. In addition, wet bricks cut better. The brick is adjusted for the first row of the base, the edges are cut and lightly sanded, after which the first row is laid according to the markings on the cement mortar. Check it for level, align if necessary.
- In the same way, two more rows of the base are laid, laying out an ash pan or firewood box, a metal corner is installed on top of the third row to support the base of the firebox. Lay the bottom of the red brick firebox over the corner.
Fireplace base masonry
- The base of the firebox is placed on a clay mortar from fireclay bricks previously soaked in water. If it is necessary to bring the chimney through the wall, a hole is punched in it with a puncher. To reduce dusting, the wall is moistened with water. The side and back walls of the fireplace are laid out of red brick on cement mortar.
Laying the base and firebox of the fireplace
- They continue to lay out the fireclay brick firebox, trimming it if necessary. In the back of the firebox, a narrowing is performed at an angle of 20 degrees - a chimney, or gas tooth. A support for a chimney tooth is placed on the upper part of the side walls of the firebox - a metal strip or corner.
Laying the walls of the fireplace insert
- From a suitable board or slab, a fireplace arch template is made and installed in front of the firebox as a support for the arch. Spread the arch with the offset of the bricks and the expansion of the seams at an angle. Spread according to the scheme, the overlap of the firebox and the first row of the mantelpiece. The chimney is taken out, the smoke damper is installed in a convenient place.
We lay out the arch for the fireplace and the overlap of the firebox
- When laying out the top row of the fireplace floor, you need to use a level. The walls can be cleaned from the remnants of the solution with a stiff brush and soapy water. The masonry is dried for 2-4 days, after which a trial kindling is carried out. For better sintering of the clay mortar, the fireplace should be fired evenly for several hours.
Leveling the top row of the fireplace
Fireplace finish - no less exciting activity that allows you to make the room not only warm, but also cozy, give it a unique look. In addition, the lining increases the heat capacity of the fireplace, and after the firebox it continues to give off heat from the heated walls.However, finishing a well-built fireplace is not at all necessary - the combination of natural brick and live flame fits perfectly into the design of any room, and you can decorate it with the help of forged elements and a beautiful lattice.
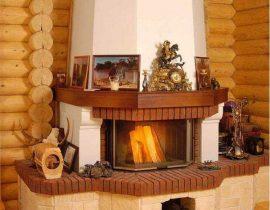
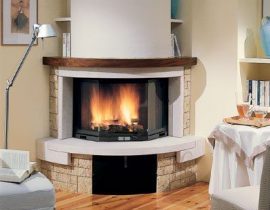
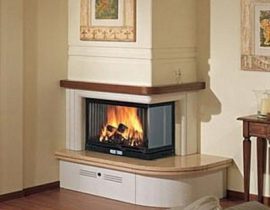
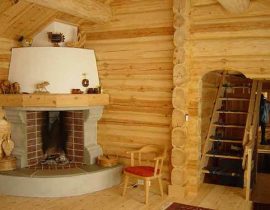
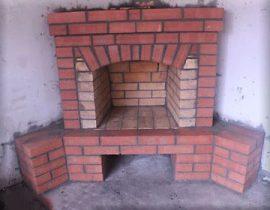
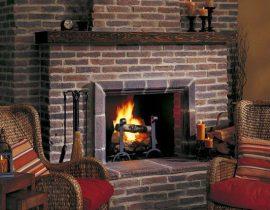
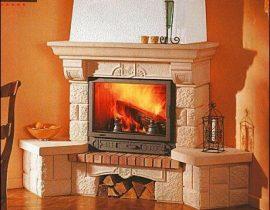
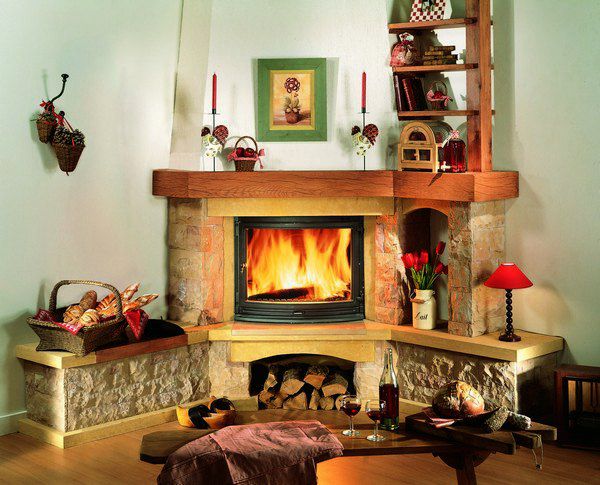
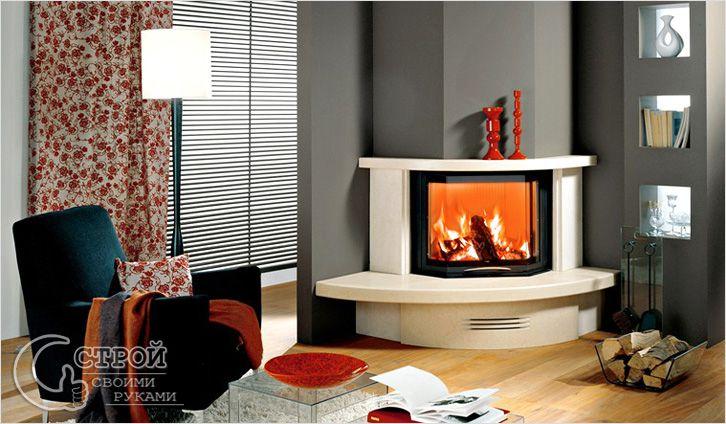
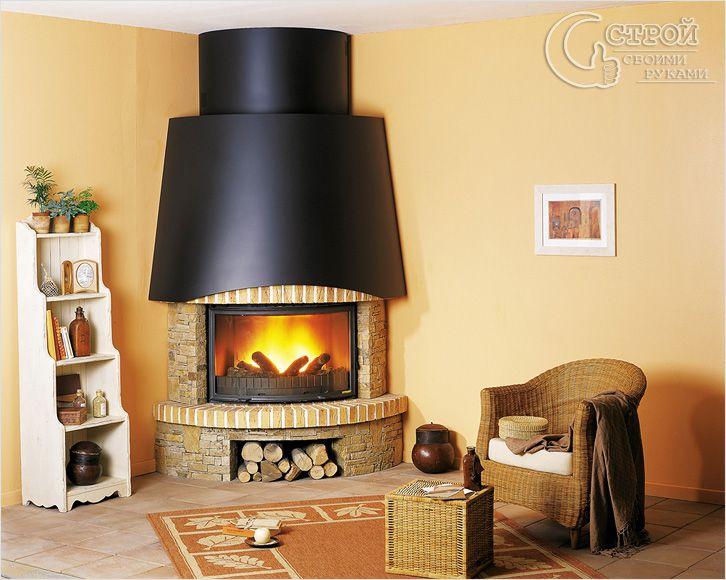
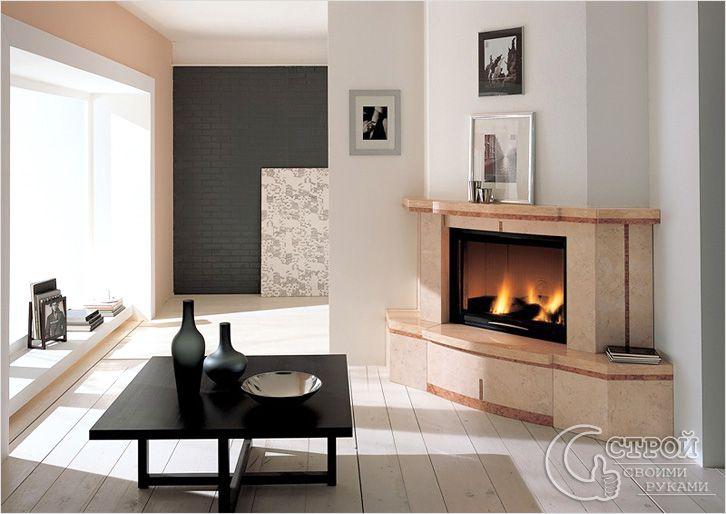
Ready-made corner fireplaces - photos of finished products
Corner fireplace in office
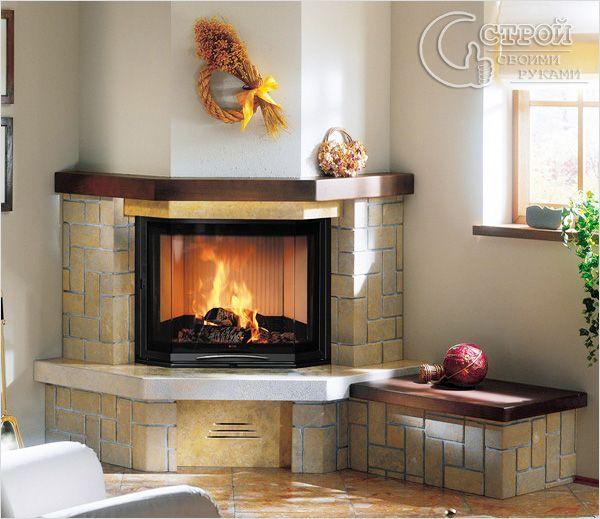
Corner fireplace in the living room
corner fireplace in the bedroom - photo
Corner fireplace in the kitchen