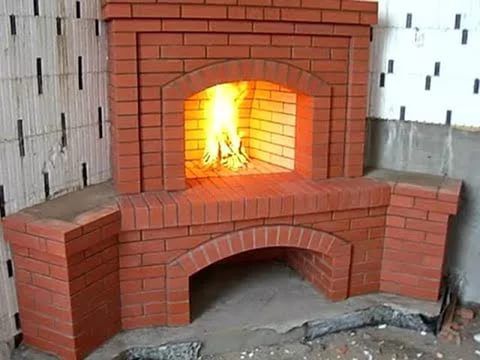
Equipping country houses and summer cottages, people dream of a special atmosphere of silence and comfort. This is the best way to contribute to wood-burning fireplaces, which not only effectively heat the room, but also deliver purely aesthetic pleasure from contemplating the fire.
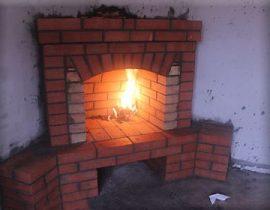
corner fireplace
In this article we will tell you how to fold wood-burning corner fireplaces for a home, about their features and specifications. And our step-by-step instructions and ordering the laying of a corner fireplace will help even a beginner to cope with this difficult job.
The fireplace stove has a number of undeniable advantages for owners of country houses. Most importantly, they can be equipped in homes where gasification is not provided or there are problems with electricity.
It is enough to quickly melt the fireplace, which allows you to provide warmth to the family even on a cool spring or autumn evening. And even where fireplaces are an additional source of heat, they will be a great solution in the off-season or during power / gas outages.
Content
- The main elements of the fireplace
- Fire safety measures when laying a corner fireplace
- Basic rules for laying a corner wood-burning fireplace
- Features of corner fireplaces
- We draw the project of a corner fireplace
- What materials are best used for laying a fireplace?
- Fireplace masonry: scheme
- Video. Do-it-yourself corner fireplace
The main elements of the fireplace
No matter how intricate the corner fireplace is, the following elements will always be present in it:
- firebox;
- ash pan;
- grate;
- portal (body);
- chimney.
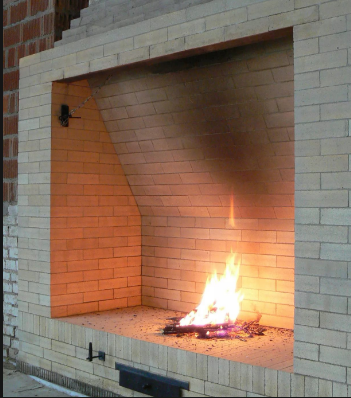
Firebox
It in the fireplace can be closed or open. This does not affect the efficiency of heat transfer. When making a fireplace with a closed firebox, you will need the following elements: a damper, transparent doors made of heat-resistant glass.
Firebox in the fireplace
A large role in the duration of the fireplace and its damper, transparent doors made of heat-resistant glass.
Provide the materials from which it will be made. The outer part of the fireplace can be made of ordinary brick, but the firebox must be made of fireclay (heat-resistant) without fail.
The finished cast-iron firebox will significantly reduce the time of laying the fireplace and simplify the task. To give the structure a stylish authentic look, it will be enough to overlay the cast-iron firebox with red brick and build a massive chimney.
Some stove-makers lay out the inside of the finished cast-iron firebox with fireclay bricks in order to minimize metal contact with fire. This point is especially important in the case of using a steel firebox.
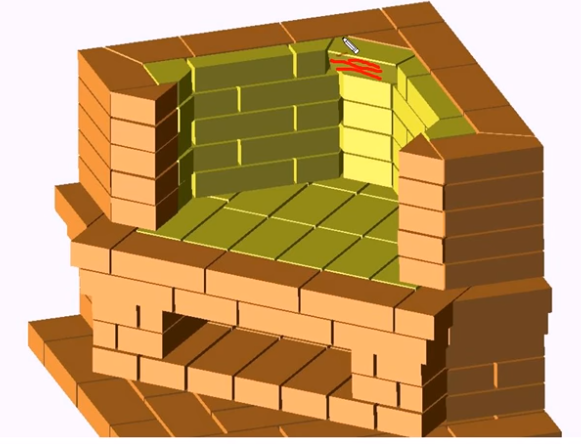
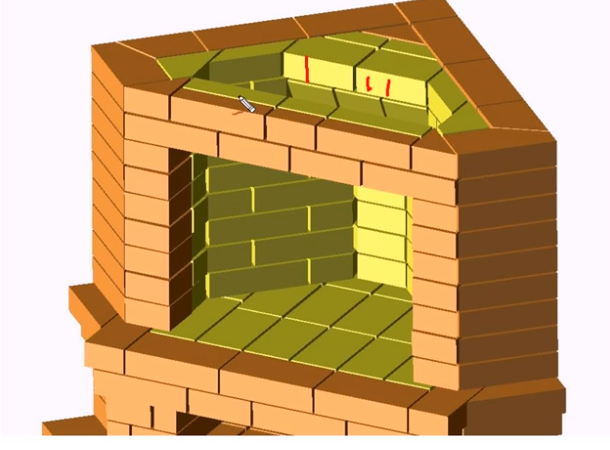
There is also such an element in the design of the fireplace as a chimney tooth. This is a small chamber located on the back of the furnace at a slope of 200.
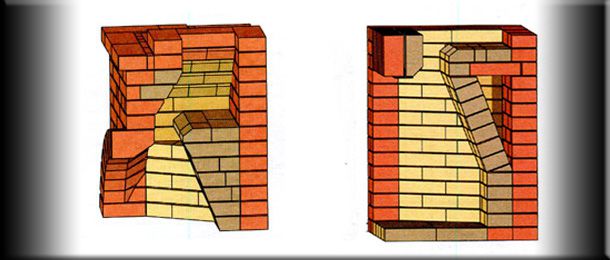
fireplace tooth
Between the ledge and the lining is a loaded platform, which has a size of 12.15 or 18 cm (depending on the overall size of the combustion chamber). The fireplace tooth passes a mixture of flue gases with cold air, which move at high speed.
In contact with the walls of the smoke box, the hot gas gradually cools, and it begins to fall down. Thus, turbulence of the gas flow is created in the pipe.
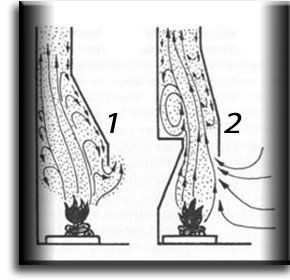
The movement of gas in the fireplace (without a tooth and with a tooth)
If the combustion process in the furnace is not intense, then smoke may “hang”. The purpose of the chimney tooth is to prevent this.
Another problem for good traction can be an oversized fireplace portal. But this can be avoided by increasing the speed of the hot gas in the upper part of the furnace. Thus, air will be sucked from the room into the upper part of the portal.
This problem can be solved with the help of a chimney tooth - a small ledge that will allow you to compress the gas flow in the upper part of the furnace.
Ash pan (or blower)
Given the intensive process of burning logs in the fireplace, a large amount of ash is formed, which falls into a special ash chamber located under the firebox. In order for the fire in the fireplace to flare up well and give off heat, you need excellent traction.
Ash pan design
When the combustion chamber is clogged with ash, it prevents the flow of air to the fire.
This point is especially important if you are going to use firewood from softwoods, as they form the most ash.
The blower is a small chamber located under the grate of the firebox.
This chamber may be equipped with a drawer-like retractable device, or it may have a simple design with a door.
But not only the role of cleaning from combustion products is played by the ash chamber. Through the blower, oxygen is supplied to the fire, which ensures intense combustion.
The blower door helps regulate draft and control the intensity of the fire.When opened, the flame intensifies. Accordingly, the closed door will block access to the fire, and the firewood will slowly smolder in the fireplace.
If the design of the fireplace does not imply the presence of a door on the ash chamber, then the base of the combustion chamber must be made with a slight slope to prevent ash from spilling out.
But not all fireplaces have an ash pan. If the chimney pipe is high and provides good draft, then the firewood will burn to the ground. In this case, the fireplace will be cleaned directly from the combustion chamber.
If under the combustion chamber it is located very low, near the floor itself and there is no way to make the ash chamber in the basement, then the stove-makers also omit this element.
The working processes in the fireplace are as follows:
- logs and firewood are stacked on a metal grate and set on fire.
- The intensity of combustion is controlled by a slide gate, which opens or closes the access to oxygen. With an open type of firebox, the intensity of combustion can only be regulated by the amount of firewood.
- As the firewood is burned, the ash is collected under the grate, in a special ash pan, which must be cleaned regularly.
- The products of combustion are removed through the chimney.
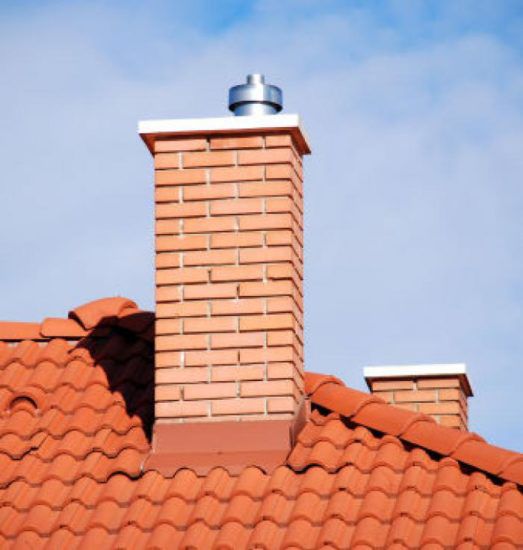
Chimney
Through this structural element, combustion products are removed. It can be made of brick or steel. In stores, you can also find ready-made ceramic structures that are assembled from separate parts.
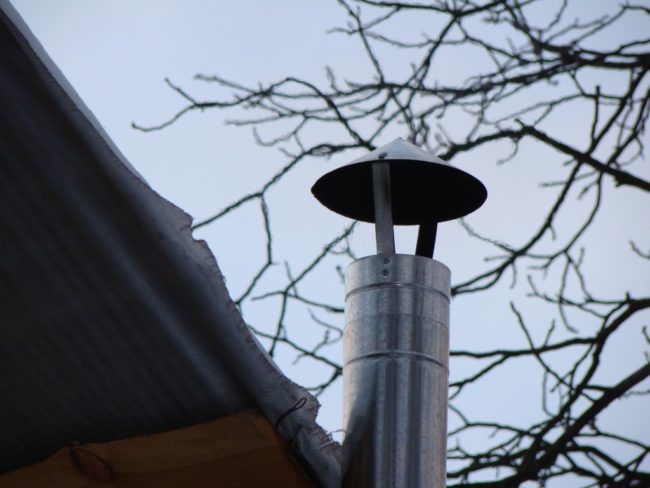
Chimney outlet above the roof
When building a wood-burning fireplace chimney, it is very important to adhere to elementary fire safety measures and to insulate well the places where the pipe passes through the wall and roof.
Furnaces classify chimneys into three types:
- wall;
- indigenous;
- mounted.
If the chimney is laid inside the main wall or structure, it is called a wall. It is, as it were, one with the wall covering.
But the root chimney is a separate element that is separate from the fireplace (stove). It is connected to the main structure with the help of a reversible sleeve. Depending on the number of stoves and fireplaces connected in the root chimney, there may be several such sleeves.

Chimney main pipe
Thus, the root (remote) pipe is the core for the removal of combustion products and such a system is often used in large houses with many rooms. This allows you to implement several fireplaces in the house and not violate the aesthetics of the exterior of the house. Indeed, in this case, there will be only one exit of the chimney through the roof.
The reversible sleeve connected to the remote pipe is made of red brick, on which a steel case is put on. The length of one sleeve should not exceed 2 meters, otherwise draft problems may occur and the efficiency of the fireplace will decrease.
To clean the sleeve from soot, a special cleaning door is performed. And in order to maximize traction in the flip sleeve, it is raised by 100 towards the movement of gases.
The same moment must be taken into account when constructing pipes for the passage of the chimney through the wall.
If the fireplace is located in a place where it is not possible to bring a vertical chimney, then the only right decision would be to build a chimney with access through the wall to the street.
At the same time, horizontal sections should be minimal, and in order to maintain good traction, they are also raised at an angle of 10 0.
But it is impossible to lay a branch pipe in the attic, since condensation may occur due to a large difference in temperature, which will increase the fire hazard.
The extension pipe is most often used by stove-makers in the construction of fireplaces. She rests on an array of fireplace. But in order for the stove (fireplace) to withstand the load of the chimney, the wall thickness of the stove must be at least ½ brick or more.
Chimney
The minimum section of the pipe is ½ * ½ brick.
Another key element of the chimney is fluff. This is an extension of the chimney at the point where it passes through the attic floor.
Why is it necessary to expand the pipe in this place?
This will protect the wooden ceilings from overheating. To do this, the fluff is laid out in the thickness of one brick (it is also possible in 1.5 bricks) and is additionally insulated with asbestos felt or a sheet impregnated with clay mortar.
The entire space between the attic floor and the cutting must be filled with fireproof material (concrete).
The pipe that runs through the attic floor is called the riser.
There is another important element in the design of the chimney, which is called the "otter". This is a small expansion of the pipe when exiting through the roof. The purpose of the otter is to protect the attic from precipitation.
Fire safety measures when laying a corner fireplace
- A separate base must be built under the brick fireplace. It is better to separate the foundation from the main one even at the construction stage, but if the fireplace project is already being implemented in an operating house, then you will have to remove part of the flooring, go deep into the ground and build a separate foundation.

The foundation is built separately
The weight of a brick fireplace exceeds 1 ton, and if the main foundation of the house sags during shrinkage, this should not affect the design of the fireplace. Otherwise, it may be deformed, and the gas will enter the room.
- All interfloor ceilings through which the chimney pipe will be removed must be insulated with asbestos material. In the same way, we isolate the walls that are next to the fireplace.
- If a fireplace is being built in a house with wooden walls, then a metal sheet must be laid between the adjoining wall, the size of which exceeds the dimensions of the fireplace by 20-25 cm on each side.
- When building an open hearth fireplace, lay brick or ceramic tiles in front of the fireplace to prevent accidental sparks and intense flames from starting a fire.
Basic rules for laying a corner wood-burning fireplace
- The fireplace is installed on a base made of fireclay bricks.
- In no case should a dressing be carried out between the firebox and the lining. Otherwise, when heated, the outer part will crack.
Without dressing
- The inside of the combustion chamber should not be plastered.
- Facing a brick corner fireplace can be made of ceramic tiles, decorative stone, artificial marble. It all depends on the style of the interior and the preferences of the owners.
- For the fuel chamber, only fireclay bricks must be used
- In the places where the door and ash pan are installed, it is necessary to lay an asbestos cord and leave a gap for the expansion of the metal.
- The back wall of the firebox is best done at a slight slope.
- For laying the main body of the fireplace, you will need a masonry mortar using red clay, but it is completely unsuitable for laying a chimney pipe, as it has a very low resistance to moisture.
- The maximum masonry joint should not exceed 5 mm. Otherwise, under the influence of high temperature, it will begin to crumble and crack.
As for fire safety during the operation of the fireplace, here you also need to follow certain rules:
- Do not bring the fireplace insert to the maximum temperature.
- Ensure a safe distance between the fireplace and objects that are easily flammable (at least 65-70 cm).
- Carry out a systematic cleaning of the fireplace from ash and soot.
In order for the fireplace to warm the room well, it is necessary to correctly calculate its dimensions before the construction stage.
Its dimensions are affected by:
- total area of the room;
- feature of the installation site;
- chimney outlet (through the wall or through the roof).
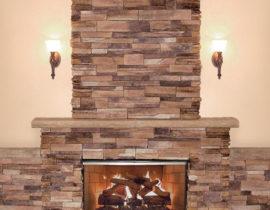
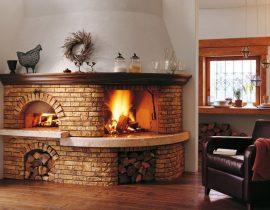
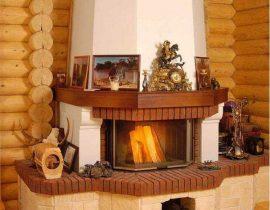
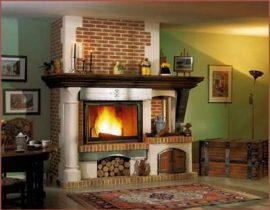
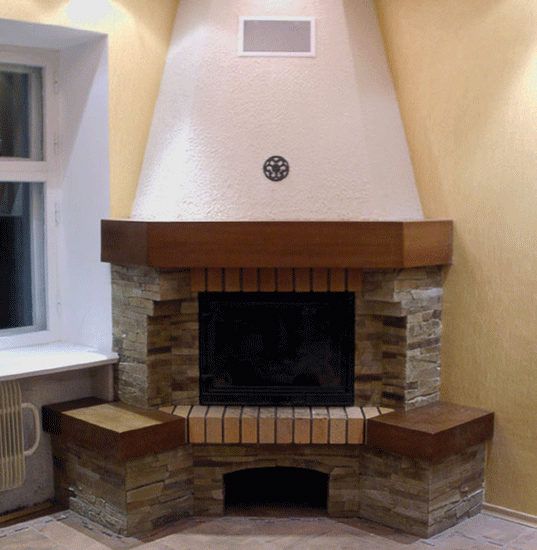
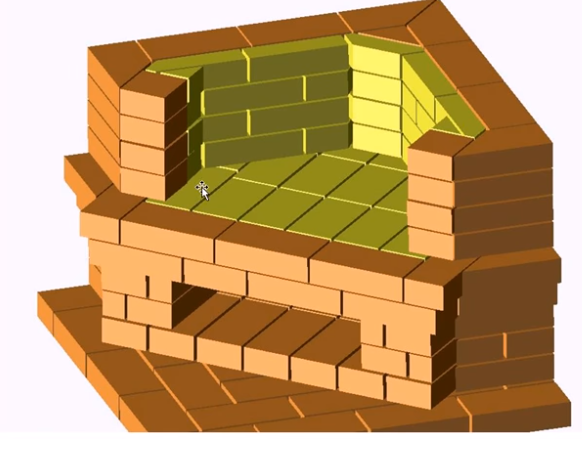
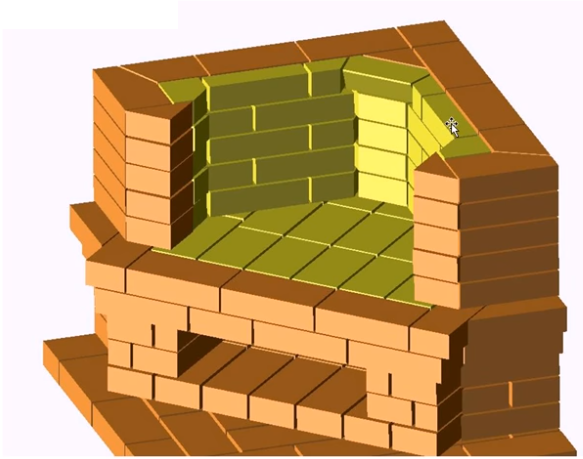
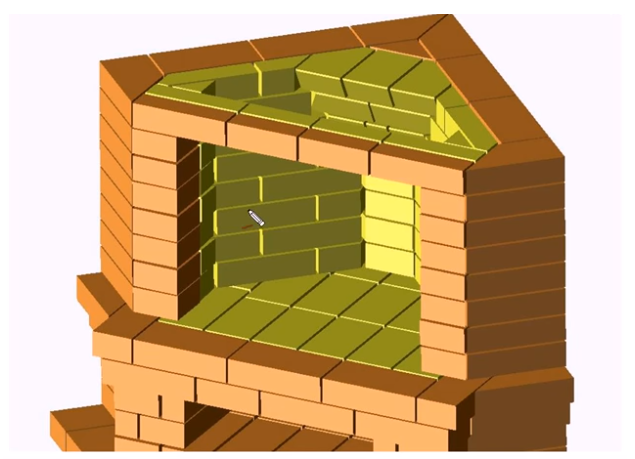
Features of corner fireplaces
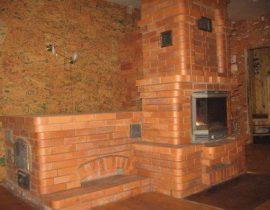
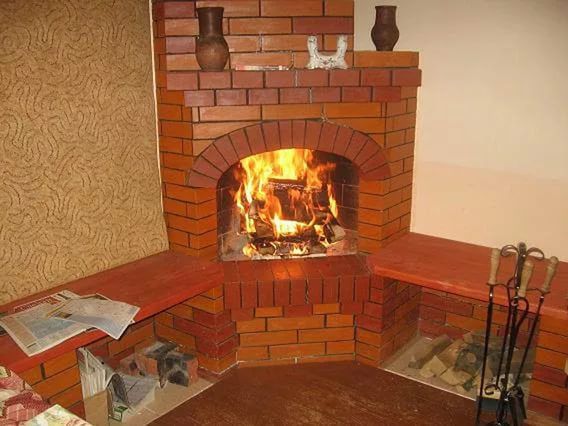
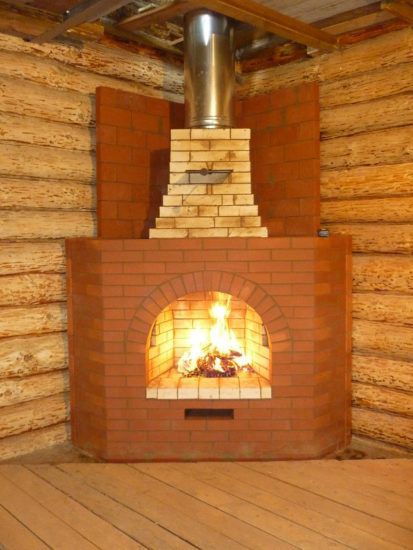
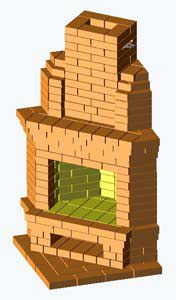
Among the many types of fireplace designs, the corner fireplace has taken one of the first positions. Such a fireplace looks very stylish in the interior and at the same time saves space.
A corner fireplace allows you to create a unique warm atmosphere in your home and emphasize your individual style.
corner fireplace
They are distinguished by compactness, thermal efficiency and neat appearance.
Often this form of fireplace is used for zoning a room, especially if it has a large area.
Due to its shape, the corner fireplace will fit perfectly into the design of absolutely any interior. The undoubted advantage of the corner design is ease of installation and originality.
In order for a corner wood-burning fireplace to be as efficient as possible, it is necessary to take into account the following features during construction.
Corner fireplace with open hearth
- It should be shallow and at the same time wide. Then the heat transfer area will be maximum.
- To increase thermal efficiency, various elements are added to the design of wood-burning fireplaces: heat shields, air casing, etc. When heated, they provide additional heat.
- The laying of the fireplace does not have to be even. Some bricks can protrude - this does not affect heat transfer in any way.
- To increase the efficiency of heat transfer, it is not recommended to perform too massive facing layer.
But no matter how big, massive and stylish a corner wood-burning fireplace turns out, do not forget that it, first of all, performs a decorative function. Therefore, it cannot be used as the main heat source.
Corner fireplace with cast iron firebox
If the cottage or house is located in the northern or eastern part of the country, then a good heating system is indispensable.
According to the design decision, corner fireplaces can be decorated in:
- modern style;
- country;
- classic.
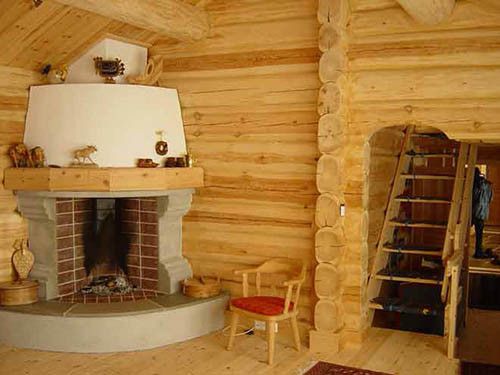
The classic corner fireplace in the English style is made in the shape of the letter "P". For cladding, ceramic tiles or red brick are usually used.
But for country music, as a rule, they choose the shape of the letter "D". At the top of the structure is a wooden beam.
Art Nouveau style is distinguished by smoother forms. This option will fit perfectly into any room.
We draw the project of a corner fireplace
Before proceeding with the construction of a corner fireplace in the house, it is necessary to draw up a detailed project and complete a drawing.The drawing should reflect all structural elements, dimensions.
If you want to increase the dimensions of the fireplace, immediately calculate how much additional material it will take and how much power the fireplace will get.
Below we give a masonry scheme, where the warping of the combustion chamber will begin from the sixth row. You can change this design somewhat, depending on the purpose of the fireplace and personal preferences.
If the main task of the corner fireplace is to heat the room, then the firebox must be made low so that the floor warms up well, taking cold air from below.
If the main purpose of the fireplace is a decorative function, then you can raise the firebox above the floor
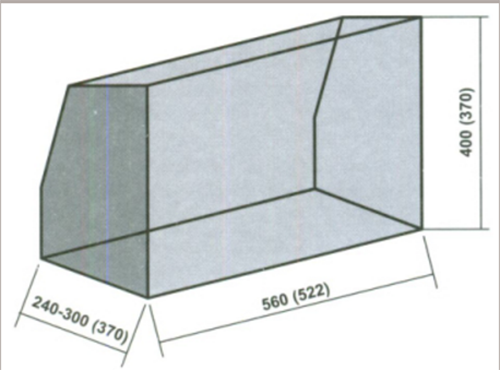
We calculate the size of the combustion chamber
The dimensions of the fireplace will depend on the size of the room, so below we provide a table that will tell you how to correctly calculate the dimensions of the structure.
The area of the room must be divided by 50.
The correct proportions of the fireplace insert
This value will tell you what area the opening of the combustion chamber should be.
For example, for a medium-sized room (20-25 square meters), you need to make a fireplace with a firebox 0.5 m wide2.
As for the overall dimensions of the structure, the ideal is the ratio of width and height of 3: 2.
As mentioned above, the depth of the firebox is of great importance. The efficiency of heating will directly depend on it. Follow approximately the following proportions: the depth of the firebox = ½ or 2/3 of the height of the firebox.

The size of the fireplace must be maintained in a certain proportion
If you decide to increase the volume and depth of the combustion chamber for decorative purposes, then keep in mind that this will significantly reduce the efficiency of heating the room.
We calculate the size of the chimney
It is equally important to correctly calculate the dimensions of the chimney, since the thrust will directly depend on this.
The optimal ratio is the pipe section in the amount of 1/10 of the combustion chamber inlet area.
If the chimney has a circular section (for example, if you are using a sandwich pipe to build a chimney), then take a diameter of at least 150 mm.

The location of the chimney on the roof relative to the ridge
With a smaller diameter, thrust will be significantly reduced.
The height of the chimney must be at least 5 meters. But if the house is 2-3 floors, then it will, of course, have to be raised. Here it will be necessary to focus on the position of the roof ridge.
Below are certain patterns of chimney outlet, which are focused on the position of the roof ridge.
What materials are best used for laying a fireplace?
For laying a fireplace, you will need 2 types of bricks: fireclay and red full-bodied.
It will be necessary to make a combustion chamber from heat-resistant fireclay bricks, and the red brick will go to the outer part of the structure.
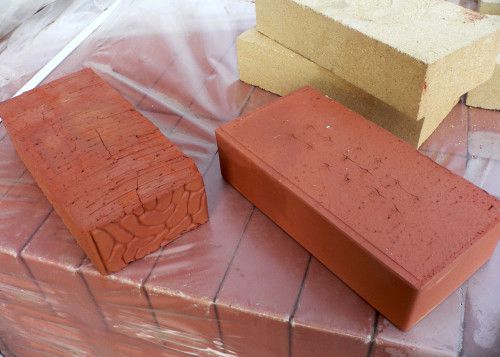
Chamotte and red brick
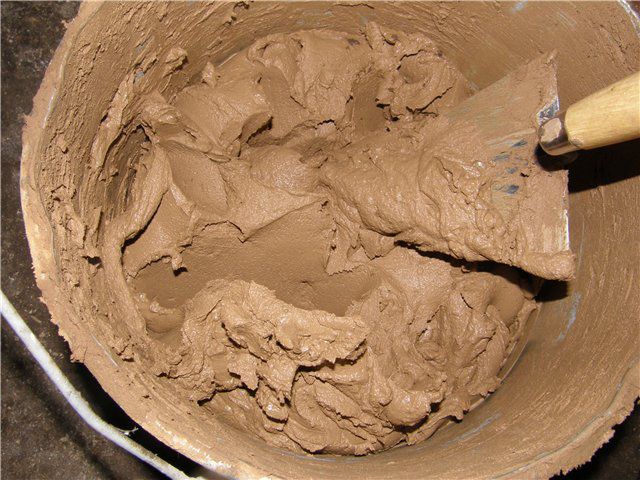
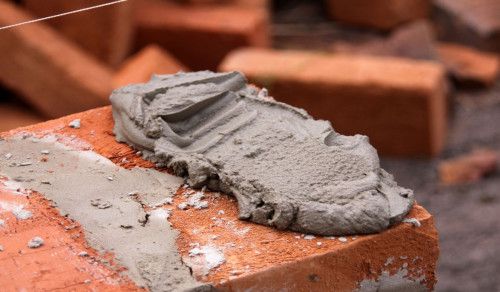
In addition, you will need a special masonry mortar, which is made from river fine sand and clay.
You can, of course, buy a ready-made dry mix for laying a stove in a hardware store. Then you just need to dilute it according to the instructions with the right amount of water and stir.
Another variant - prepare the solution yourself. To do this, you need sand and red river clay. The quality of the clay used will directly affect the quality of the solution and the strength of the entire structure of the fireplace.
That is why many experienced stove-makers prefer the option of making the solution on their own. So you can choose the clay that meets the technical standards as much as possible.
Due to its unique properties, soft and plastic red clay turns into a durable stone when heated. One of the main indicators of the quality of clay is the percentage of its fat content. If you take "skinny" clay, then when heated, it can crack.
thick mortar
After firing, good oily it acquires the strength of a brick and can endure very high temperatures. However, in order for it to really be strong and securely fasten the masonry, it is necessary to observe the correct proportion of all ingredients.
For strength, Portland cement grade M300 can be added to the masonry mortar.
Depending on the quality and fat content of the clay, the solution is made "by eye", that is, there are no ideal proportions.
Here you will need to focus on the appearance and how it is typed on a trowel.
The solution should be of medium density
The solution should have the consistency of thick homemade sour cream, do not drip from the trowel. It should be homogeneous, without grains. Mix the solution thoroughly.
Attention. Clay mortar is only suitable for laying a fireplace. For the construction of the foundation and chimney, use cement mortar.
Fireplace masonry: scheme
When determining the optimal dimensions of the fireplace structure, be guided by the typical ratio of the fuel chamber inlet: 3: 2.
Corner fireplace (general view of the masonry scheme)
If the fuel chamber is made very deep, then a strong loss of heat will be observed, since it, accumulating in the furnace, will leave through the chimney.
At the same time, the depth of the fuel chamber must not be made too small, otherwise there is a danger of smoke in the room.
In previous articles, we have already considered laying a small corner fireplace. Today we offer a detailed scheme for the construction of the corner fireplace "Annushka" for a red brick house "for jointing".
Fireplace size:
Base size - 89 * 89 cm
Height - 161 cm (excluding chimney).
From the materials you need to purchase:
- Fireclay refractory bricks for the combustion chamber (not lower than M200) - 55 pieces.
- Red ceramic brick for whole fireplace. - 356 pcs (excluding pipes). You can additionally take 10% of the total, taking into account defects and errors.
- Mortar for laying the foundation (cement, fine sand, gravel and water).
- Mortar for laying bricks.
- Roofing material for foundation waterproofing.
- Boards for the construction of formwork.
- Smoke damper 250 x 130 - 1 pc.
- Steel corner 50 x 50 x 5 x 600 - 1 pc.
- Steel corner 50 x 50 x 5 x 800 - 2 pcs.
- Steel sheet 3 x 400 x 600 mm - 1 pc.
- Metal rods and wire for reinforcement.
- Metal wire 0.8 mm for dressing.
From the tools prepare:
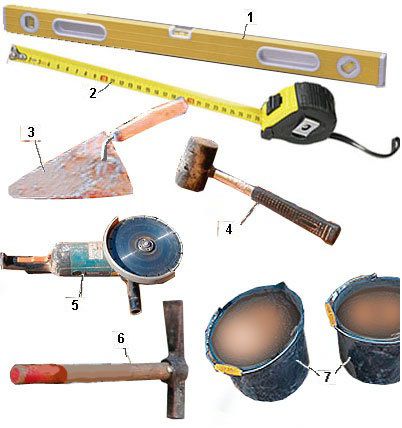
masonry tools
- Trowel for laying bricks.
- Roulette and marker.
- Rule.
- Construction mixer or drill with a nozzle.
- Rubber mallet for laying bricks.
- Bulgarian for turning bricks.
- Threads for pulling plumb lines.
- Building level, protractor and plumb.
- stapler.
- Shovel and bayonet shovel.
- Solution bucket.
- Construction hammer for the construction of formwork.
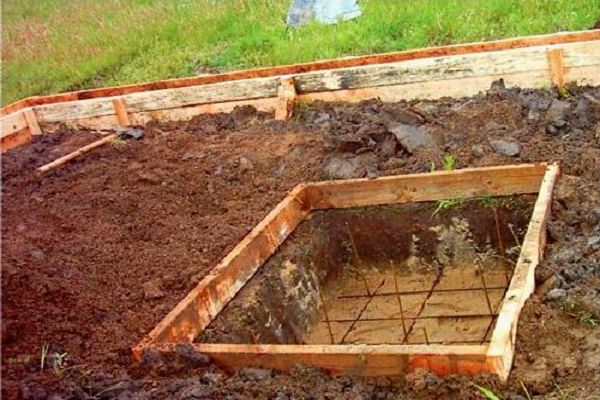
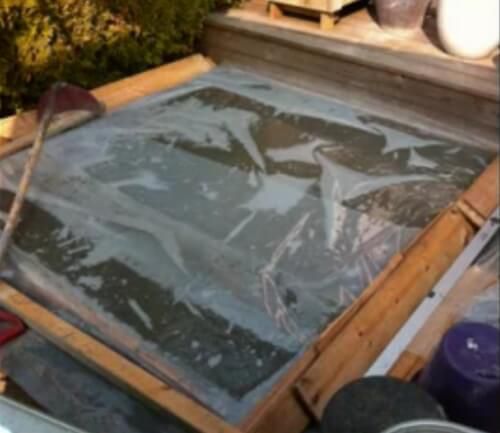
Foundation construction
Given the massiveness of the corner structure, it is necessary to make a separate foundation for the fireplace.
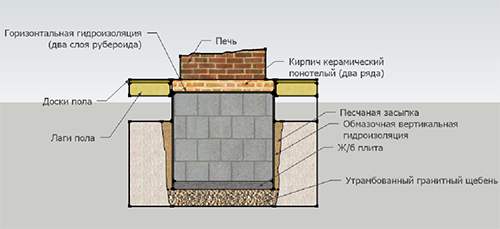
Foundation laying
The order of work is as follows:
- Marking on the floor dimensions under the fireplace.
- Removing part of the floor covering in accordance with the dimensions of the fireplace.
- Excavation of soil to the depth of freezing. Usually this is 60-70 cm. Use a bayonet shovel for this work.
- From old boards or plywood we create a formwork, which is a wooden frame. We fasten with nails or screws.
- Formwork waterproofing. To do this, it is necessary to lay a layer of roofing material along the perimeter of the formwork.
Foundation waterproofing
- Creation of an air cushion. We pour a layer of sand and gravel on the bottom of the pit.
- We prepare a cement mortar, and fill up the pit, not reaching 2 bricks to the level of the finished floor.
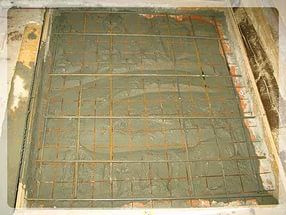
- We put a reinforcing mesh on top. It is very easy to do it yourself. To do this, you need steel rods, which must be connected to each other with wire. This will create a reliable and durable frame.
We reinforce the foundation
- We do - a technological break of 20-25 days.
- We remove the formwork and bring the foundation to the level of the finished floor with the help of solid brickwork. We fill the gap with a sand-gravel mixture and beautifully decorate the gap between the finished floor and the built foundation. If you planned to build a permanent formwork, then it does not need to be dismantled.
Wall protection from heat
Given the angled design of the fireplace and the close fit to the wall, a number of fire prevention measures must be taken to protect the walls from overheating.
Wall protection
This can be done in two ways:
- Attach the reflective foil screen to the wall with self-tapping screws. The size of such a screen is 1 * 2 meters. When doing this, consider the size of your fireplace, the top of the screen should extend beyond the highest point of the fireplace by 30 cm.
- Using ceramic tiles, you can create a beautiful protective screen that will perfectly fit into the overall interior of the room and emphasize the beauty of the fireplace.
If the clean floor comes close to the fireplace, then it is recommended to lay 15-20 cm of a protective coating in the form of ceramic tiles in front of the base of the firebox.
Preparation of materials for masonry
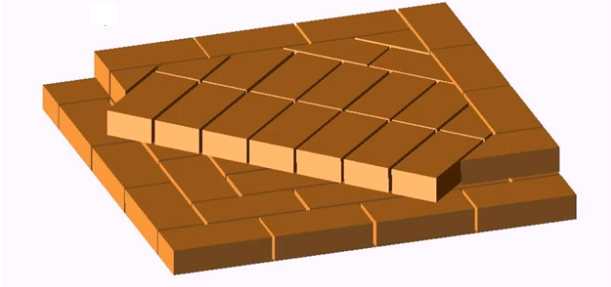
Given the complex corner design of the fireplace, you will need a large number of hewn and divided bricks into ½ or ¼ parts.
How to do it right?
It is better to separate the bricks immediately, according to the order. Before separating the necessary part of the brick, mark with a marker on its front side and make a groove.
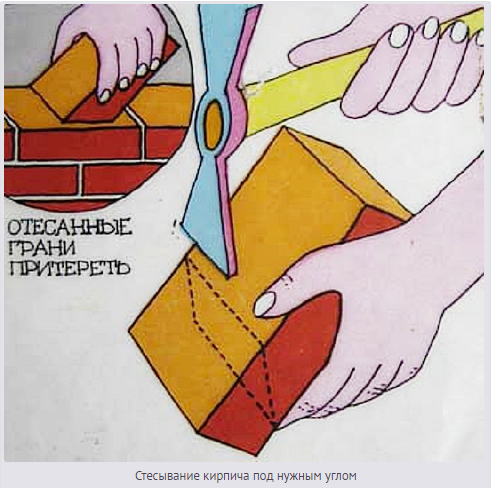
Cutting bricks at the right angle
At the same time, one longitudinal groove is enough for ½ brick. In order to chip off 1/6 or 1/8 of the brick, we draw a groove on all sides of the brick.
Before starting laying, lower, select all the brick with which you will work at this stage and lower it into the water so that it absorbs moisture as much as possible.
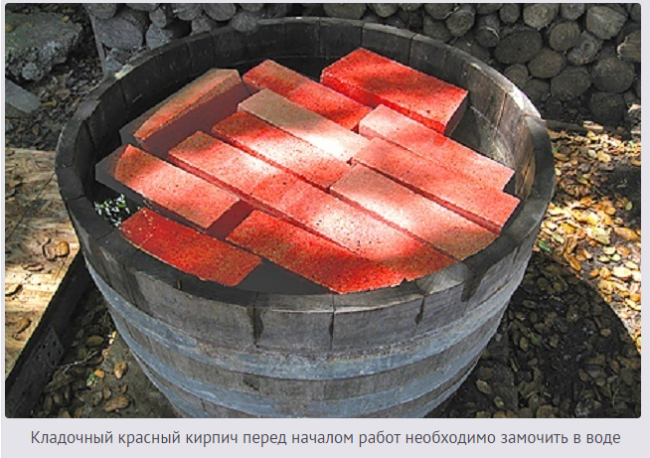
Masonry bricks must be soaked in water before starting work
If you put a dry brick, then it will begin to gain moisture from the masonry mortar, which can adversely affect the strength of the masonry.
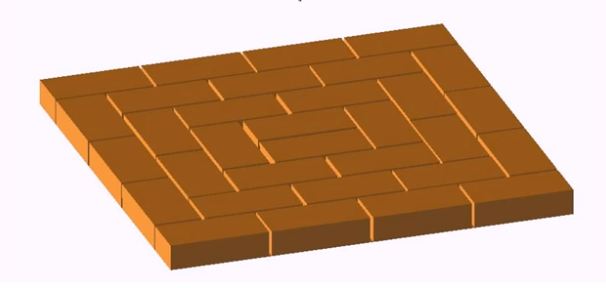
Advice. Do not rush to clean the fireplace right away. First, sort out the order and lay out each row “dry”. Number the brick of each row and arrange it in groups on the floor. So you can see all the difficult places that you have to face, and avoid serious mistakes that will be hard to fix later.
Fireplace masonry
Before laying the base, measure a sheet of roofing material and lay it on the floor. It will perform the function of waterproofing.
Advice! To make perfectly even seams, take wooden slats equal in thickness to the thickness of the seam. Lay a brick and a rail on top. Apply the solution and lay the second row. When it dries, remove the rail. Prepare the number of slats so that they are enough for 2 rows.By the time you finish the third row, you will be able to remove the wooden fixture from the first row and use it further.
- 1 row is laid out solid, according to the ordering scheme. The size of the base will be 90 * 90 cm. Using the building level, check diagonally how evenly you laid out the bricks. The first row is rectangular.
1 row
Advice! To prevent the stove from being pulled to the side during laying, pull 4 sheer threads, which are fixed to the ceiling. They will serve as a kind of beacons for the furnace.
- The 2nd row is also laid out solid, but already lays the angular shape of the structure. Please note that its 2 sides measure 89 * 89 cm. Watch the thickness of the seams.
2 row
Pay attention to the shape of the bricks, they are all different shapes. At the preparatory stage, you should have already divided them into appropriate fragments, laid them “dry” and numbered each.
- 3 row we begin to form a niche for firewood, located under the hearth of the fireplace.
3 row
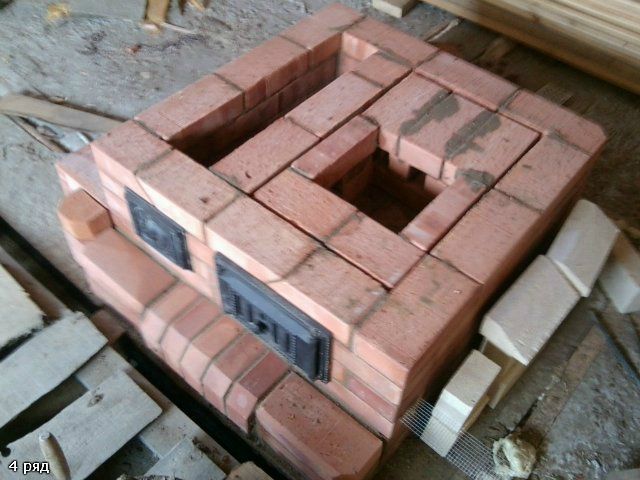
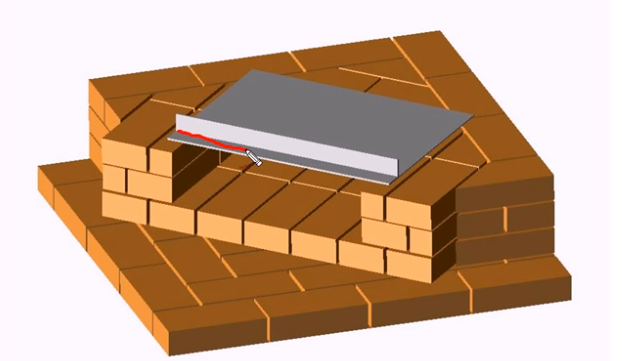
- 4 row repeats the previous one. We're just going up in height. We will need to cover the niche here with a metal corner and a 3 mm thick iron sheet.
4 row with corner
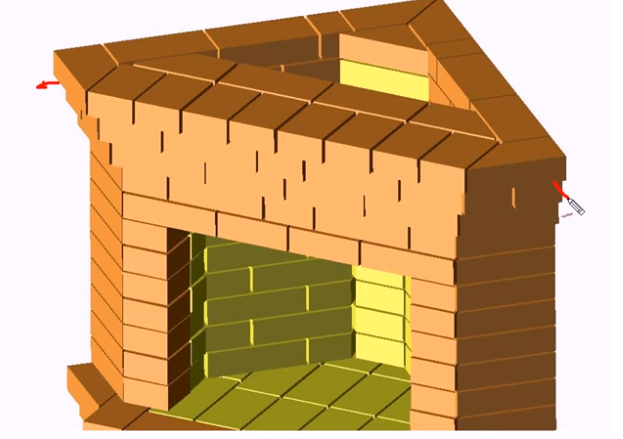
- The 5th row is continuous and the masonry is the same as the 1st row, but there is one feature. When laying bricks, they must be moved 30 mm to the outside, thus increasing the size of the fireplace. On the frontal part, the overlap protrudes 20 mm forward.
5 row
- 6 row is laid out in the form of the 5th, but with a slight change. The core is laid out with fireclay bricks, forming a fireplace. Like the previous row, it also extends 20-30 mm along the perimeter, but already relative to the 5th row.
6 row
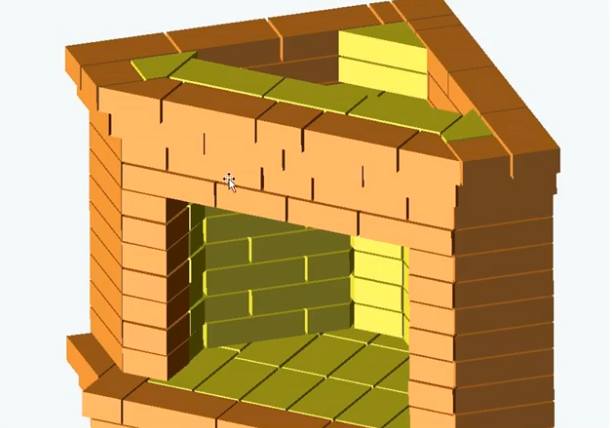
Please note that in this row, fireclay bricks are also not completely whole.It will first need to be prepared. - 7 row begins to form a firebox. The walls of the firebox are laid out with fireclay bricks. Do not forget that between ordinary and heat-resistant bricks you need to leave a gap of 3-4 mm.
7 row
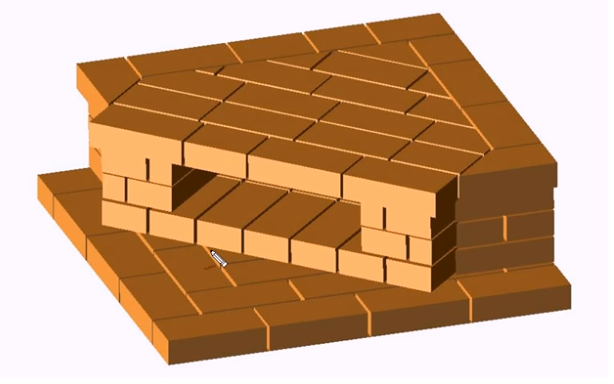
- 8-10 rows are laid out similarly to the 7th row. Please note that all these rows are laid out exactly, without offset, of the same size. They are the same size as rows 2-4.
8-10 row
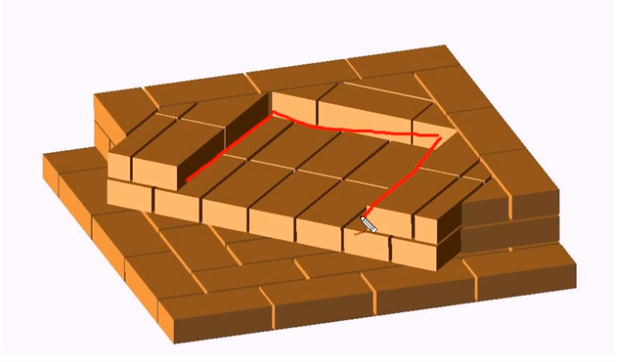
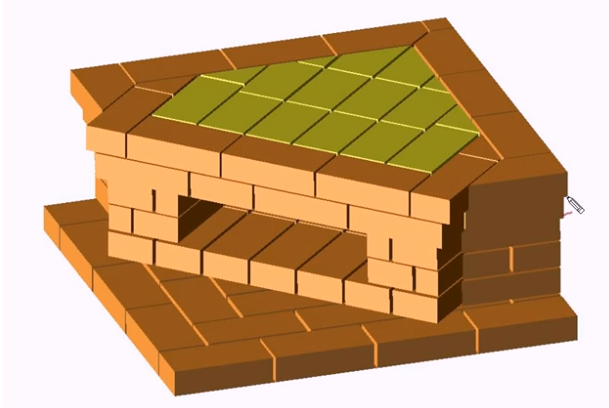
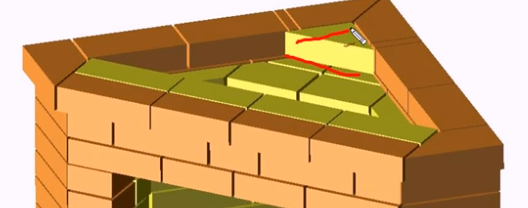
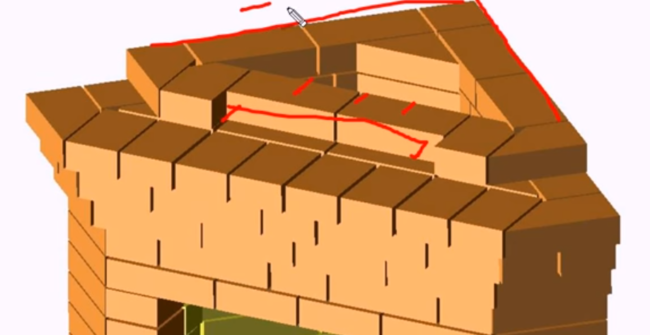
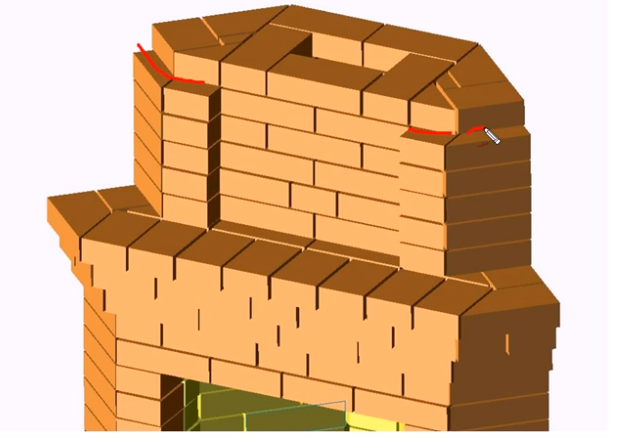
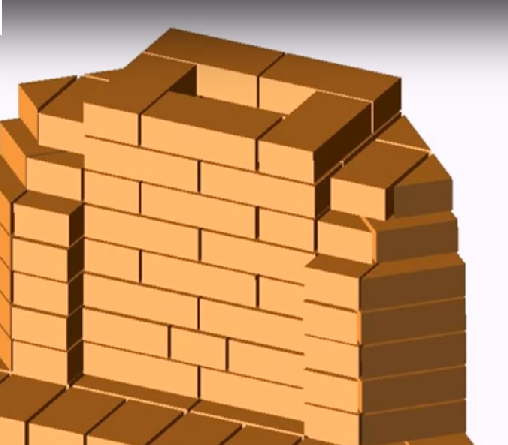
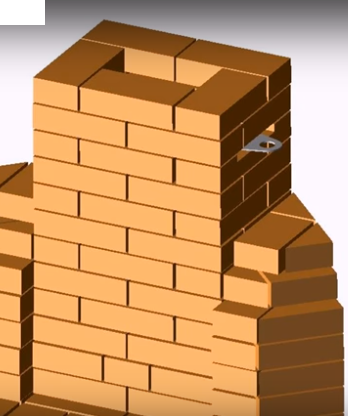
- 11 row. We begin to form a fireplace tooth (mouth).
11 row tooth formation
We grind the central corner brick, as shown in the figure. He stitches inward.
11 row
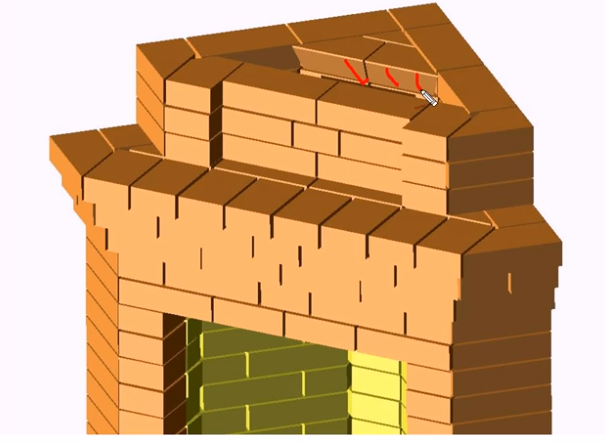
- 12.13 row. We continue to carry out the tooth of the fireplace, grinding bricks at an angle inward. Here, in the 13th row, we lay two metal corners along which the fuel chamber will be covered.
12-13 row
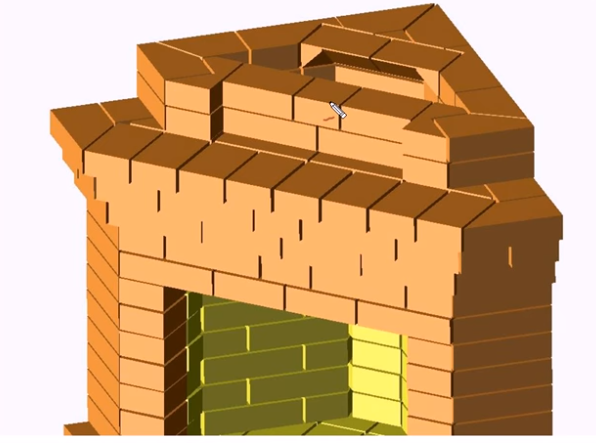
- 14 row overlapping of the fuel chamber.
14 row
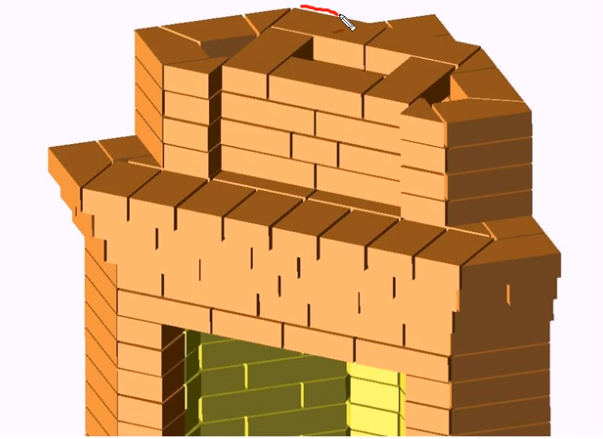
- 15 row - here we finish forming the chimney tooth.
15 row
- 16 row forms a platform. Here we again release a row by 30 mm and move the brick along the facade by 2 mm. Here we start to increase the size
16 row
- 17 row. We increase the size of the side walls by another 30 mm. We release fireclay bricks in front of the firebox by another 45 mm and cut them with a grinder from below.
17 row
Bricks will go to this row - 11 and 1⁄2 (red), 5 (fireclay).
- 18 row. Again we increase the size of the side walls by 30 mm, and cut the front part, as in the previous row, from below.
18 row
- 19 row. We reduce the side walls of the structure to 760 mm. This is where the formation of the mantelpiece begins. Bricks above the front of the fireplace are released inward and cut from below with a grinder, as in the previous rows.
19 row
- 20 row begins to form a chimney.From the side of the back of the fireplace, it gradually narrows, as can be seen in the figure.
20 row
To do this, the bricks forming the back wall are released inward by 60 mm and cut obliquely from below at an angle of 450
- 21 row. The size of the chimney is brought up to 130 mm. The back wall brick is pushed forward to get this distance and cut from below to the size of the previous row.
21 row
- 22 row. Here we have already clearly indicated where the pipe will be located. Its size is 26 * 13 cm. Please note that we only carry a pipe. For each row of pipe will go 10 red bricks.
22 row
- 23 row is placed similarly to the previous one.
23-24 row
- We put the 24th row according to the figure. For this series you will need 9 red bricks.
- 25-27 row we lead the pipe into one brick.
25-27 row
- 28 row. Here we install a smoke damper 250 * 130 mm. For this series you will need 5 whole bricks.
28 row
- 29-30 we lead the chimney similarly to the previous scheme.
29-30 row
 Please note that in this row, fireclay bricks are also not completely whole.It will first need to be prepared.
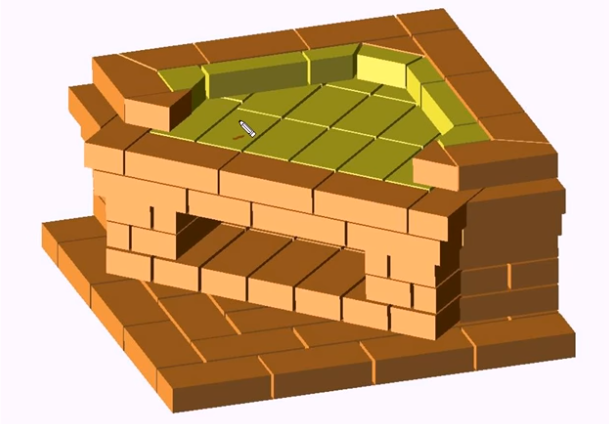


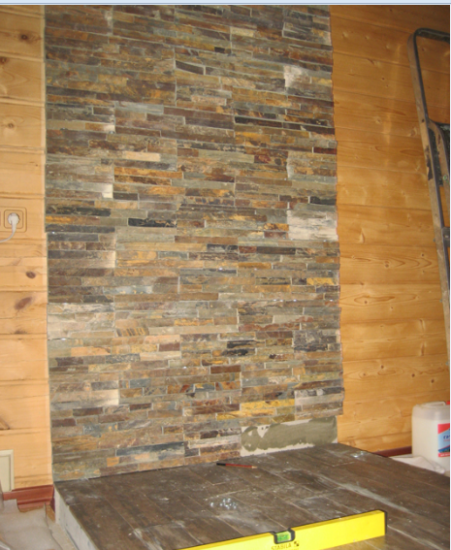
Facing works
The final stage in the form of cladding has not only a decorative function. The cladding layer facilitates the maintenance of the fireplace, there is no need for constant painting of the plaster, etc.
If you bought a beautiful red brick, then initially the fireplace can be made “for jointing”. A classic-style fireplace will become a very beautiful decorative element in the living room, in a wooden house.
High-quality cladding will perform a protective function, increasing the strength of the entire structure. As a facing layer, you can use artificial stone, ceramic tiles - it all depends on personal preferences and the style of the interior.
Fireplace for embroidering
If you chose artificial stone as a cladding, then you will need a special adhesive mixture designed for high temperatures.
You can use the same mortar that you used when laying the fireplace. Remove excess mortar immediately, otherwise it will be difficult to clean the surface of the stone later.
Plastering with subsequent painting is a very economical and uncomplicated option that will allow you to realize beautiful decorative elements. The advantage of this option will be ease of operation, and the paint, if desired, can always be refreshed or changed.
The only drawback of this option will be the sensitivity of the plaster surface to shock, so it is better to lay out the corners of the fireplace with brick or artificial stone.
To increase safety measures during operation, you can install a protective screen on the fireplace.
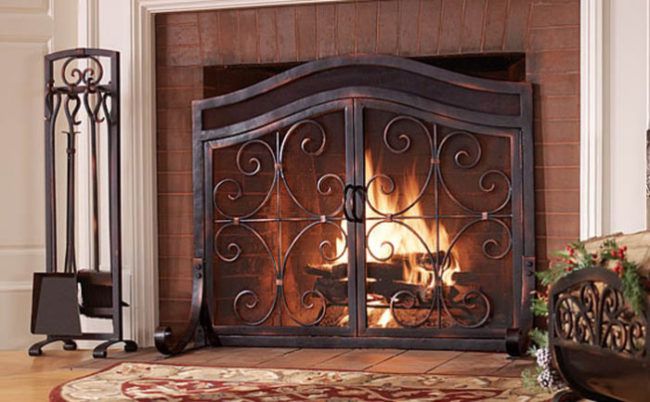
protective screen
You can buy such a screen already in finished form in the store, or you can make it yourself.
The decorative protective grille will protect the floor covering from sparks. The easiest way is to make a steel frame from two pieces of steel pipe, which are connected to each other in the form of the letter "T".
Such a screen should cover about 60-70% of the focus. The location of the screen at such a height will perform a protective function, but at the same time it will not interfere with the tossing of logs into the furnace.
The lower part of the screen is fixed on a stand, which prevents falling and swaying.
Heat-resistant glass or non-combustible material can be used as the screen itself.
Kindling a fireplace
When all facing work is completed, and the chimney system is fully completed, we proceed to the first kindling of the fireplace.It is better to wait a few days until all adhesive and cement mortars dry well.
- Take a small amount of small firewood or brushwood and put it in the combustion chamber.
- Do not immediately give a strong heat to the oven, warm up gradually.
If you clearly follow the above step-by-step instructions and do not violate the order, then you will have a wonderful corner fireplace.
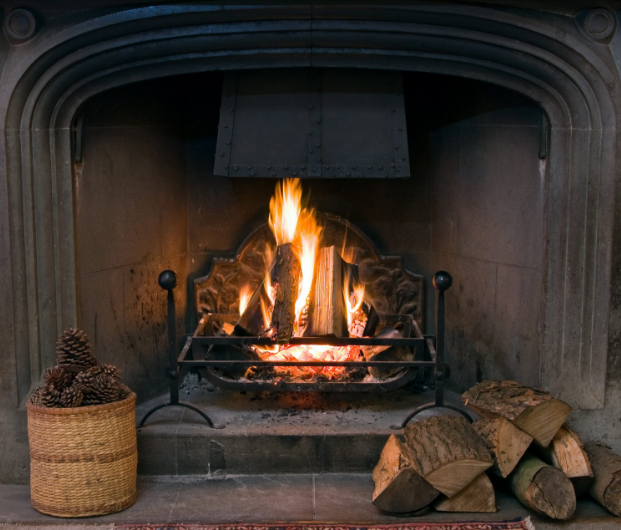
Fireplace with open hearth
You will literally become the creator of the hearth. Places where the whole family will gather for a cup of aromatic tea, share news and relax. A flickering flame in an open fireplace and measured crackling of firewood will create a unique atmosphere of home comfort.
Video. Do-it-yourself corner fireplace