Fireplaces are built in apartments, houses and cottages, choosing the appropriate shape, type of fuel and furnace, materials, installation method. Before purchasing building materials, be sure to design a fireplace masonry scheme and drawings of the future structure.
Content
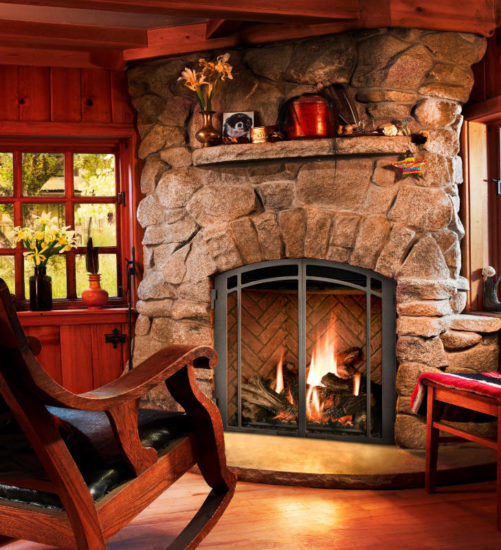
The layout of the fireplace masonry depends on the type of fireplace
Firebox type:
- closed (flame and living area separated by a heat-resistant glass door);
- open (the fire in the fireplace is separated from the living area only by a fireplace grate);
- combined (heat-resistant glass is equipped with a closing-opening function).
According to the type of fuel used in the fireplace:
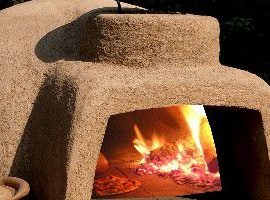
- firewood;
- natural or liquefied gas;
- electricity (works from the mains, there is no live flame in the fireplace);
- biofuels that do not leave combustion products.
Fireplaces without fuel (false fireplaces) - decorative imitations of fireplaces (fuel is not burned, the fireplace is only an element of interior decor).
Fireplace shape:
- round;
- rectangular;
- triangular;
- cylindrical;
- non-classical (suspended fireplaces).
By location:
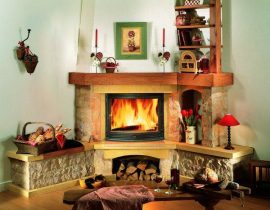
- angular;
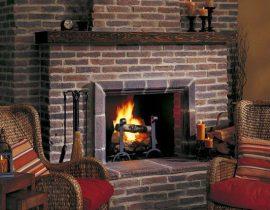
- internal closed fireplaces (they are placed in the wall, usually erected simultaneously with the house);
- semi-open external fireplaces (not aligned with the structural elements of the house);
- open fireplaces (located away from the walls of the room);
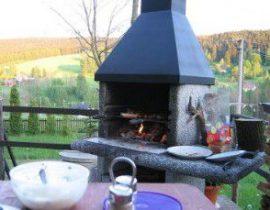
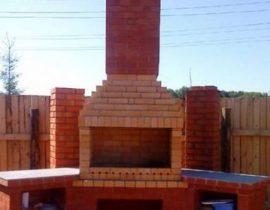
- outdoor fireplace;
- stove-fireplace (the main function is space heating).
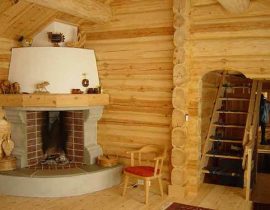
The design of the interior of the fireplace
- Firebox and fuel burner (a niche where the combustion process takes place and the space under it).
- Portal (the outer part of the fireplace, which decorates the firebox).
- Blower channel (for air access to the flame).
- Grate.
- Ash chamber.
- Smoke valve (retractable, in the form of a disk or in the form of a drum).
- Smoke cornice (a structural part of the fireplace protruding in the form of a vault, located above the open part of the firebox).
- Hailo (part of the fireplace to collect smoke).
- Chimney.
- Smoke tooth.
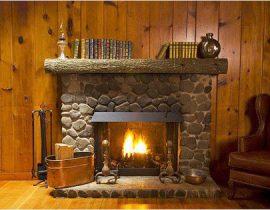
- Fireplace shelf.
- Nozzles on a pipe for protection against wind and ensuring fire safety.
General stages of preparation and construction of a drawing of a fireplace
Before building a drawing, we determine the desired type of fireplace, the budget for its construction, location in the house, appearance, including decoration. The draft version is built by hand, on a piece of paper in a cage, the final version is built on a computer or the same paper, but already precisely referring to the size and scale.
Important! If you plan to build a brick fireplace, you must take into account its dimensions (6.5 x 12 x 25) and the dimensions of the seam (about three millimeters).
- We measure the room where the fireplace is planned to be installed, draw a diagram, adhering to the scale. You should get two drawings: the appearance of the fireplace and its section in a vertical plane.
- On each drawing, be sure to mark the dimensions, scale and type of brick used.
- We mark on the drawing the depth of the foundation (from fifty centimeters to one and a half meters).
- We calculate the firebox (chamber where fuel combustion occurs). The ratio of the volume of the room and the niche of the fireplace is 1:50.
- We schematically build a fireplace portal. The ratio of depth to height is two to three or one to two.
- The chimney (hole) is calculated and drawn in relation to the firebox 1:8.
- The length of the pipe is calculated by measuring the distance from the base of the fireplace to the roof peak and adding at least 100 cm to this value.
The minimum inner perimeter of the pipe is 140 x 270 cm.
After performing the calculations and constructing an image of the fireplace in space, they proceed to a series of drawings that display each row of masonry (top view or horizontal sections).
Foundation. Drawing, construction stages
- We make markings on the floor, strictly checking the accuracy of angles and lines, remove a section of the floor along the intended contour (dig a pit) with a depth of half a meter to one and a half (depending on the design of the future structure and its weight). We make the length and width of the pit 30-35 centimeters larger than the dimensions of the brickwork of the fireplace.

- At the bottom of the dug hole we lay a row of sand, fine gravel, or a mixture of them. We do tamping and leveling.
- We lower the formwork onto the compacted layer of sand (gravel), additionally coated on the outside with waterproofing material (bitumen and the like). The height of the formwork is at least 15 cm. The perimeter of the formwork = the perimeter of the fireplace + 15-20 cm on each side. We lay reinforcing bars at the bottom of the formwork, fixing them together with a welding machine (crosswise).
- We fill the formwork with a mixture of gravel, sand and cement (but), and fill the gap between the walls of the formwork and the walls of the pit with clean sifted sand.
- The distance between the floor level and the top layer of the compacted and leveled mixture of cement, sand and gravel should be about 5-7 cm.
- A waterproofing material (roofing material) is laid on the foundation, preferably in two layers.
- After pouring the foundation, wait 1 week for it to shrink and completely solidify.


The correctness of pouring the foundation for the fireplace is checked by the level at each stage.

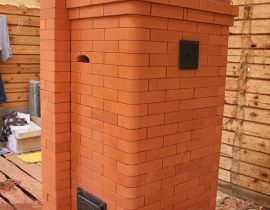
- 1 Row.Solid brickwork (fireplace base). Bricks are cut at various angles, according to the drawing.
- In the second row, space is left for mounting a metal ash box.
- 3 Row.The ashpit is partially laid with bricks.
- 4 row.Yellow marks where to use fireclay bricks. In this row, the grate is installed and the firebox is laid out.
- 5 row.Construction of the portal and walls. If it is necessary to highlight the portal, the brickwork is shifted forward by a few millimeters.

- 6 – 9. In these rows, a firebox is laid out, according to the project, carefully checking the horizontal level of the structure with a level.
- 10. Formation of a portal using a circle or temporary jumpers.
- 11-12. Wall laying and portal construction. Bricks are cut on site to ensure a snug fit. When cutting, it is necessary to use eye and respiratory protection against construction dust (goggles and gauze bandage).
- 13-14. In these rows, the brick is placed obliquely, forming walls at an angle of 45-60 degrees.
Important! Number each row of brickwork with chalk so as not to make mistakes during construction.
- 15. Bringing the masonry to the height of the inclined walls (mirrors).
- 16-18. Again lay out the inclined walls.
- 19. The firebox is narrowed, shifting the bricks by a few millimeters.
- 20. The chimney is narrowed in the frontal part.
- 21. The masonry is leveled above the portal and the walls of the fireplace.
- 22-23. A ledge is built of brick, warning: the penetration of soot and cold air into the furnace is a furnace tooth.
- 24. The brick is laid in an even row, a mantelpiece is formed on the front part.
- 25. The twenty-fifth row is tied with the previous one. In the place where the valve is planned to be installed, ¼ of the thickness is grinded off from the brick.
- 26. They begin laying the chimney, install the valve, bring the mantelpiece into proper shape, decorating it.
- 27. Inside the chimney, a stainless steel pipe is fixed with mastic.
- 28-… Fireplace chimney construction.


Important! In the place where the chimney is in contact with the ceiling, it is sheathed with foil or iron sheets.
The last point is the installation of metal components and finishing.