Would you like to fold your own stove or fireplace? At first glance, this task seems too difficult, especially if you have no experience in bricklaying.
Do-it-yourself fireplace stove drawings and stove assembly
In fact, many homeowners successfully lay out fireplace stoves with their own hands, the drawings and ordering schemes of which we want to bring to your attention. Using them, as well as recommendations for masonry, you can gain the necessary skills and save on the wages of professionals.
What is a drawing and ordering scheme
The first thing to understand is the concept of a sketch, drawing and ordering a fireplace. A sketch is a drawing that indicates the appearance of a stove or fireplace, in whole or in part, in one or more views. From the sketch, you can understand the location of the firebox, ash pan, chimney, dampers and other elements, as well as the principle of operation of the stove. The drawing is made to scale, it indicates the dimensions of the future stove, as a rule, approximately, since the exact dimensions are highly dependent on the thickness of the seam. An ordering scheme is a laying diagram for each of the rows of a fireplace or stove, indicating the row number, location and type of bricks, doors, dampers, supporting elements. If the rows are repeated, the fragments of the scheme are combined into one, indicating all the same type of rows.
If you decide to learn how to build fireplace stoves with your own hands, the drawings will help you determine their overall dimensions, according to the sketch you can figure out the purpose of individual elements and the direction of movement of flue gases, and the ordering scheme will tell you how much brick you need and how to lay it. Those who have already built fireplace stoves with their own hands do not always use drawings - according to the scheme, they can determine both the dimensions of the stove and the principle of its operation. Let's try and we will understand this fascinating matter using the example of a simple stove-fireplace.
Fireplace stove: masonry technology
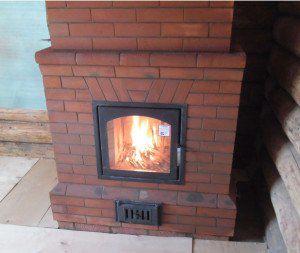
Such a stove is a simple but reliable source of heat for a living room or country house. The firebox is large, like a fireplace, but closed with a glass door - this makes the stove safe and easy to use. An ash pan is located under the firebox to remove combustion products. The smoke channel is more complex than that of a traditional fireplace, hot smoke passing through it heats the walls of the stove well, so it has a greater heat capacity than conventional fireplaces.
Fireplace stove - photo
For a fireplace stove, full-bodied ceramic bricks are used in the amount of 620 pieces and fireclay bricks - 100 pieces, refractory masonry mortar based on Mortel-28 clay - about 25 kg, clay-sand masonry mortar - 300 kg. In addition, doors are needed: for the firebox - a fireplace door with heat-resistant glass, size 50x48 cm, three cleaning doors 14x13 cm, as well as one blower with dimensions 25x13 cm, and two dampers: 30x19 cm and 27.5x15.5 cm.
Refractory mortar is used for laying fireclay bricks, ceramic bricks are placed on ordinary clay-sand mortar. The solution is prepared according to the instructions on the package.
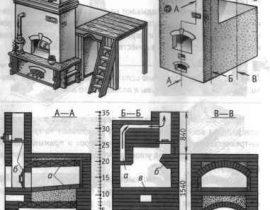
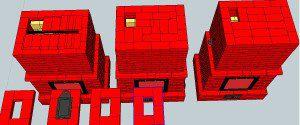
Ordering scheme of the fireplace stove
- The first two rows are the base, the so-called under the furnace. In the third row, they begin to lay out the smoke channel and install cleaning and blowing doors. In the fourth and fifth rows, the laying of the smoke channel is continued, and in the sixth, they begin to lay out the bottom of the furnace from fireclay bricks - in the diagram it is painted yellow. They continue to lay a fireclay brick firebox on a refractory mortar and walls on clay-sand in the seventh, eighth and ninth rows. A grate is installed between the firebox and the ash pan.

The layout of the laying of the first rows of the fireplace stove
- Rows from the tenth to the twelfth are laid in the same order, laying out a hole for the firebox in the front part. In the thirteenth row, a fireplace door is installed, in the fourteenth, a vault is made of vertically standing brick, leveling the vault in the fifteenth row. The sixteenth row forms a mantelpiece on the front side, and in the seventeenth row they begin to lay out the overlap of the firebox. They complete it in the eighteenth row, while leaving small holes in the smoke channel. If everything is done in accordance with the diagram, then the channel will have a tortuous shape, allowing the smoke to warm up all the walls of the furnace.
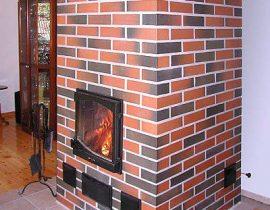
Masonry stove-fireplace
- In the nineteenth row, a 30x19 cm damper is installed on the smoke channel on the left. In the next seven rows, the outer walls of the furnace and the chimney are laid out, and in the twenty-seventh row a metal strip is laid to support the ceiling of the furnace.
Step-by-step laying of a fireplace stove - photo
- Rows from 28 to 30 - overlapping the furnace, laid according to the red brick scheme. Next, lay out the well of the chimney from one row of bricks to the required height. In each row, the brick is shifted so that a dressing is formed: the seam of the previous row must be blocked by the upper brick.This provides structural stability. In the second row of the well, a second damper is installed.
Furnace floor masonry


In the video below, the whole process is described in more detail, and after studying the diagram, you can understand all the nuances of laying such a furnace.
The video tells how to properly install the fireplace door. The rest of the doors are installed in the same way.
There are a great many schemes for laying stoves and fireplaces, they are different in terms of material consumption, masonry complexity, shape, appearance and purpose. Some of them are presented in our article.
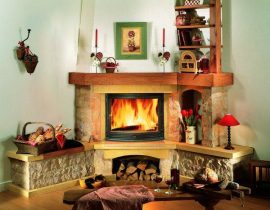
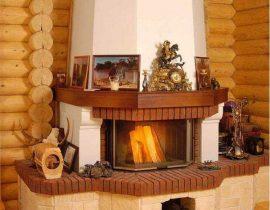
Drawing and diagram of a corner fireplace with a round arch
The fireplace is installed in the corner of the room on a separate foundation. The firebox is located at a level of 28-30 cm above the floor level, under it is an ash pan. The firebox arch has a round shape and is lined with bricks. Firebox height - 52 cm. Rectangular smoke channel with a chimney tooth - a beveled vault in the rear wall of the firebox, the resulting narrowing provides good traction due to increased pressure in this area. Above the chimney tooth on the front side there is a cleaning door for removing soot. The fireplace mantel is made of brick. A brick apron is located around the smoke channel, under which heated air circulates - holes closed with grates are made for its exit.
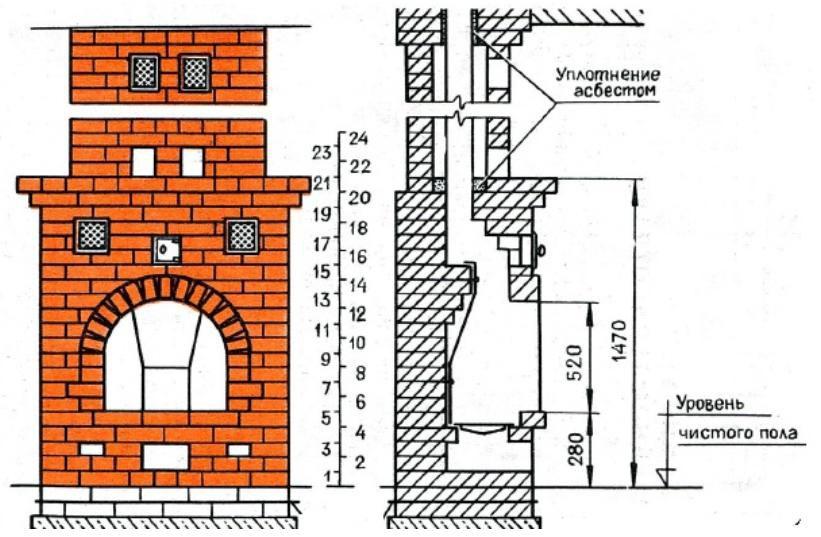
Fireplace stove - drawing
The required materials and purchased items are shown in the table.

Table of necessary materials for the construction of a fireplace stove
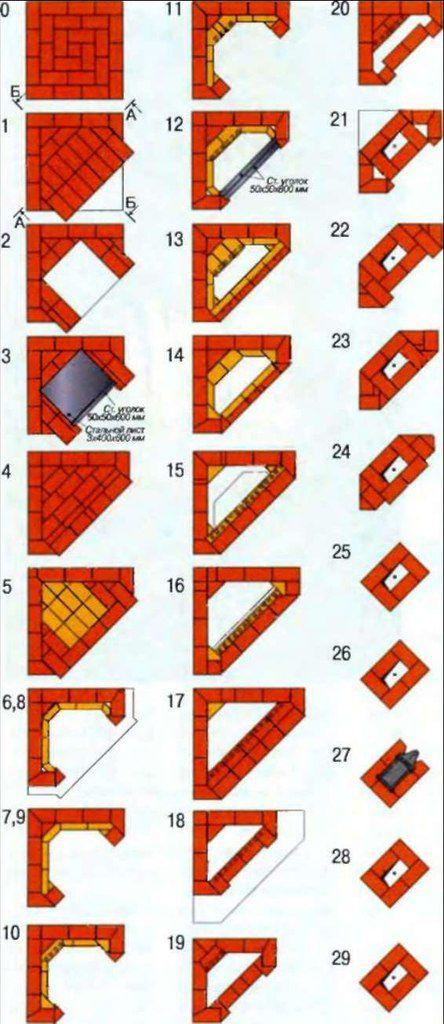
The fireplace ordering scheme describes in detail the masonry process. Please note that before starting the laying of the first row, it is necessary to level the base, this can be done using two rows of masonry, made according to the scheme of the first row.

Fireplace ordering scheme
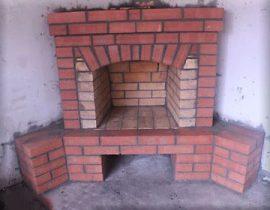
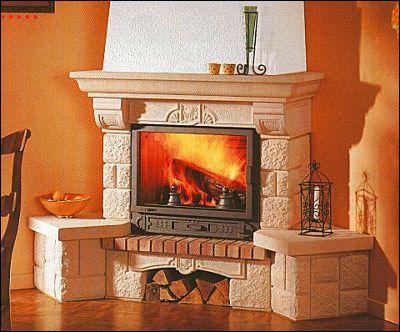
Drawing and diagram of a corner fireplace with a straight arch
The fireplace insert imitates a traditional Russian stove. The zero row is located below the floor level and is made in the form of a square that redistributes the load. The firebox is made of fireclay bricks, the fireplace walls are made of ceramic. The bottom of the ash pan is made of a metal sheet, which makes it easier to remove the ash - the sheet is simply pulled out. A chimney tooth is located in the rear part of the firebox, the firebox ceiling rests on a steel corner. The laying of such a fireplace is carried out according to the scheme.
Corner stove
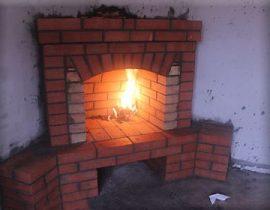
Simple wall-mounted fireplace with a direct chimney
A very simple fireplace scheme. The furnace is rectangular, lined with refractory bricks. The ash pan is separated from the furnace by a grate. A straight and fairly wide chimney allows you not to worry about draft, and a gas tooth will prevent it from tipping over and smoking the room. A damper is built into the chimney. The dimensions and layout of the fireplace masonry are shown in the figure.
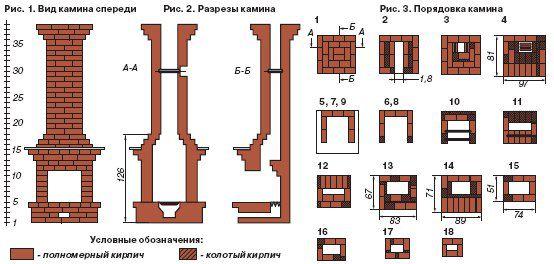
Do-it-yourself fireplace with a direct chimney
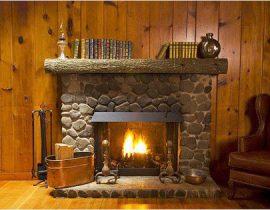
Wall fireplace with podium
The peculiarity of this fireplace is the absence of an ash pan and a straight chimney of a simple shape. In the lower part of the fireplace there is a semicircular podium placed forward. It serves not only for decorative purposes, but also for safety: the firebox of this fireplace is shallow, and sparks are possible. The firebox is lined with refractory bricks. The narrowing of the firebox in the rear part forms a ledge - a gas tooth. The mantelpiece is made of wood and rests on a semi-circular log. The simple shape of this fireplace will fit perfectly into a hunting-style house.
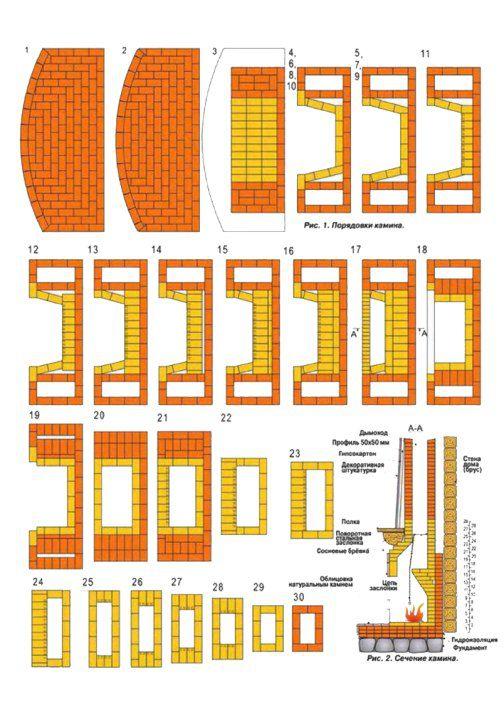
Example of a wall fireplace with a podium
As can be seen from the article, it is not difficult to lay stoves and fireplaces with your own hands, drawings and diagrams will help you understand the intricacies of the stove craft.You can also learn how to properly make a foundation for a fireplace, knead the masonry mortar and lay a brick from the article about do-it-yourself fireplace masonry.