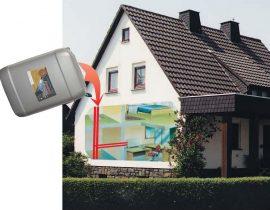
In country houses, expensive heating systems are rarely installed, because they are used, as a rule, only on rest days.
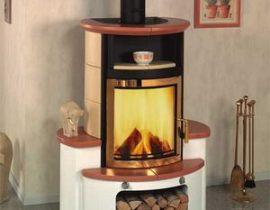
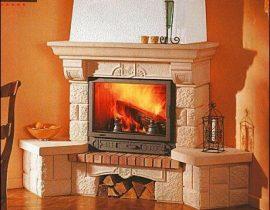
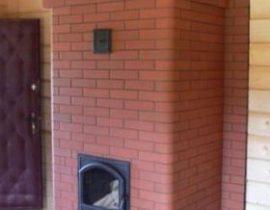
Furnace - fireplace photo
You can quickly heat a country house on cold days with a fireplace, but it heats up only during the fire and cools down quickly, in addition, the fireplace cannot be used for cooking.
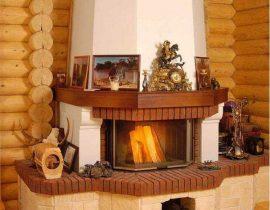
A combined stove-fireplace has much more functionality - it can be used to heat a small house of 1-2 rooms, cook food on a hob, and a fireplace insert with heat-resistant glass will allow you to enjoy the view of a live fire. It is quite simple to build such a fireplace stove, you can even do everything yourself if you follow the ordering scheme.
Content
Fireplace stove device
Before you build a fireplace stove with your own hands, you need to understand its design and decide on the installation site. The presented fireplace stove has two fireboxes on opposite sides: the stove firebox with a hob is installed from the side of the kitchen or kitchen compartment and is used for cooking and heating the house, the fireplace insert is located from the side of the room. For safety, it is equipped with cast-iron doors with heat-resistant glass, which allows installation even on wooden cottages from a log house.
Both fireboxes can be fired at the same time thanks to the extended chimney and a system of valves that can be used to block each smoke channel individually.To improve draft and make cleaning easier, ash pans with doors are equipped under both fireboxes; they are separated from the combustion chambers by grates.
The fireplace stove is installed on a foundation made of concrete, brick or rubble concrete. If the foundation is erected simultaneously with the construction of the house, it is necessary to separate it from the common base with a sand or gravel cushion.
When designing a fireplace stove and a chimney, it is also necessary to take into account the location of beams, rafters and other floor elements, and to carry out penetrations through them in compliance with fire safety requirements.
Necessary materials
To build a fireplace stove in your country house, you will need:
- A strong desire to abandon paid installation and do everything as much as possible with your own hands;
- Furnace brick - about 8 hundred pieces;
- Heat-resistant masonry mixture based on clay -200 kg;
- Fireplace door with heat-resistant glass 500x500mm in size;
- Cast iron furnace door, 200x250 mm;
- Blower doors, 120x250 mm and 120x120 mm;
- Three cleaning doors for cleaning the chimney, 120x120 mm;
- Two grates for fireboxes, 200x250 mm and 250x400 mm;
- Cast iron hob with burners, 410x720 mm;
- Steel corner with a shelf 40x40 mm and a steel strip 40 mm - 3 meters each;
- Steel sheet 3 mm thick and approximately 60x60 cm in size;
- Heat-insulating sheets - asbestos or basalt, thickness 4 mm;
- Annealed wire for securing doors;
- Sandwich pipe and chimney fittings;
- Boards and waterproofing roll materials for formwork;
- Concrete and rubble stone for the foundation;
- Dry construction sand, crushed stone;
- Fire-resistant flooring - tiles, porcelain stoneware, metal sheets.
When buying a brick, pay attention to its appearance: the brick should not be burnt, as evidenced by the glossy sheen of its surface, or underbaked - fragile and uneven in color on a chip.
Foundation for a fireplace stove
How to make a foundation for a fireplace from monolithic concrete is described in the article "DIY brick fireplaces". The following describes the technology for erecting a rubble foundation - a cheaper option that requires less cement for concrete.
- A pit for a fireplace is dug in the place where it will be located, in accordance with the plan. The depth of the pit is equal to the deepening of the foundation of the building itself, the dimensions are 5-10 cm larger than the overall dimensions of the hearth of the furnace. The bottom of the pit is covered with a layer of rubble and rammed, leveling.
- The formwork is erected to the floor level in the house from a planed board or plywood sheets, coated with bituminous waterproofing from the inside and outside, and dried.
- A large rubble stone is laid at the bottom of the pit, the space between it is covered with crushed stone with an average particle size of 50 mm.
- A portion of a cement-sand mortar is prepared: 1 part of cement is mixed with 2-3 parts of sand, after which it is diluted with water to the state of liquid sour cream. Pour on a layer of stone and rubble.
- The next portion of the mortar is prepared, the stone is laid out again, the gaps are filled with rubble and the mortar is poured. So continue to a level of 5-7 cm below the floor. The top layer is leveled with cement mortar and the foundation is left for 3-7 days to gain strength.
The first layer of brick, which forms the bottom row of the hearth of the fireplace, is leveling. It is placed according to the scheme of the first row on a layer of waterproofing - roofing material, using a thickened layer of mortar - up to 1 cm.
Technology of laying a fireplace stove
Put the stove-fireplace on a heat-resistant mortar based on clay and sand. Ready mixes are sold in oven stores, but if there is a quarry with good oily clay near your dacha, you can use it. The solution in this case is prepared as follows: clay is soaked in a barrel of water for a week, removing foam and floating debris from the surface. The excess water is drained and the resulting slurry is stirred, gradually adding sand to it until the slurry almost immediately begins to peel off the spatula. If desired, add up to 10% cement or porcelain stoneware adhesive to the solution, mix. After that, the solution is ready to work. It is impossible to rejuvenate the solution with cement with water, so it is better to add cement in portions, in the amount of solution that you can use up in an hour and a half.
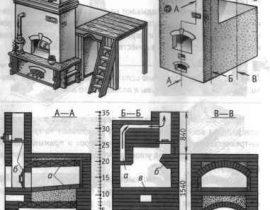
Furnace masonry technology - fireplace photo
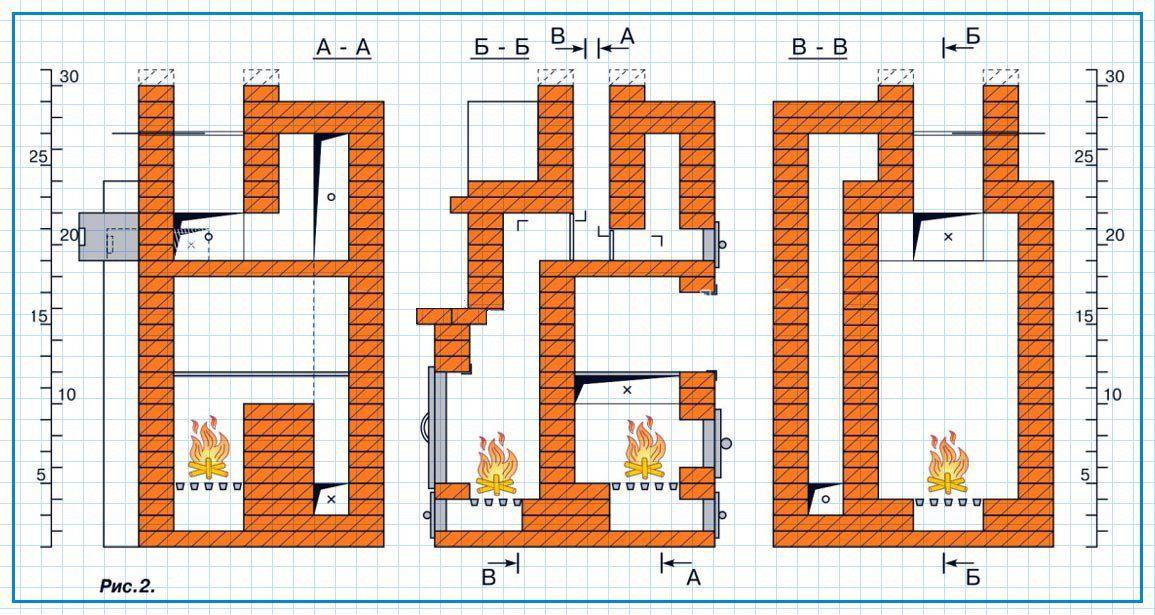
The scheme and ordering of the fireplace stove are shown in the figures.
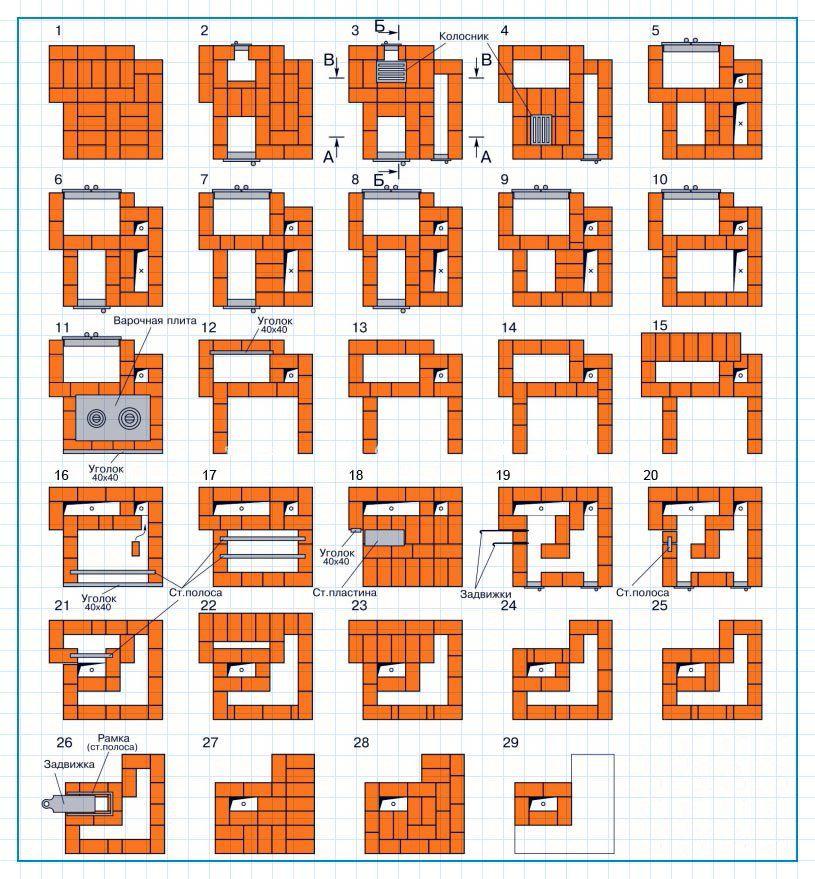
Step-by-step masonry ordering the stove - fireplace
The masonry technology is as follows:
- The first row forms under the furnace. It can be laid from substandard brick - chipped, with cracks. In this case, be sure to use the level and align the row as much as possible.
- In the second row, the installation of the blower doors begins. Between the door frame and the masonry, it is necessary to lay a strip of asbestos or basalt sheet. The door frame is fixed to the brick of the first row with metal pins, such as nails, through the holes. If they do not line up with the seams, you can carefully drill the brick of the first row. The rest of the laying is carried out according to the scheme.
- In the third row, the doors continue to be fixed with a wire threaded through the holes in the sides of the frame and tucked into the seams of the masonry. In addition, on top of the third row, the grate of the grate of the fireplace insert is laid according to the scheme.
- In the fourth row, the blower doors are closed with bricks, fixed in the same way to the wire. Lay the grate of the furnace furnace. On the side, they begin to lay out the smoke channel, put a cleaning door. The solution from the inside of the smoke channel is carefully smoothed by hand to avoid roughness and excessive deposition of soot and soot.

We close the blower with a brick
- In the fifth row, the installation of the fireplace insert door begins, fixing it to metal pins in the same way. It is much heavier than the blower doors, so it must be temporarily additionally fixed vertically with a wire. An asbestos strip is laid between the door frame and the brick along the perimeter.
- In the sixth row, they put the door of the furnace in the same way, and then they put it according to the scheme from 6 to 8 rows. In the 9th row, the door of the furnace firebox is closed on top with a brick, the 9th and 10th rows are laid out according to the scheme.
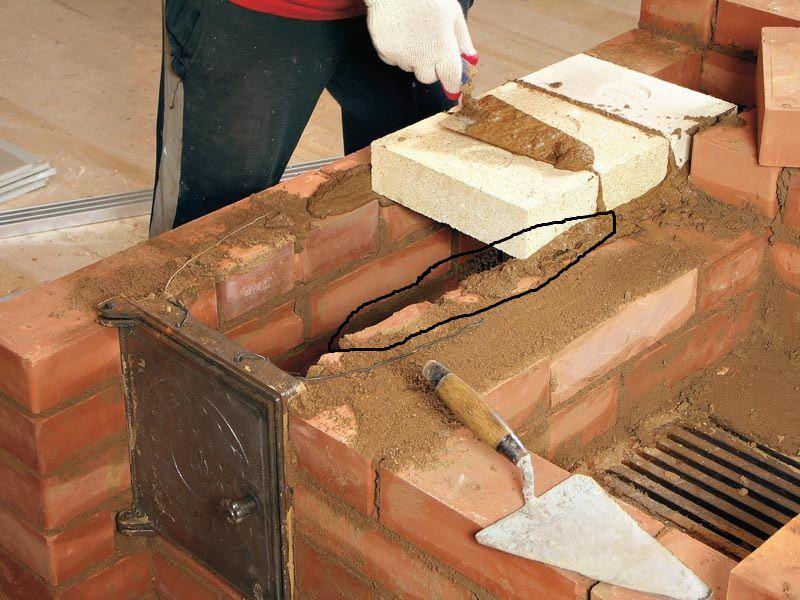
- On the brick of the 11th row, you need to lay the hob. Therefore, the brick is first laid out dry, adjusted, the position of the slab is marked with a marker, after which the brick is removed and, with the help of a grinder, recesses are made for laying the slab so that it lies flush with the brick.
- In the 12th row, the door of the fireplace insert is laid on top with a brick, not forgetting to fix it to the holes in the frame with wire. A steel corner is laid on top of the brick according to the scheme. Rows from 13 to 15 are laid according to the scheme.
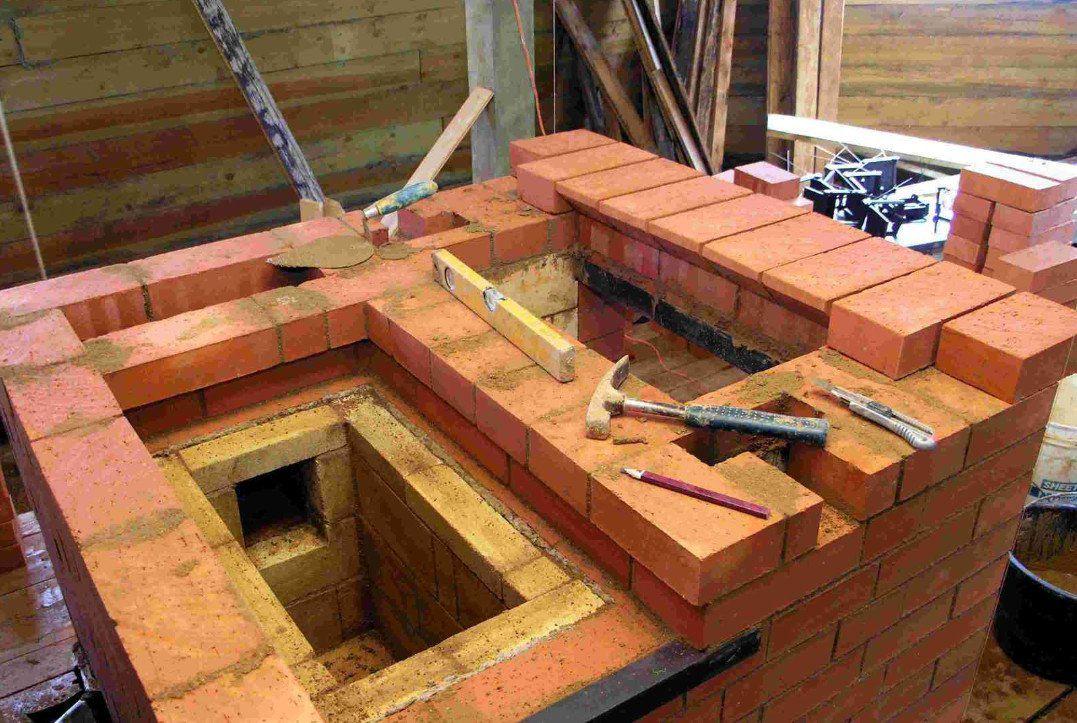
Laying 12 rows of bricks for the stove - fireplace
- In the 16th row, they begin to perform a vault over the hob, for this, in accordance with the scheme, a corner and a steel strip are laid in front of it above it. At 17, a brick is laid on top of them, and a steel strip is next again to support the vault. In the 18th row, it is completely laid with bricks, and a steel sheet 3 mm thick is placed at the place where the valves are installed.On the side of the brick, in accordance with the scheme, a piece of steel corner is fixed - it serves as a support for the valve.
- In the 19th row between the bricks, grooves are made slightly larger than the thickness of the metal of the valves - about 5 mm, valves are made according to the scheme and put in place, checking the overlap of the smoke channels. Install two more cleaning doors.
- In the 20th row, a steel strip is installed above the smaller valve. Continue laying according to the scheme. In the 21st row, a steel strip is placed on top of the masonry - the chimney will rest on it.
- From the 22nd row, the laying of the chimney begins: the smoke channels narrow and gradually overlap. The masonry is carried out according to the scheme from 22 to 26 rows, in which a common valve is installed on a frame made of a steel corner.
- The furnace is covered - rows 27 and 28, after which they proceed to the chimney. It is laid according to the scheme of 29 rows with dressing, shifting the rows by half a brick, to the desired height. For the installation of a complex chimney, you can use a heat-insulated sandwich pipe and various adapters, elbows, penetrations and support elements.
- After the masonry is completed, the fireplace stove is dried until the masonry mortar dries, after which they slowly begin to heat.
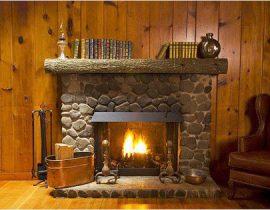
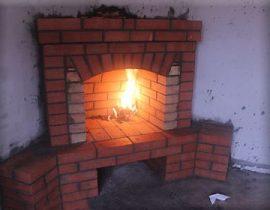
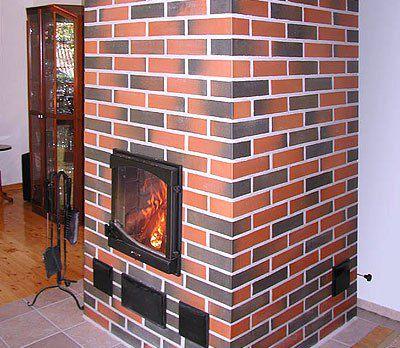
Finished stove - brick fireplace
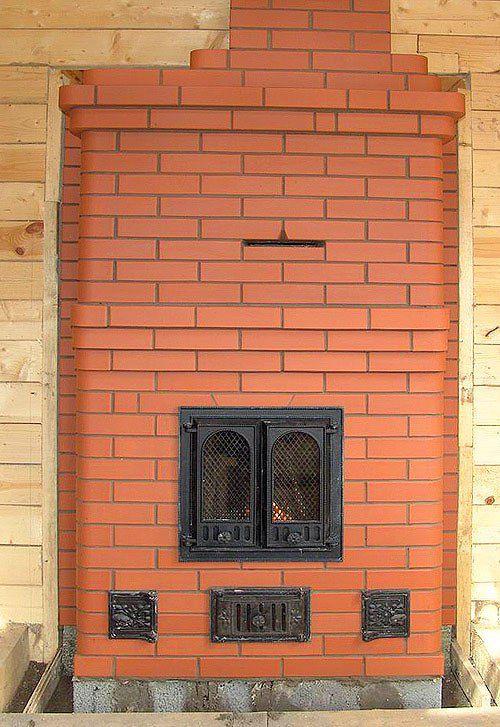
The presented design of the fireplace stove is universal: it will help you quickly warm up in cold weather when kindling a fireplace, cook food, and heat the house well due to the long smoke channel, when passing through which the smoke heats up the bricks. The heat dissipation from such a stove is much higher than from a conventional fireplace, and this will allow you to use less firewood, while enjoying the view and warmth of the fire.
Video instruction: do-it-yourself stove - fireplace