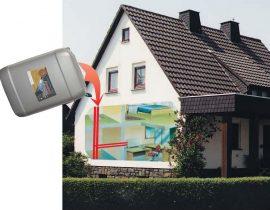
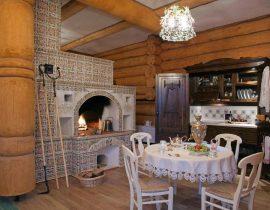
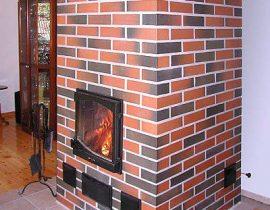
The Dutch oven, she is a Galanka, a Gulanka or a Galanka, appeared under Tsar Peter the First. About three hundred years ago, he issued a decree prohibiting the use of stoves in houses that did not have a chimney, that is, classic Russian stoves that were heated “in a black way”.

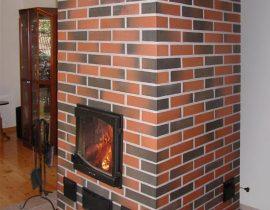
Dutch rectangular oven
So the first brick structures appeared that could heat a large house.
Video - Dutch oven
Design features
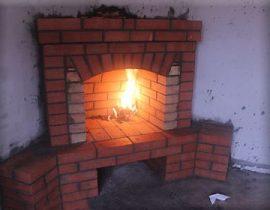
The Dutch woman consists of a very capacious firebox (a niche where firewood, coal is laid), located almost at the very floor, six smoke channels - three lift and three outlet (thanks to which the flue gases heat the stove gradually) and a chimney. Laying begins after the construction of the reinforced foundation.
The shape of the furnace can be rectangular or round.
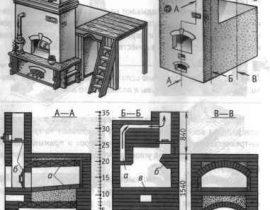
The principle of movement of flue gases in the Dutch
Flue gases generated during the combustion of fuel from the furnace enter the first lifting smoke channel. Here they give off their heat and through the pass gradually descend to the level of the furnace through the outlet channel, where, due to the high temperature, they heat up again and the process is repeated. And from the last channel, the smoke goes out into the chimney.
Such a system of smoke circulation allows you to effectively warm up the room.
The draft in the classic, outdated model is regulated by the height of the pipe, the valve and the firebox door.

Scheme of the furnace
The positive aspects of the Dutch oven
- the ability to heat a large space;
- ease of construction (compared to the Russian stove);
- after the combustion of the fuel, the stove heats the room for a long time due to the heated bricks that have accumulated heat;
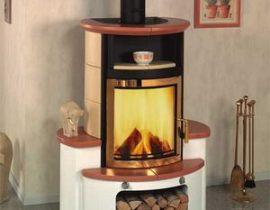
- aesthetic appearance;
- in modern models it is possible to transform the furnace hole, stylizing it as a fireplace;
- due to the thickness of the masonry in one brick, the structure warms up quickly, while using less fuel than in a Russian stove;
- the possibility of combining the furnace with boilers and connecting it to the water circuit and even to gas burners;
- the possibility of using any solid fuel.
Disadvantages of the classical design
- the lack of a hob does not allow the use of the oven for cooking;
- the absence of a blower in the classic Dutch model does not allow optimal control of traction;
- due to the same design feature, in bad weather with poor draft, smoke may enter the room;
- the absence of a grate and a box for collecting ash complicates the process of cleaning the furnace from combustion products.
- Modern designs are devoid of these shortcomings. In addition, the Dutch are modified, allowing you to bake bread in ovens or cook food, and the blower allows you to adjust the draft and eliminates the possibility of furnace gases entering the room.
What is needed for laying the oven?
For the oven itself, you will need such materials, how:
- furnace solid bricks and refractory (approximate number - about two hundred pieces, depending on the volume of masonry);
- roofing material, hydroisol or special film;
- oven clay;
- river sand;
- cement (concrete);
- plastic wire;
- cast iron doors;
- grate;
- asbestos cord;
- water;
- valve;
- foundation reinforcement.
Tools:
- shovels:
- containers for kneading kiln clay;
- fine mesh for sifting sand;
- tape measure and building level.
Important! In order to check the correctness of the construction of the drawing, the oven is laid out of bricks on a flat surface without the use of binders (clay and cement). This avoids construction errors.
Clay mortar preparation
This is done in advance, two or three days before the furnace will be built.
Clay is sifted through a mesh so that there are no lumps and large inclusions. Then fill the sifted clay with water, after soaking, drain the excess. When the clay swells, mix it with an equal amount of sifted sand and add water (from the ratio of 1 part water to 8 parts of the mixture).
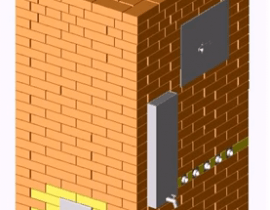
Foundation under the dutch
It is rational to build the foundation at the same time as the foundation of the house, but in no case should they be interconnected. Between them fall asleep a sand cushion.
Work order
- We clear the area intended for laying the furnace, make markings. If the construction will take place in an already built building, the flooring will have to be dismantled. The optimal size of the foundation is one and a half meters by one and a half meters. The calculation is made based on the size of the furnace, increasing this value by 10-20 centimeters.
- Dilute the cement with water. The ratio is one part cement to three parts water.
- Pour the resulting solution onto the prepared site.
- We lay the reinforcement crosswise on top of the freshly poured cement. Between the metal bars, the approximate distance should be 10-12 centimeters.
- We fill the reinforcement with cement mortar. We check the horizontal level with a building level. Irregularities in the foundation will negatively affect the verticality of the Dutch masonry.
- The last stage - through a sieve, pour dry cement powder onto the wet layer and lay roofing felt, waterproofing or roofing material (any available waterproofing material) in several layers. Pour sand over it. Layer thickness - 5 centimeters. We moisten the sand.
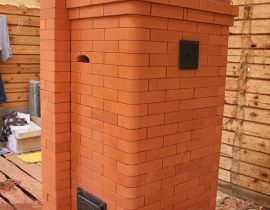
Do-it-yourself Dutch masonry

Scheme of laying the furnace - Dutch
ordering
1. Lay out the first row of bricks on top of the sand cushion, check the horizontal level with the building level and fill the entire row with cement mortar.
2.3. In the second and third rows, we lay the bricks flat, fastening them with mortar.
To make the oven perfectly vertical, we use plumb lines and number each row with chalk, for convenience.
4.5. Starting from the fourth row, the bricks are laid "on edge". We begin to lay out the stand under the internal partition and the ash pan opening. The bricks on the back wall will subsequently be removed during the operation of the furnace, so they are laid without using a bonding mortar. The door is not installed to reduce heat loss. In each row we observe the dressing.
We install the firebox door, fixing it between the bricks with plastic metal wire. For tightness, the edges of the door are sheathed with asbestos cord or other heat-insulating heat-resistant material.
6,7,8. We cover the niche for collecting ash with bricks, leaving a hole under it, we lay the furnace grate.
9-13. We lay out the walls of the chamber where the combustion of fuel occurs. Installing the door using the same technology as the ash pan door.
14.15. In this row, we block the firebox, and on the back of the stove we leave space for smoke circulation.
16.17. Here it is necessary to lay a cleaning door or, to reduce heat loss, replace it with a knockout brick.
18-26. We produce the formation of three channels of smoke circulation.
27. Finishing the masonry. You should get three vertical channels of smoke circulation, having the shape of a coil. The walls of the channels must be perfectly smooth. Coating them with clay is irrational.
28. We cover the chimneys, leaving a hole for the chimney. When laying the floor, we slightly shift the masonry back (by 5 cm).
29. Lay out this row without a shift and still form the chimney of the furnace.
30. We lay the chimney and install a valve designed to adjust the draft.
Important! Every 2-3 rows we control the horizontality of the rows with a building level.
We lay a pre-furnace sheet on the floor, which prevents sand from entering the room from under the furnace.
Installation of a chimney for a furnace
Building codes and installation procedure
In the case when the distance between the pipe and the highest point of the roof is less than one and a half meters, the height of the pipe is taken at least fifty centimeters above the level of the roof ridge.
If the distance is more than one and a half meters, the pipe can be made flush with the ridge. And if the distance is more than three meters, then the height of the pipe is taken by calculating the angle between the roof ridge and the highest point of the pipe at 10 degrees.

Chimney installation
After the thirtieth row of masonry, the chimney begins.It is built of the required length, and in the area of \u200b\u200bthe ceilings, a special brick thickening (fluff) is made, without changing the internal space of the pipe and sheathing the outer part of the pipe with asbestos or other non-combustible material. This is necessary so that the ceiling does not accidentally catch fire.
Important! When laying a pipe, cement is added to a solution of clay and sand, 1 part of cement to 10 parts of the mixture.
After laying the pipe to the desired height, we build its head and put on a metal head on top, which protects the pipe from penetration into the channel of dirt and precipitation.

Chimney diagram
After completion of construction, it is necessary to allow the furnace to settle and dry completely. This may take up to two weeks. You can check the draft by burning rags or paper in the firebox. Thus, we have analyzed an example of how to build a Dutch oven with your own hands. Also read about the construction of the furnace potbelly stove with water circuitwe think it will be useful for you.