Dutch (galanka, Dutch, Dutch stove) - a reliable stove for home and garden. It is easy to cook on it (when equipping the classic model with an oven), it quickly warms up the room, and a fairly simple design allows you to build an oven with your own hands.

Dutch oven
Content
A little about Dutch
The blower (due to the low thrust of the classic Dutch, its model was modified with an ash pan and a blower) and the combustion zone are equipped with doors during construction. Through them, air from the room enters the furnace. A constant supply of oxygen supports combustion. Thrust depends on the gap of the blower door. Above the chamber for collecting ashes, metal bars are immediately installed in the masonry, designed to support firewood, ensuring free shedding of ashes into the ash pan. The chimney needs a damper. It is placed to reduce the loss of warm air into the pipe.

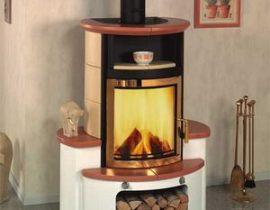
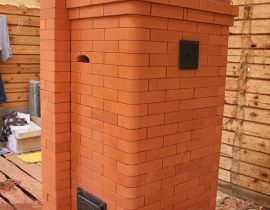
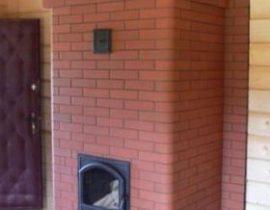
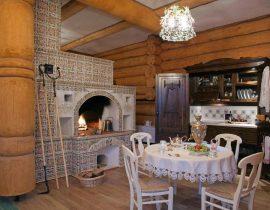
Appearance of the furnace
The oven (if necessary) is placed in the oven between the channels - smoke circuits, through which heated smoke runs.
In order for the masonry to be strong and the stove to last for a long time, the foundation must be reinforced.
How to fold dutch
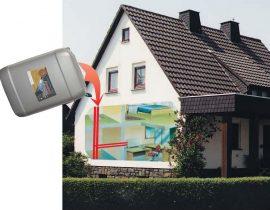
Decide on the location of the oven. It is good if it is located in such a way as to heat two rooms at the same time.
It is irrational to place the heater near the outer wall of the building, this will provoke the accumulation of condensate.

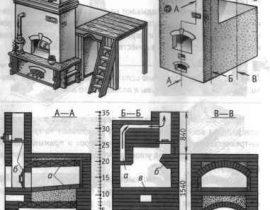
Dutch stove drawing
The foundation must be taken care of at least a week before the start of construction.
Before starting work, we draw or print out the order, stock up on the necessary number of tools, bricks, prepared clay and cement mortar and other materials.
We take the dimensions of the foundation somewhat larger than the base of the furnace. We disassemble the floor logs, dig a pit to a depth of about half a meter. If the distance between the foundation of the house and the furnace is very small, we will subsequently make a sandy layer between them.
We mix the cement mortar - three parts of water to one part of cement.
Pour the first layer of mortar to the bottom of the foundation pit.
We prepare several metal rods of the same length (10-15 cm less than the length of the pit). We put them in the solution, observing the distance between the bars up to 12 cm.
We again fill in a layer of cement mortar (about 10 cm) and repeat the process of laying the reinforcement.
We bring the foundation "under zero", that is, we make it flush with the floor, gradually pouring the solution.
Gently sprinkle the upper part of the last uncured layer through a sieve with dry cement powder (“iron”).
In the process of work, it is necessary to strictly check the horizontal level of the surface.
Cooking clay
Sift dry clay through a sieve (you can use a bed grate or a fine mesh). Next, soak the sifted powder with water, wait until the clay swells, carefully draining the excess liquid. When it completely absorbs water, add a new portion of the liquid - 1/8 of the total volume and sand (1 to 1 with clay).

Preparing a clay solution
Let's start laying
We lay a waterproofing film, on top of it a thin layer of sand (1-5 cm) and soak the bricks in water.
In the first row, we do not use mortar for bonding bricks. We lay out a platform of bricks, placing them flat. On top of this site, we pour a cement solution (a layer of small thickness).
The next two rows are similar to the first. We make the layout taking into account the order.

First row masonry
At this stage of construction, it is necessary to install plumb lines. We will prepare long nails, a hammer, a load (for example, a nut) and a silk or nylon thread. We hammer nails into the corners of the masonry (in the wet mortar between the first and second rows of brickwork). Using a stepladder, from the ceiling we lower a thread with a load to these nails. We hammer four more nails on the ceiling, tie the threads between the ceiling and the masonry. Check the verticality with a level. We eliminate inaccuracies by bending the nails.

We install plumb lines that will serve as a level for laying bricks
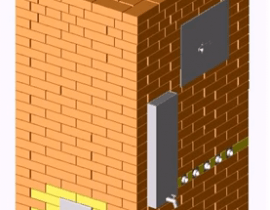
In the third row, we install the blower door. To do this, it is necessary to measure the door and leave a space in the masonry that exceeds the width of the door by 5-10 mm. On the perimeter we apply an asbestos cord to the cast-iron door. The fixation of the product between the bricks is carried out due to the refractory wire (it must be “drowned in the mortar between the bricks) and fastened on the inside of the door frame.

Blower cover for oven
Important! In the course of construction, be sure to check the masonry diagonals with a tape measure and check the conformity of the dimensions of the drawing and masonry.

Installing the blower cover
Fourth and fifth rows: we lay out a stand (without the use of cement) under the inner partition and an opening for cleaning the ash chamber.
Here we install a cast iron door for a firebox niche.
The next three rows (6-8): we build the walls of the furnace and the overlap of the door (we hang half a brick on each side of the door or we make a lock connection by cutting the bricks in the form of wedges).

Installing a cast iron door
We lay a grate through which combustion products will fall into the ash pan. We do not use a binding solution, so that later it will be possible to replace the part.

Installing the grate
Next (9-13 rows) we build the walls of the fuel chamber.
In the fourteenth and fifteenth rows, we cover the firebox (for example, laying bricks, using metal corners as a support), while leaving space on the back of the furnace for connecting the chimneys to the chimney. We line the inner space of the firebox with fireclay bricks (we put it “on edge”).

Dutch stove masonry scheme
The next rows (16-17) are the laying of a cleaning door or replacing it with one “knock-out” brick.
18-26 rows: we build smoke circulation channels in the form of a coil - three pieces.
27: we finish the construction of smoke circuits.
28 row: channels - we block the smoke circuits (we make a shift 5 centimeters back), leaving a hole for the exit of flue gases.
Row 29: We make the formation of the chimney, we carry out the masonry without shifts.
30: We continue the construction of the chimney, install a metal valve (we wrap the edges with asbestos cord and insert the valve frame into the brickwork) to be able to regulate the draft in the furnace.
Next, we continue the construction of the chimney and chimney. In the place where the chimney will pass through the ceilings, it is necessary to make a thickening in the brickwork, placing the bricks flat.Be sure to use heat-insulating materials to protect the floors from excessive heat and possible fire.
The operation of the furnace is possible 15 days after the completion of construction. To check the draft in the furnace in the firebox, we burn a small amount of rags or waste paper by adjusting the gaps of the damper and the blower door.
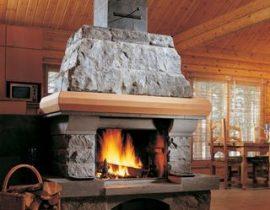
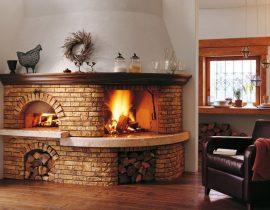
Take care of the appearance of the stove by finishing it with stone, decorative plaster, paint or by grouting.

Furnace finish
Video - do-it-yourself Dutch oven