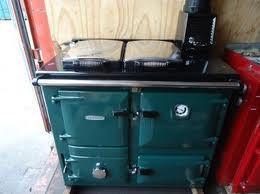
A boiler for a bath is a structure consisting of a metal or brick heating element and a water tank.
bath boiler
Metal boilers are cheaper and easier to install than brick sauna stoves, in addition, a steel stove can be installed without dismantling the floor covering and without pouring the foundation. If the budget does not allow you to purchase an expensive automated heating system for a bath, it is advisable to assemble a boiler with your own hands from a pipe, steel sheets, or even from a used gas cylinder. To do this, it is enough to have the skills of cutting metal with a grinder and be able to handle an electric welding machine.
The fuel for boilers can be: electricity, gas, liquid fuel, firewood, coal, peat, fuel briquettes and even sawdust.
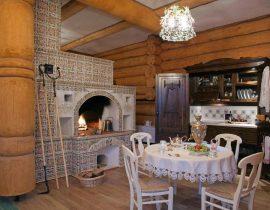
In order for the stove to evenly heat not only the steam room, but also the rooms adjacent to it, it must be installed in the central part of the bath. We bring the firebox door either directly into the steam room, or into the dressing room, from where we will lay the firewood.
Content
We build a stove-boiler for a bath with a do-it-yourself water heating function
The design of this furnace involves the production of steam, heating the space of the bath and heating the water in the tank. Under the furnace, as well as under any other brick structure, a foundation is required. Its most successful form is reinforced.For it, a rectangular pit is dug, the bottom is covered with sand, and then cement is poured with reinforcement bars laid every 15-20 cm of the poured solution. Construction begins only after the foundation is fully strengthened and solidified. Then it is checked for horizontality, covered with waterproofing materials, and only then they begin to lay the first row of the furnace.

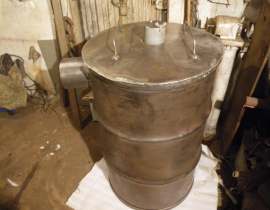
For the stove itself, the base of which is 4x5 bricks, and a height of just over two meters, you will need: doors (for a blower, firebox and a double-leaf door for the heater); cast iron or steel chimney damper; a metal tank with an embedded water supply tap and a lid (volume 170-180 liters); asbestos cardboard; sheets of steel (we will cut strips from them to cover the oven and doors); furnace clay solution; fireclay and red full-bodied bricks; angle grinder (grinder) with wheels suitable for cutting bricks; grate; pipes 1050 mm long and 50 mm in diameter.
Metal elements (doors, a tank, a valve and grates), with the ability to handle a grinder and a welding machine, can be done independently by cutting out parts from sheet steel and welding them together. However, you can also purchase ready-made products.

The first row of the oven is standard for any masonry. We lay out a platform, 4x5 bricks in size. We check the horizontal position, if necessary, tapping the bricks with a hammer.

The second row differs from the first in a small niche that will serve to collect ash. Here we install the door-blower.

The third row is similar to the second, but it is laid out taking into account the dressing (that is, in each subsequent row, the end part of the upper brick is located above the middle of the lower one).
In the fourth row, yellow fireclay bricks will come in handy, with which we will line the furnace of the sauna stove. Here we close the door and lay the grates. So that the grate of the grate, expanding when heated, does not damage the masonry, we cut out grooves in the fireclay with a grinder, into which we lay the grate. At the same time, 5 mm should remain on each side of the grate. We fill these grooves with sand.

From the next (fifth) row, we begin to form the fuel chamber.

Sixth row - we install a door through which we will subsequently load fuel, build up the walls of the firebox, observing the dressing and checking the verticality and horizontality of the masonry (we use plumb lines and a building level).

The seventh and eighth rows are similar to the sixth.
The ninth row of bricks is designed to cover the firebox door.

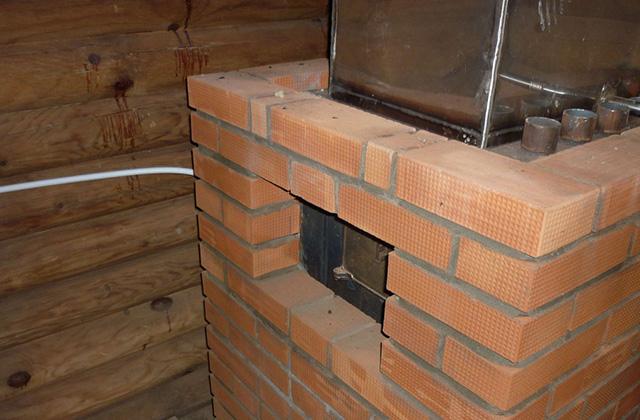
The tenth row is non-standard. In this row of masonry, we must prepare a place for installing a water tank and lay six pre-prepared pipes with a diameter of 50 mm across the masonry. Their function is to support the cobblestones inside the stove and ensure uniform heating of the sauna room even after the fuel burns out.
Bricks for the tenth row will have to be cut into quarters by a grinder, between which we will lay pipes, wrapping the end of each with asbestos cardboard.


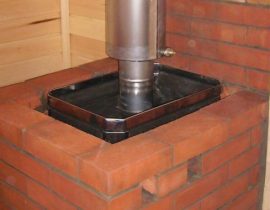
After all six pipes are laid, we install a tank (boiler) for water made of steel or cast iron.

Eleventh row - we block the pipes with red brick. 12, 13, 14, 15, 16, 17, 18 rows - we build the walls of the furnace, observing the dressing.
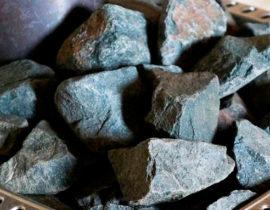
In the nineteenth row, the walls of the furnace should reach the top of the boiler to heat water.We lay stones in the interior of the furnace above the pipes (use only safe, proven rocks that can withstand high temperatures and do not emit harmful gases when heated into the atmosphere).

In the twentieth row above the tank, we lay steel strips designed to support the brickwork and create a ceiling above the tank. In the next row (21) we put bricks on top of these strips and block the tank. Leave space for a double door.
22-25 rows - we build the walls of the furnace, observing the dressing.
In the twenty-sixth row, using steel strips, we install the door and make a ceiling over it.

Row number 27. Here it is necessary to lay steel strips 10 cm wide each. Under them, in the bricks of the twenty-sixth row, we cut out recesses. Be sure to leave a gap between the steel and the bricks to avoid cracks in the masonry and the destruction of the furnace. We put a piece of asbestos cardboard into each recess.

28th row - with the help of steel strips we block the furnace, leaving space for the flue gases to exit into the chimney. We grind the bricks of this row with a grinder for the installation of a valve (it is necessary to reduce heat loss to the chimney and the ability to regulate draft).
29, 30 rows - lay out solid overlapping areas.
Starting from the thirty-first row, we are building a brick chimney.

After the stove with the boiler is completely ready, the surfaces of the walls and ceilings are thermally insulated, a sheet of metal is laid in front of the stove to protect the floor covering from accidental sparks and fire - we dry it. To do this, we burn a certain amount of waste paper and rags in the firebox.At full capacity, a bath stove with a boiler can be put into operation no earlier than two weeks after completion of construction, you need to allow the solution to dry normally at room temperature
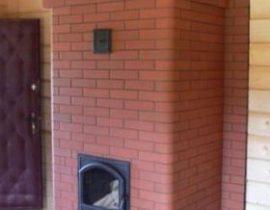
In the bath, it is important to paint the brickwork or finish it (heat-resistant ceramic tiles, natural and artificial stones, etc.). After all, the appearance of the stove and boiler is far from the last point regarding the pleasure of visiting the steam room.
Video: finishing the boiler in the bath
Thus, we figured out how to make a stove-boiler for a bath with your own hands, in addition, we advise you to read about sauna stove. Easy steam for you!
Video. Do-it-yourself unique stove-boiler for a bath