Humidity and air temperature, comfort and benefits for the body depend on the stove in the bath. The sauna stove must be equipped with a tank for heating water, a chimney and a heater pocket for stones.

If you have a great desire to fold the sauna stove with your own hands, and not hire specialists, be sure to read this article several times, you can even print it on a piece of paper and use it directly as a cheat sheet. At the same time, you will save a lot and get invaluable experience, which in the future you will fold similar structures for money. External decoration plays an important role, because a bath is a place of rest, both physical and moral, and the appearance of the stove plays an important role in this! After the exterior finish, the stove in your bath should become its “highlight”, an exclusive decoration that is just nice to look at, like a picture.
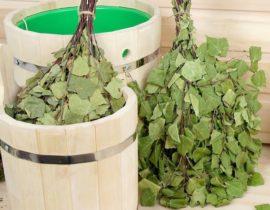
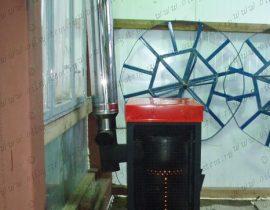
The sauna stove is located either with a furnace door to the adjacent room, or directly to the steam room, where the firewood is laid. Naturally, it is better that firewood be laid from the next room, if dimensions allow you - do just that.

Water tanks are mounted either behind the furnace body on supports (floor or wall mounting), or they are mounted directly above the furnace firebox. At the same time, a stationary floor tank mount is safer than a wall mount.
Content
Video instruction: how to weld a metal stove for a bath with your own hands
Calculation of the tank volume for a sauna stove
The volume of the water tank is calculated by taking from seven to ten liters of water per person with a temperature of at least fifty degrees. So, if you plan to visit a pair of 3-4 people at the same time, you should choose a tank with a volume of at least 40 liters.
How to calculate the volume of the steam room and the firebox of the furnace?
It is not enough to measure the dimensions of the room. It is also necessary to take into account the material of the surfaces. If the room has windows, a glass door, surfaces made of tiles, bricks, concrete, their area should be measured. For each square meter of such surfaces, add one and a half cubic meters to the volume of the room, which will be taken into account when choosing the size of the furnace. The minimum power of the sauna stove is 8-10 kW.
Furnace Requirements
The sauna stove must be safe (both in terms of fires and for human health - not cause burns if accidentally touched and exclude smoke from entering the room), the temperature regime must be regulated, and the dimensions must correspond to the volume of the room.
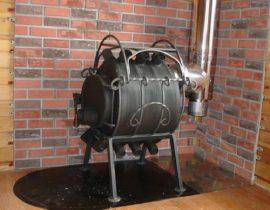
Metal stove-heater, is it suitable for a bath?

Metal furnace heater
This furnace design is the simplest.For work, you will need steel sheets with a thickness of at least 5 mm, a welding machine and a grinder (or a gas cutter), pipes for supplying and discharging water, refractory bricks, a solution of furnace clay, stones, chimney pipes, a faucet, stove doors with valves and hinges, metal profile for mounting the stove support.

Sample furnace heater
The design itself consists of a water tank with pipes connected to it and a tap. The tank is heated from the rear wall of the stove, the interior of which, in turn, is zoned into a firebox and an open-type heater. Flue gases are disposed of through a chimney that exits the furnace through the heater and sauna walls.
First of all, it is necessary to cut the bottom and side walls of the future stove from steel sheets and connect them by welding. We weld the corners inside the furnace - they will support a sheet of metal on which we will lay the stones.

We make a frame for the furnace
On the front wall we cut a rectangular hole for the door, and from the cut out rectangle we make a door. Along the perimeter, you can scald it with strips of steel for a greater fit. In the lower part of the door or the front wall of the firebox, we drill several holes for air to enter the furnace. By welding we fix the door hinges and the hinge under the valve.

Making a door

We cover the interior of the furnace with fireclay bricks
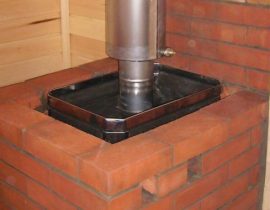
To make a chimney, we will prepare a pipe and make a hole in a sheet of metal on which there will be a heater. We weld the pipe to the steel sheet.

Metal stove for a bath
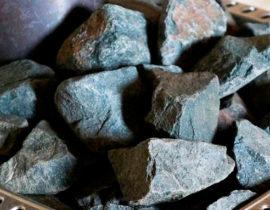
We proceed to the installation of the water tank. It consists of three walls and a bottom, hermetically welded between themselves and the rear wall of the furnace. We weld the inlet and outlet pipes for water to one of the side walls of the tank.Then we weld the tap at the bottom of the tank. We install the entire structure on a frame made of steel profiles or on a brick base 20-30 cm high. We cover the metal parts of the furnace with refractory paint. On top we lay out stones (soapstone, porphyrite, basalt, etc.) ranging in size from 5 to 12 cm. We mount the chimney and chimney, pour water into the tank, cover it with a lid and ignite the finished stove, checking the design for draft and no smoke in room.
To modernize a potbelly stove for a bath, you can equip it with an ash chamber with a grate and an ash collection box. This will greatly simplify the cleaning of the stove, and the blower door will help to better regulate the draft, and, accordingly, the temperature and speed of fuel combustion. For the same purpose (controlling the heating temperature of the furnace), as well as to reduce heat loss through the chimney, it is equipped with a valve. It can be of the slide type or any other.

Chimney damper

Gate valve - view 2
Stove for a bath from a pipe or an old cylinder
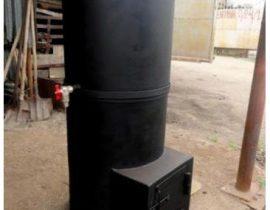
The difference between this design and the previous one is that the water tank is located directly above the firebox. For work you will need: a pipe for the furnace and tank (wall thickness 1 cm, diameter 50 cm, height 150 cm); pipe for the heater (the wall thickness is the same, and the diameter is 35 cm); mortise crane; metal fittings; door hinges; steel sheets with a thickness similar to pipes; tools for welding, metal cutting.

Stove for a bath from a pipe
- We divide the pipe of a larger diameter in two, using a grinder. From one part (length 60 cm) we will mount a water tank, from the second (90 cm) we will design a heater for a bath.
- We make markings on a sheet of steel to cut out a circle equal in diameter to the pipe - the furnace body. To do this, it is convenient to use a can of paint or a marker. This circle will serve as the bottom of the structure. Hermetically weld it to the pipe.
- Immediately we make the legs of the structure. To do this, we strengthen the bottom of the sauna stove with a metal frame made of profiles. Frame height 10-15 cm.
- After the stove stands firmly on its legs, draw a 25x7 cm rectangle on the body. This piece of metal will be the blower door. We cut it out with a grinder, equip it with hinges, a handle bracket and a latch.
- We make a grate. Its task is to pass air from the blower into the combustion zone, retain fuel and not prevent ash and ash from entering the lower chamber of the furnace. Such a lattice can be made from pieces of reinforcement or a sheet of metal with holes cut into it. The grate must be fixed by welding in the inner part of the pipe at a height of 12-15 cm from the bottom.

Making a grate
- Above the grate there will be a firebox. We cut out the door for it with a size of 25x30 cm, departing from the level of the grate by about 20 cm. We install the door in the same way as a blower.
Firebox door for stove
- We will build a heater from reinforcement. Bending it in different directions, we give the reinforcement bars the shape of a basket, fasten them together with plastic wire. Here we will lay stones for the furnace. We install the "basket" on the top of the pipe. Here we cut through the door of any shape and again equip it with hinges, a valve.
door for heater
- Next up is the water tank. The tank body is a pipe, 60 cm long. For this pipe, we cut out the bottom, in which, in turn, we cut a hole and pass the chimney pipe through this hole.We fix the parts by welding. Closer to the bottom of the tank we cut in the crane.
Water tank
- Now we assemble the two parts of the furnace together so that the tank is located strictly above the firebox. We produce a welded seam.
- It is convenient to make a double-leaf lid for the tank. We cut out a circle, divide it into two equal parts, one of which is tightly welded to the tank, the other is fastened with the first half with loops. To make it more convenient to open the tank, we equip the lid with a handle-bracket made of fittings.
tank cap


Thus, from the simplest materials, you can quickly and cheaply build a sauna stove with your own hands, while it will not functionally differ from the purchased counterpart! By doing the work efficiently and slowly, you will get a result that will delight you and your guests for many years!
Do-it-yourself ordinal masonry stove for a bath - photo report
Everything is very simple, just look at the photos and do the same, of course, you need to use the right materials and mixtures!

Brick oven for a bath is ready
Zero row of the furnace base: The second row of the furnace base:
 Second row and blower chamber
  Fourth row - block the blower
 We put the grate
 The second row of fireclay bricks
 We leave a gap between fireclay and facing bricks
 Third and fourth row of fireclay bricks
 We cover fireclay bricks with ordinary
 We put the fifth row of fireclay bricks
 We make a fireclay lattice
 Making a holiday channel
 We put the furnace door
 Display register
 Fasten the top of the door
 Finished furnace door
 The appearance of the furnace at this stage
 We make a lattice on which stones will have to lie
 Second row of stone pocket
 Output the upper level of the register
 What the oven should look like if you're doing everything right
 Necessary places for laying fireclay bricks
 Extreme row of fireclay bricks
 Making holes in fireclay bricks
 Preparing the valve for installation (fitting)
 Gate valve installation
 Gate valve lining
 Closing the opening above the core
 We narrow the chimney
 Chimney masonry
 Installation of the second valve
 Fitting the top of the chimney to the ceiling
 If you did everything right, your sauna stove should look something like this
Congratulations, it turns out that you have completely coped with the task on your own!