If the task arose to quickly and inexpensively build a small metal furnace for heating a room, then the best option is a furnace potbelly stove. Even the most inexperienced welder who has crooked seams and constantly sticks the electrode to the metal can build it with his own hands.

Do-it-yourself potbelly stove
The cross section of the furnace is made round, square or otherwise, depending on the source materials and the needs for which the installation is carried out.
Content
Potbelly advantages:
- low cost of construction;
- compactness;
- the ability to work on any solid fuel;
- ease of installation and maintenance;
- the possibility of using the furnace in rooms where it is impractical to install a foundation and install a capital chimney;
- the possibility of cooking on a stove.
Potbelly stove disadvantages
- metal sheets have good thermal conductivity, as a result of which the furnace cools down quickly after the fuel burns out;
- if the thickness of the metal used for mounting the furnace is insufficient, it may quickly burn out and the structure may fail;
- not all modifications of the potbelly stove have adjustable draft and burning intensity;
- the need for constant monitoring of the fuel combustion process;
- the use of raw or tarry fuels will lead to the formation of scale (soot) on the discharge pipe.
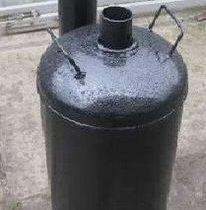
Do-it-yourself potbelly stove from an old can
This version of the stove consists of the firebox itself, a grate where firewood is laid, a chimney, a blower, legs that replace the foundation. The fuel tank is located horizontally. The chimney can be brought out through the window or made long enough if it is intended to heat a greenhouse, garage or other similar room.

Potbelly stove from a can
The advantage of using a can is that there is no need to weld the steel structure, cut out the firebox door and fix it. Of all major works remain: installation of the outlet pipeline and legs replacing the foundation of the furnace, installation of a grate, cutting through the blower, if necessary, supplying the furnace with a reflective screen.
For work it is necessary to prepare:
- chisel and hammer;
- can - base for the fuel tank;
- smoke exhaust pipe;
- welding machine and electrodes;
- metal corners for oven legs;
- hacksaw for metal;
- file;
- wire for grate.

Scheme of a potbelly stove from a can
The procedure for assembling a potbelly stove from an old can
- We set the can horizontally and mark the place of the future blower. It will have the shape of a sickle or a rectangle, and be located under the lid of the can. By hitting the center of the chisel handle with a hammer, we cut a hole. We process the edges of the hole with a file, achieving smoothness and regularity of shape.
- We cut a hole in the bottom of the can or in its wall, the diameter of which is equal to the diameter of the outlet pipeline.
- To make a grate, we bend the steel wire in a zigzag shape and insert it into the fuel tank. There we straighten the wire, adjusting it to the size of the walls of the can so that it is convenient to lay firewood and chips.
- For the stability of the structure, we mount the legs. We cut them out with a hacksaw for metal from a metal corner and weld them to the bottom of the structure.
- We weld a metal pipe designed to remove combustion products.
If desired, this design can be coated with heat-resistant paint. They are purchased at stores selling automotive parts. Paints are packaged in spray cans.
If there is a need to install a reflector, it is cut out from a piece of solid metal and welded to the outside of the fuel tank, secured by welding to short pieces of metal corners.
So that the stove can be moved from place to place, we weld metal handles on the sides of the can.
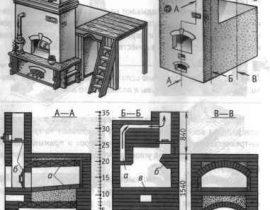
Potbelly stove with smoke
This is a rectangular furnace with minimal fuel consumption and the ability to control the intensity of combustion. The structure (furnace body) is assembled from metal sheets by welding.
Required materials and tools:
- welding machine complete with electrodes;
- grinder and circles for cutting metal;
- roulette;
- metal corners;
- metal bars for the grate;
- pipeline;
- sheet metal.
The furnace consists of the following departments: furnace, smoke circulation, ashpit, outlet pipeline. Additional elements: doors with canopies and hecks, grate, metal legs, valve on the pipeline to reduce heat loss.
Assembling a potbelly stove with chimneys
- We make a drawing of the future furnace.
- According to the dimensions indicated on the drawing, we make markings on sheet metal and cut out blanks for the future firebox with a grinder.
- We join sheets of metal, forming a rectangle. Inside (on the side walls of the furnace) we weld metal corners on which the grate will be laid.

We join sheets of metal forming a rectangle
- The grate is made from a set of longitudinal and transverse metal bars of the same length, connected by welding. The cells must be of sufficient size to hold fuel on them and free passage of combustion products through the grate. The grate itself does not need to be welded to the body of the firebox, then it can be pulled out while the furnace is being cleaned from ash and ash.
Grate
- At the next stage of work, it is necessary to weld a sheet of metal inside the furnace, which forms a smoke circuit. The size of this sheet of metal should correspond in width to the bottom of the furnace, and be slightly smaller in length.
The device of the furnace potbelly stove from the inside
- After the inside of the furnace is ready, it is necessary to make a blower door and a door for putting fuel into the furnace. We make the doors in such a way that it is convenient to clean the oven and remove the grate. To make canopies, we use a metal bar and a tube of a suitable size. We cut them with a grinder and weld them to the walls of the furnace and to the doors, respectively, then insert the free section of the rod into the tube. For the convenience of using the doors, we make handles from thin strips of metal and attach them by welding. We make the valves in the form of a long curved strip of metal and, accordingly, a hook for which it will cling.
oven door
- The legs of the furnace can be made all-welded from metal corners or adjustable. To be able to adjust the length of the legs, you will need nuts and metal threaded rods of appropriate thickness. Due to this technique, the potbelly stove will stand steadily even on uneven surfaces. And also, with the help of such legs, it is convenient to disconnect the oven from the pipe and carry out maintenance or replacement of any parts.
- Outlet pipeline with damper. For the damper itself, you will need a metal bar of small diameter and a sheet of metal of circular cross section, with a diameter slightly smaller than the diameter of the pipe. We drill two holes in the pipe, insert a rod into them, bend its outer part for convenience, and install and weld a metal circle inside the pipe. Thus, when the bar is rotated, the circle will also rotate accordingly, changing the gap and reducing heat loss from the furnace to the atmosphere.
Discharge pipeline with damper
- In the upper part of the furnace, we cut a hole corresponding to the diameter of the outlet pipe and weld it hermetically.


There can be two or three smoke turns in a potbelly stove. And in order to reduce heat loss from metal walls to the atmosphere, the furnace is lined with refractory bricks from the outside or a reflective metal screen is installed with a layer of heat-insulating material, for example, asbestos sheet.
To kindle a fire in the oven, newspapers, sawdust, small dry logs are placed on the grate and the newspapers are set on fire with matches. When the logs flare up, larger firewood is added to the stove. Do not open the firebox and blower doors at the same time.The regulation of draft and intensity of combustion occurs by changing the gap in the pipe (valve) and through the blower.
Potbelly stove from an old gas cylinder: video instruction
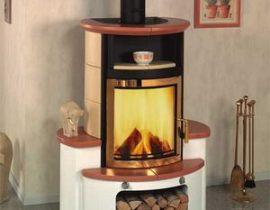
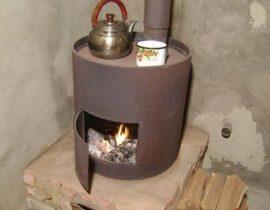
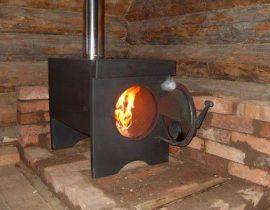
Photos of finished homemade bourgeoisie
If you still don’t know how your potbelly stove will look like in the final form - look at the already created models, maybe you will take a piece from each and create something of your own, unique!

Potbelly stove photo

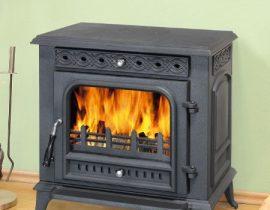
Stove potbelly stove photo 2

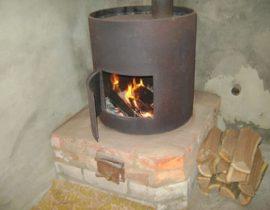
Potbelly stove photo 3

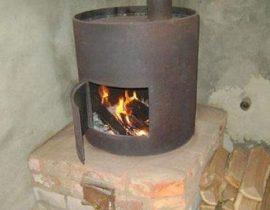
potbelly stove 3