Do-it-yourself potbelly stove is quite simple. The main thing — be able to use some tools and have the right material. Although such a stove was invented many years ago, and even now it has not lost its relevance.
How to make a potbelly stove
So, it has become an indispensable heating device in many life situations:
- it helps out motorists, as her easy to install indoors garage;
- for summer residents, she has long become a true friend, since not always outside the city, where many people like to spend the summer, you can use alternative types of heating, and not everyone can afford to lay down a brick oven;
- Residents of the private sector often install a potbelly stove as an additional heating device.
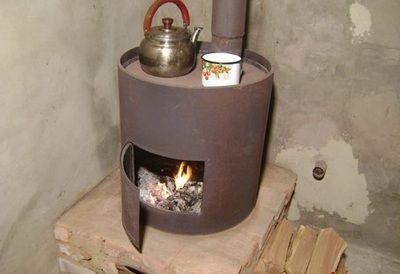
What Russian craftsmen do not make potbelly stoves from! Entrance goes everything that is made of thick metal — this is gas cylinders and disks wheels large cars or agricultural machinery, barrels and metal sheets, pipes of various diameters and even flasks.
In some embodiments, tanks for heating water and cooking stoves are provided.
To to begin work, it is necessary to stock up on materials, auxiliary parts and tools.
Content
- Preparing the tools
- Models of the most common bourgeois
- Potbelly stove from a flask
- Furnace for working out - analogue of a potbelly stove
- Potbelly stove from car rims
- Potbelly stove from a gas cylinder
- Potbelly stove made of metal sheets
- Video - the master shares his personal experience in making a potbelly stove with his own hands
- Place of installation of the stove-potbelly stove
Preparing the tools
Of the tools you will need:
- grinder and different disks hercorresponding to the materials;
- welding machine, about at 200BUT, as well as electrodes to it;
- brush with metal bristles;
- slag hammer;
- chisel, construction hammer, pliers;
- drill and perforator;
- measuring tools.
Models of the most common bourgeois
Depending on which room the stove is intended for, it is selected her model. It must satisfy the owner not only in appearance, but also in terms of technical characteristics.
If a potbelly stove is made for a dwelling, it must have an appropriate design. Let it not be the same as factory manufacturers offer, but still bake should look neat. In addition to the external design, additional functions for heating will be useful for the house. For example, a hob will never be superfluous for a summer resident's house.
for garage not necessary to make the oven elegant, but multifunctionality also does not hurt her. When working in the garage in cold weather, it will be good to warm tea or hot water to wash your hands of various lubricants.
No matter how the potbelly stove looks, it always has the same design and consists of the following nodes:
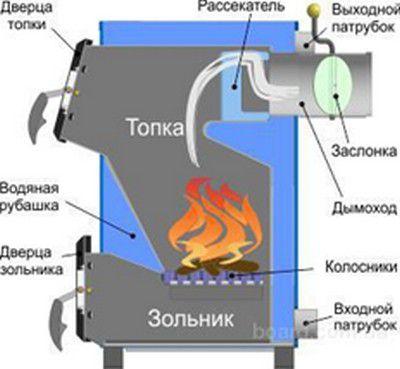
Schematic diagram of a potbelly stove - nothing complicated
- The combustion chamber in which fuel is laid. She must have reliably closing door;
- Grid-iron lattice, which is laid on the bottom of the furnace. And it is better if it is made of cast iron;
- Blower chamber or ash pan — this is a chamber where ash from burnt firewood is collected and through which air is supplied for better combustion;
- Smoke exhaust pipe.
- In addition to these main departments, the master can arrange a hob or supplement the oven with a tank for heating water.
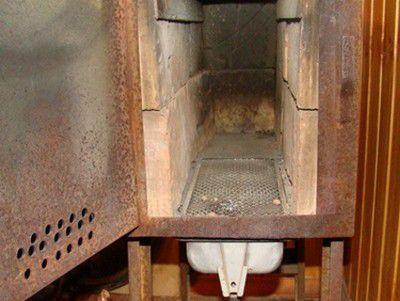
The firebox can be additionally laid out with bricks
Also, you can overlay the firebox with heat-resistant bricks, then bake will last longer and heat will remain in it much longer.
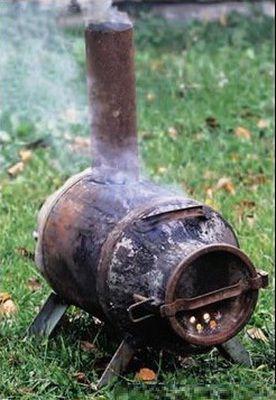
More one useful addition to a potbelly stove can be two metal plates welded inside, which will create obstacles for the direct exit of hot gases into the pipe. This is a simple device will do an ordinary potbelly stove with a long-burning stove.
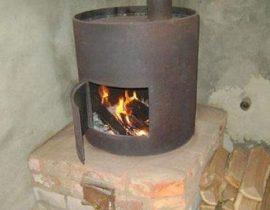
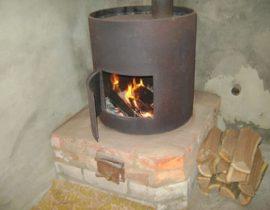
Potbelly stove from a flask
This capacity familiar everyone people of the older generation — Once upon a time, milk, ice cream and vegetable oil sold on tap were brought to stores in such containers. If someone has such capacity in a pantry or shed, her it is quite possible to use for the manufacture of a potbelly stove.
This is what a potbelly stove from an old flask looks like
It must be said that this bake Good fit for garage, but is unlikely to be appropriate at home if her do not upgrade. But if you apply force and attach an ash pan, a blower to the bottom of the flask, and attach a thick wire on top in the form of a hob outline, then the stove fit and for a country house.
Step by step work is carried out as follows:
- This capacity convenient in that her is already ready reliable door;
- The flask is laid on its side so with such calculationfor easy opening of the door. On the side wall containers, which becomes the bottom, holes are drilled — it will be grate lattice;
- Further under lattice the metal chamber of the ash pan is welded or screwed, and for her a separate door is made that will help regulate the intensity of the flame burning;
- Then, near the ash pan, legs are screwed on both sides;
- A hole is made in the rear upper part of the furnace, and a chimney pipe;
- In front of the pipe, if desired, you can make a hob by welding or screwing brackets from thick metal wire.
- Before installing the oven permanently, you need to carry out her street test. If it works well, you can put her to the her place and output chimney outside.
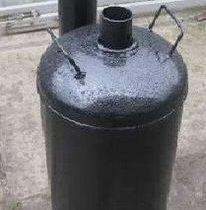
Furnace for working out - analogue of a potbelly stove
A stove-stove that works at working out is more suitable for a garage, because it will inevitably emit an unpleasant odor when heated.

A good solution for a garage - a potbelly stove at work
This design consists of two tanks of round or square shape, connected between themselves a pipe with numerous round holes having a diameter of one centimeter.
Make enough oven simply, and will be required for her small amount of material
- metal sheets;
- corner for the legs of the structure;
- pipe of the required diameter — it will depend on the size of the intended furnace;
- thick wire.
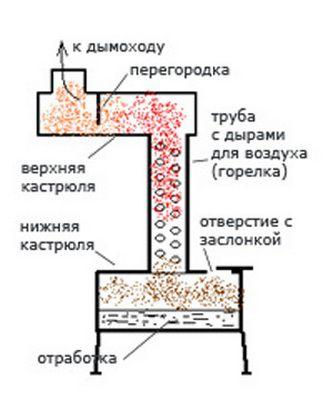
Schematic diagram of the stove at work
- Manufacturing work starts with what is being done drawing and on German all dimensions of the future product are affixed.
- Further all parts are prepared according to the indicated dimensions:
- in given case square panel for tanks and their side walls, in the upper and one lower panels of the tanks, round holes are cut for the chimney and the connecting pipe;
- a pipe in which holes are drilled;
- four identical pieces from the corner for the device legs;
- a small piece of pipe for the chimney;
- a small piece of metal for the damper.
- Further goes oven assembly work
- by welding, the parts of the tanks are interconnected;
- legs are welded to the bottom tank, and a damper is fixed to the hole in the top panel. It must be mobile, therefore it is attached only in one place;
- Further connecting and chimney pipe;
- then, the upper part is connected to the lower part by welding;
- at the last stage, the fixing wire or metal strip is fixed by welding;
- welding seams are cleaned and heat-resistant paint is applied to the furnace.
Potbelly stove from car rims
In this case, for the manufacture of the furnace were used discs from big wheels combine, but for this it may well be suitable and discs from wheels car "KAMAZ".
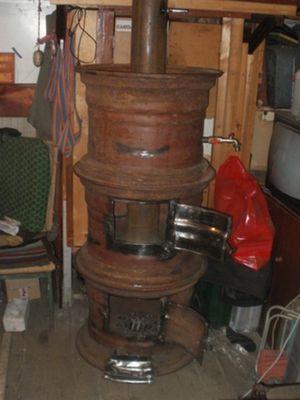
Do not rush to throw away old rims - they can come in handy
Such a potbelly stove can be built from two disks, but the presented version is built from three, since the upper one is a hot water chamber. Thus, the heater received an additional useful function.
Making such an oven also first, preparatory work is carried out before connecting all the disks together.
- First, they work on the lower part of the furnace, which will become a blower;
- in the disk, the bottom is welded with a pre-prepared round plug cut from a metal sheet;
- Further a square hole is cut out, and a door is made from the cut piece of metal, attaching a shutter (latch) to it;
- a firebox is being made — it will be located in the middle of the structure;
- a square part is also cut out of the disk and a door is arranged;
- a grate is laid on the bottom of the furnace;
- in the upper part, a solid panel is welded with a round hole in the middle, into which the chimney is welded;
- the upper water tank must be absolutely tight, for this, the lower and upper parts are first completely cut out of it;
- a round panel is welded on top with a hole for passing the pipe and for filling it with water;
- on the side wall of the disc, as close as possible to the bottom, install the faucet;
- Further goes assembly of all parts together by welding — it should make the whole structure hermetic;
The chimney, leaving the combustion chamber, must pass through the hot water tank.
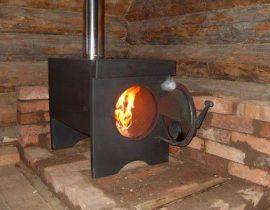
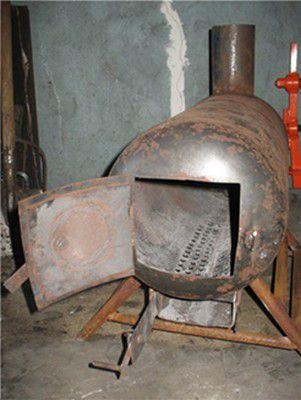
Potbelly stove from a gas cylinder
It is enough to simply turn a gas cylinder into a potbelly stove, as it is almost ready. Remains add some elements and cut some holes. But you need to know which of these containers two types of oven available — with or without hob her.
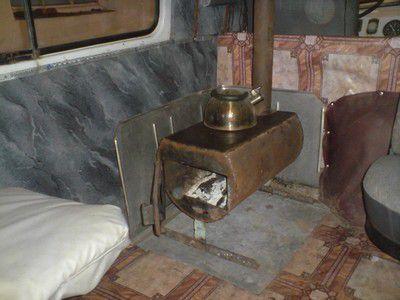
A popular model is a potbelly stove from a gas cylinder
All work to be done by byrow:
- First of all, a window is cut out from the top of the cylinder, which will be an opening for the firebox. The door itself is made from a sheet of metal or they work on a cut out part.
- The balloon is turned on the side, and many holes are drilled in its lower part. They will play the role of a grate.
- A metal box is welded under these holes. — ash pan, you also need to weld a door on it.
- Further legs are welded to the balloon.
- If it is decided to make a stove with a hob, the upper semicircular part is cut off from the cylinder, and instead her a metal sheet cut to size is welded. Metall dli plates must have a thickness of at least three millimeters.
A slightly different solution
You can do it differently — a thick metal wire is welded on top of the cylinder, bent into a rectangle in the form of a plate. But the first option will be much more convenient, since the cooking area will be much larger.
At the very end of the cylinder body, a round hole is cut out, to which the chimney is welded.
Such a variant of the potbelly stove fit for any room.
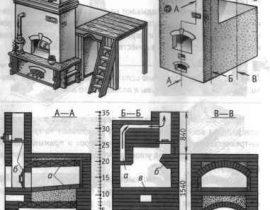
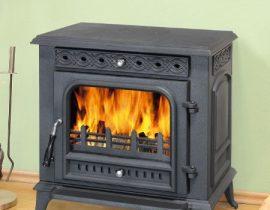
Potbelly stove made of metal sheets
The most successful and applicable option in any room can be considered a potbelly stove of a classic rectangular shape. It is compact and neat, does not take up a large area, so fit even for a small country room.
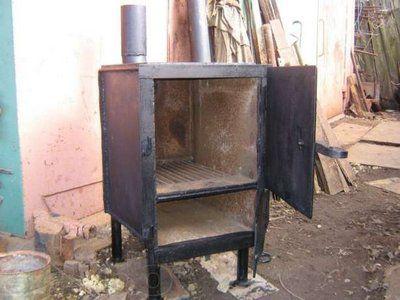
Potbelly stove of classical rectangular shape
The drawing clearly shows the entire structure of the furnace. This is exactly the option when the design is improved with metal plates that do not allow hot air to immediately go directly into the pipe. Therefore, the oven retains heat longer, and means, the room is heated for a long time.
- Of the materials needed metal sheets, thick two three millimeter metal corner, chimney pipe and for burner — one cover.
- From metal sheets, after marking them, separate parts are cut out, which will later be fastened together by welding — these are the bottom, walls, hob, inner plates and grate.
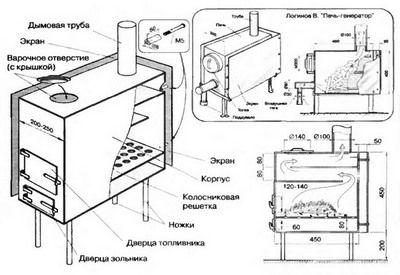
You can rely on something like this drawing
- Holes for the ash pan and firebox are cut out on the front panel. On them doors are fixed with the help of hinges and locks on them.
- From the inside, a metal plate is welded onto the front panel of the furnace at a distance of 15 centimeters from the top, which should be 10 centimeters less than the length of the side wall of the potbelly stove.
- On the back wall also a second plate is welded from the inside, at a distance of 7 centimeters from the top. These two plates will create labirint dli'm smoke and means — and hot air.
- Cut a hole in the top hob to fit the prepared lid and more one — for chimney pipes.
- Legs are welded to the bottom.
- On the side walls, a place is marked for the grate, and brackets are welded from the corner, on which the grate will be placed. lattice.
- To make a grate, strips one centimeter wide are cut in a metal sheet (or many round holes can be drilled).
- To the corners prepared in advance in size, they assemble and weld all the details of the structure.
- Further install a chimney.
- "Aesthetics" issues are dealt with last. — this is the cleaning of welding seams and painting with heat-resistant paint.
Video - the master shares his personal experience in making a potbelly stove with his own hands
Place of installation of the stove-potbelly stove
So that the potbelly stove brings for hosts only benefit, you need to do it right her install following the safety instructions.
- The place where the stove will be installed must be finished with fire-resistant materials. — this applies both to the floor and to the walls around the heater. Such material can be heat-resistant drywall, metal, or stone or brick lining.
- It is forbidden to install a potbelly stove next to flammable materials.
- Good ventilation system — this is also one of the main conditions for the room where the stove will stand.
- In order for the stove to cool longer, it will be good if the section of the pipe that is located in the attic and above the roof is insulated incombustible material.
If the master has the skills to work with a welding machine and all the necessary material for the manufacture of this heater, you can safely get to work. Having such reliable assistant, don't worry — the house will always be heated, and there will be a hot dinner on the stove.