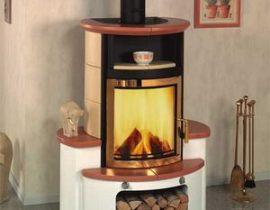
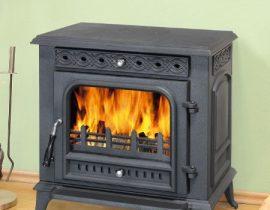
Furnaces, called potbelly stoves, are now as popular as they were many years ago. They are used in houses, dachas, garages, saunas, potbelly stoves also heat greenhouses, and even the Ministry of Emergency Situations uses this type of stove in emergency situations. Potbelly stove can be made by hand or buy a ready-made factory model. We advise you to read our articles on self-production potbelly stoves in the garage, as well as about the manufacture potbelly stoves for baths.
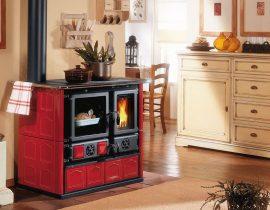
There are a lot of modifications of the furnace: they are supplemented with water tanks, connected to heating systems (both air and water), adapted to work on waste oil or sawdust.
Content
Video: stove with water circuit boiler
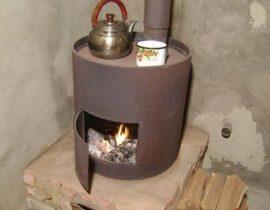
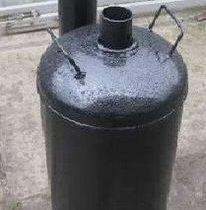
Potbelly stoves are made from everything that is lying idle on the farm:
- from used fire extinguishers;
- gas cylinders;
- metal barrels;
- cans;
- just weld the steel structure;
- make brickwork.
The shape (cylindrical, rectangular, etc.) and the appearance of the furnace depend on the type of material used.
Despite this diversity, the general design of each furnace consists of:
- furnaces;
- grate;
- ash pan;
- chimney;
- chimney.
The size of the furnace feed opening depends on the fuel used.If firewood is used, then the hole, respectively, should be larger than in a similar stove, which is heated with coal or fuel briquettes. To protect the heated room from fire, the potbelly stove is installed on a foundation or a sheet of metal, insulated with brickwork, a reflector or sheets of heat-insulating material (mineral wool, asbestos), and the chimney is supplemented with a spark catcher. If it is necessary to install a stove in the house and connect it to the water circuit, then the design is supplemented with pipes and a water tank (another name is a heat exchanger or boiler). This form of heating becomes especially relevant with the autumn drop in temperature and the desire of the owners to save on heating their own residential and non-residential premises.
Requirements for a system with water heating: good circulation of water in the system and sufficient heating.
The water circuit is installed either to an already finished furnace, or erected during the construction process along with the furnace. The circulation in the system can be natural and forced (using a pump).
We make a water circuit for a potbelly stove with our own hands: step by step instructions
A potbelly stove that will heat several rooms must certainly be assembled from durable materials with a significant service life. For example, it can be sheet steel with a thickness of three millimeters or brickwork.
The first stage of construction is the preparation of a sketch or drawing. To do this, we select the place where the furnace will be placed, take the necessary measurements with a tape measure. After that, we calculate the dimensions of the structure and transfer them to the drawing.
When the drawing is ready, they start marking the foundation and laying it.
- We dismantle the floor slabs and dig a rectangular pit to a depth of 40-50 cm.
- We fill the bottom of the pit with a but (fine brick chips, sand, gravel).
- We fill the buta layer with cement, checking the horizontality of the filling with a building level. We are waiting for the cement to dry.
- On the dried layer of cement, several layers of roofing material are laid, which acts as a waterproofing agent and prevents the influence of moisture from the soil on the design of the furnace.
Create a water circuit coil
The most practical, durable and safe potbelly stove made of bricks. And the main element of a potbelly stove with a water circuit is a coolant (other names: coil, register or heat exchanger). This coolant is installed directly in the furnace furnace and connected to the water heating system. The design of the coil can be different, made either from sheet steel with a thickness of three to five millimeters, or from hollow steel pipes. However, steel structures are less popular due to the small heating surface.

Water heating coil for potbelly stove
The design of the water circuit itself consists of the following elements:
- coil;
- pipes (cast iron, steel, copper, bimetallic, etc.);
- expansion tank;
- radiators.
The following tools and additional materials will come in handy: a welding machine, a drill and a grinder, a hammer, a trowel and a cement mortar, a dowel-nails.
Water, heated in the coil, flows through pipes to the radiators installed in the rooms, the field of which, cooling down, returns to the coil.
A brick potbelly stove should provide compartments for igniting fuel, for collecting ash and ashes, and a compartment for placing a coolant.In masonry, as construction progresses, conclusions are drawn for the chimney and pipes through which the coolant moves.

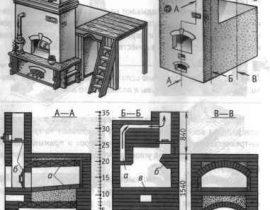
Installation of a water circuit during the construction of a brick potbelly stove

The process of laying a furnace with a water circuit
The stove is made of refractory bricks, fastening the masonry with oven clay or a special heat-resistant mixture. The first two rows are made solid, then they lay out a niche for the ash pan (a box into which the ash will fall), the next row is laying the floor under the grate and installing it. At the same time, on the front of the potbelly stove, they always leave a place under the stove door - a blower. After the ash pan is ready, lay the grate and proceed to the laying of the firebox, similarly leaving space for installing the door. They are fixed between bricks on special metal frames and on metal wire.
When the firebox is almost ready, the serpentine and pipes are sewn into the masonry - smoke and under the water circuit. The top floor is made either of bricks or of a thick cast-iron (steel) slab, which acts as a slab. The chimney is taken out through the roof, observing fire prevention measures (isolation of the metal pipe from all flammable ceilings).

Installation of a water heating system
If necessary, we install a circulation pump, measuring instruments near the boiler.
We connect the main pipelines leading from the furnace to the radiators. If the pipes pass through the walls, the floors are broken at the place where the pipe passes, and subsequently sealed with cement. The connection of pipes is carried out depending on the material from which they are made.
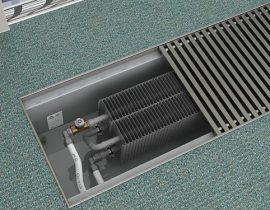
Radiators in the room are hung on brackets under the window and pipes are brought to them.The size of the radiator is calculated based on the window sill space:
- distance from the floor 10-15 cm;
- from the wall 2-5 cm;
- from the window sill 10 cm.
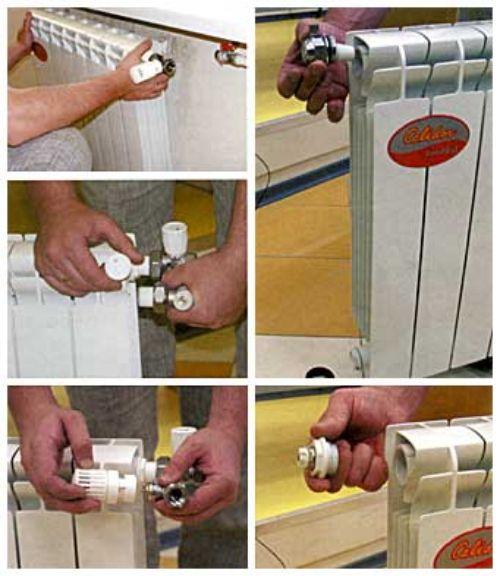
Installation sequence:
- mark the location of the brackets on the wall;
- drill holes for them;
- we fix the brackets on the wall, strictly observing the verticality;
- we collect all the radiator taps according to the scheme and hang it on the wall;
- we install the outlet and inlet pipes.
Installation of radiators to the furnace
At the inlet and outlet, it is necessary to install temperature sensors, as well as shut-off (to block the movement of water) and control fittings.
Be sure to mount an expansion tank, in case of sudden boiling of water in the system.
When you turn on the system for the first time, you should carefully monitor all possible leaks and the temperature regime in the potbelly stove.