A fireplace is not only a source of heat, but also an interior element that largely determines the style of the room, so much attention is paid to its decoration. There are several ways to give the fireplace an attractive appearance, from the budget plasters and painting before tiling. Each finishing method hides its secrets, and we will try to reveal them in this article.

Fireplace finish
Finishing a fireplace with your own hands requires not only knowledge of technology, but also accuracy, patience and the use of recommended materials, because the fireplace gets very hot during the firebox. Facing not intended for fireplaces and stoves from constant temperature changes can fall off or even collapse, so carefully study our recommendations before getting down to business.
Content
Finishing the fireplace with natural brick is beautiful
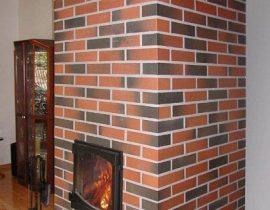
If your fireplace is built by a professional stove-maker, has no distortions and blemishes, chips and cracks, you can not resort to expensive finishing, but simply cover the brick with a heat-resistant stone varnish. The lacquered surface perfectly repels dirt and soot, water and dust, resulting in a beautiful old English style fireplace at no extra cost.

Finishing the fireplace with natural bricks
Is it possible to make beautiful from simple plaster?
If the masonry is not even enough, or you do not like the look of natural brick, you can resort to an inexpensive finishing method, very popular in the old days - to plaster the fireplace and cover it with a layer of heat-resistant paint. Advantages of this method:
- Low price of materials;
- The method is easy to perform and does not require special skills and the use of a tool;
- It is easy to refresh or repaint the fireplace, giving it a new look;
- Facing does not make the fireplace heavier, there is no need to strengthen the foundation.

plastered fireplace
Finishing the fireplace with plastering and painting includes several stages:
- Prepare the surface of the fireplace - remove dirt, dust from the surface, as well as old plaster, if any. Do this with a spatula or grinder. After cleaning, the surface is treated with a primer.
- After cleaning, the surface of the fireplace is moistened to reduce dusting and the masonry seams are embroidered by 0.5-1 cm - this is necessary for better adhesion of the plaster mortar to the brick.
- The fireplace is pre-heated and dried. When plastering, its surface must be warm, otherwise cracks will appear on the plaster at the first heating.
- On the surface of the masonry, the reinforcing mesh is fixed with the help of small nails. It will serve to strengthen the layer of plaster.
- For plastering and finishing, special heat-resistant mixtures are used - you can buy them in hardware stores. The mixture is poured into water in the recommended proportion and thoroughly kneaded with a construction mixer until smooth.

Heat-resistant mixtures for plastering a fireplace
- The plaster is applied using two spatulas: narrow and wide.With a narrow spatula scoop up the solution and evenly distribute it across the width of the large spatula, and then apply the distributed mixture to the surface of the fireplace. With a narrow spatula, internal corners and embossed protrusions are trimmed.
Applying plaster to mesh
- As a solution, you can also use the old-fashioned method - a mixture of clay and sand. Oily clay is mixed with sand approximately in a ratio of 1: 1, diluted with water so that the mixture does not blur, but does not form cracks when leveled with a spatula. The solution is applied in the same way, rubbing it with a wooden float and finally leveling it with a piece of burlap or other coarse-weave fabric.
- Drying of the solution is carried out for several days. For clay plaster, it is quite possible that it will take about a week, during which the fireplace needs to be slightly heated, especially in the cold season.
Drying a plastered fireplace
- A layer of paint or a special decorative putty for stoves is applied over the plaster. Fireplaces require heat-resistant silicone paint, and you can give it the right shade with a water-soluble color.
- The coloring of the fireplace can be done without plaster, right on the brick - in some cases, such fireplaces fit perfectly into the design of the house.


We paint the fireplace with heat-resistant paint
This method has a drawback - the finish is not durable, and in case of accidental impacts it is prone to shedding, especially at the corners. You can fix this drawback by lining the corners with stone or tile, and how to do this - read below.
Video - finishing the fireplace with decorative plaster
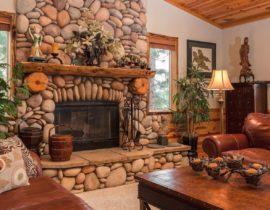
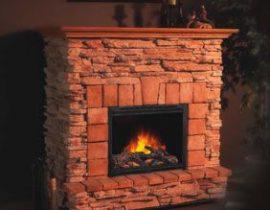
Finishing the fireplace with stone or tiles
One of the most popular ways to finish a fireplace with your own hands is to cover its surface with decorative materials: natural and artificial stone, heat-resistant terracotta tiles or porcelain stoneware. Tiles cannot be used for this purpose - the coefficient of its thermal expansion is very different from brick. After several cycles of heating and cooling, its adhesion to the substrate will deteriorate and the tile may fall off.

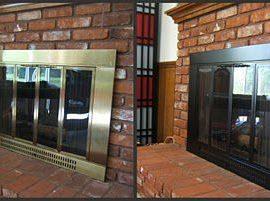
Fireplace before finishing and fireplace after finishing
Step by step cladding process
- Prepare the surface of the fireplace: embroider the seams, clean from dust, dirt, traces of plaster. Treat the surface of the masonry with a primer that improves the adhesion of the adhesive. If the surface of the brick crumbles, a reinforcing mesh with a mesh size of 1.5 cm is fixed with nails or screws.

We fix the reinforcing mesh
- Terracotta tiles or stone are selected according to the size of the surface to be finished and laid out on the floor in the order in which they will be laid. If adjustment of the tile is necessary, it is carried out before laying begins.
- Mix heat-resistant glue for stone or porcelain stoneware with water according to the instructions on the package, using a construction mixer. Laying starts from the bottom row, from the first whole tile. To apply glue, two spatulas are used: with a smooth and jagged edge. With an even spatula, they collect and apply the solution on a surface sufficient for laying several tiles, pass over it with the serrated edge of a figured spatula, after which they apply a terracotta tile or a finishing stone, press it and gently tap it with a rubber mallet. Check the evenness of the row and tiles by level. For facing corners and ledges, special elements are used - they are sold together with finishing material.
Start laying tiles
- When laying the next row, cuts of any building material are placed between the tiles so that even seams are formed. They cover the entire desired surface with tiles or stone, dry the solution, and then cover the finishing material with heat-resistant varnish - it is necessary to protect the stone from moisture, soot, and dirt.
Photo - fireplace before finishing and fireplace after finishing


Finishing the stove with terracotta tiles and stone is very durable, but it will be quite difficult to fix the flaws, so you should be careful when working, do not rush and do not save on materials. To make the installation process more understandable, you can watch the video.
Terracotta tiles for fireplaces - video
Finishing the fireplace with tiles
With the help of tiles, you can create a truly royal fireplace and turn the room into royal chambers. A fireplace with a tiled finish is not only beautiful, but also has excellent thermal conductivity and retains heat for a long time. The glazed surface of the tiles is very resistant to dirt, durable, indescribably beautiful and durable. But all these advantages are overshadowed by two factors: the tiles are quite expensive, and it is better to finish the fireplace during the laying of the fireplace. If you are ready for the costs and initially planned to finish fireplace tilesthen this technology is for you.

Finishing the fireplace with tiles with your own hands
- The tiles are three-dimensional tiles with a smooth, glazed outer side and a hollow rump on the inside. The ceramic inner surface of the tiles perfectly conducts heat, while the outer surface protects your fireplace from moisture, damage and dirt.
tile sample
- Tiles before laying must be laid out on the floor and checked for matching shades. Due to the complex technological process, even in one batch there may be fragments that differ greatly in color. They are sorted, and the darker ones are placed in the bottom row. Tiles are soaked in water before laying.
- The foundation for the fireplace must be designed for the thickness of the cladding: due to the large weight of the tiles, they need a solid support.
- Finishing with tiles begins simultaneously with the laying of the walls of the fireplace. Inside the rump there are opposite holes through which the so-called crutch is threaded - a piece of thick strong wire, diameter - 4-5 mm. A piece of soft annealed wire, usually used for knitting reinforcement, is attached to this crutch. The length of the wire should be such that it can be led over the edge of the first row of brickwork and fixed there.
The scheme of fastening tiles to the fireplace
- Rumpa is filled with a solution of clay, sand and brick rubble - small fragments of red brick. The solution should be fairly thick. A row of tiles is installed, pressing them tightly against the first rows of the fireplace masonry, the rumps are pulled together in a row with a wire and the space between them is filled with coarse sand or clay mortar. The wire, fixed on a crutch, is laid in the seams of the brickwork under the next row of bricks.
- So they lay the whole fireplace: lay out several rows of bricks - tile the masonry with tiles. Rows of tiles are also tied with soft knitting wire through the holes in the tiller. All cavities between the masonry and the finish are covered with sand or sealed with mortar. Such facing will give the fireplace not only an exclusive look, but also make it durable.


Not everyone has access to such a type of finish as tiles, but it can be replaced with colored majolica or tiled flat tiles by laying them using the technology described above. The appearance of such a fireplace will not differ from the tiles, but laying it is much easier and cheaper.

Fireplace decoration photo
Thus, finishing a fireplace is not a complicated procedure, which, as we have seen, you can do it yourself. Read our site and you will learn everything how to make a good fireplace in your house/apartment.