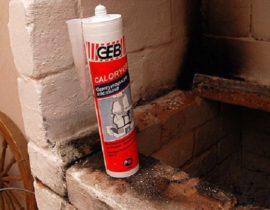
If a decision is made to cover a folded stove or fireplace with a conventional or decorative coating, then different materials are used for this: traditional mortars consisting of clay and sand or ready-made plaster mixtures, which today can be purchased at any specialized or hardware store. Stucco for stoves and fireplaces must have heat-resistant properties and have high adhesion, as well as adequately respond to expansion when heated.
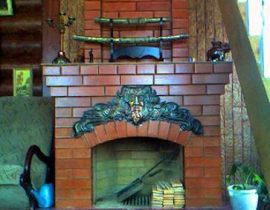
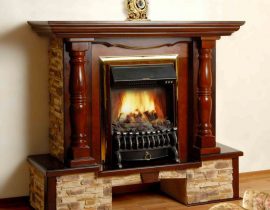
Plastered fireplace - photo
Content
Why is it necessary plaster bake
Why is it necessary to plaster heating brick structures? Fireplaces, and especially stoves, are trimmed for several reasons:
- Plaster creates an airtight layer that, in the event of cracking of the masonry mortar in the joints between the bricks, will not allow carbon monoxide to enter the room.
- Plaster attaches neatness and improves the appearance of the structure as a whole.
- The plaster mixture also performs a hygienic role.So, over time, in the seams, especially if a masonry mortar made from natural materials was used, colonies of insects or microorganisms harmful to humans may appear, which will be quite difficult to remove.
What tool is needed for the job
During plastering work, you can not do without special tools. For such a process you will need:

Oven Plastering Tool Set
- Plaster hammer. It is used for hammering special plaster nails.
- Cam hammer. It is necessary for hitting a Trojan, a chisel or a gear.
- Scissors cutting metal — they are used to cut the reinforcing mesh. Such scissors have a special shape that allows you to save your hands from injury.
- Trowel (trowel). This tool applies and distributes the solution by bytop of the oven walls.
- Spatulas are used in different sizes — they apply and smooth the solution in difficult places.
- Grater. This tool smoothes surfaces, removing serious defects. It is used for rough grouting.
- Poluterok used for better leveling of plaster for painting.
- Ironing board. This tool is similar to trowel and is used for the same, but has a soft rubber working surface.
- Brushes of various sizes are designed for cleaning tools, applying plaster and giving decorative texture.
- Notches are made with a chisel when preparing walls for plastering, if a reinforcing mesh is not used.
- metal brushes, which are designed for cleaning surfaces when removing old coatings.
- plumb line — it is necessary to check the evenness of the vertical overlay of the plaster.
- The building level is used to verify the verticality and horizontal planes.
- rule — This tool aligns large surface areas with beacons.
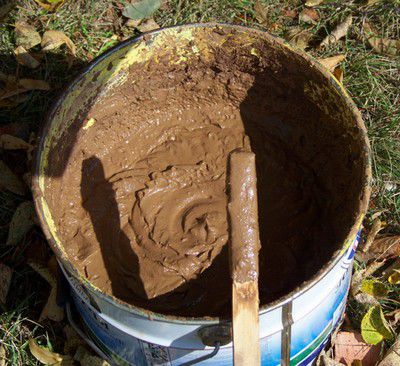
How to prepare a heat-resistant mixture
A very important property of the plaster layer is its resistance to temperature extremes, to which the structure will be constantly exposed. Therefore, such a solution is subject to special requirements for the quality and proportions of its components.
Self-prepared plaster mixtures can be prepared from several ingredients taken in different proportions. They are simple and complex.
- Simple compositions include a solution consisting of sand and clay.
- Complex solutions include those that consist of more than two ingredients (for example, special fireclay clay).
Each of the components of the mixtures must be cleaned of impurities by sifting through a fine sieve, and then they are combined in a dry form. Further the mixture is diluted to the consistency of thick sour cream.
Sand-clay mortar
An important point is the choice of clay for the solution, since her quality and fat content affect the overall adhesion of the plaster layer. If the clay is oily, then the amount of sand in the composition can be increased.
More one important component of the solution is the reinforcing component — it can be asbestos, finely chopped straw, crushed fiberglass or hemp. It is better, of course, to choose natural environmentally friendly elements instead of asbestos, as it is unsafe for human health. Some stove-makers add a little salt to the composition. It is unlikely to negatively affect the quality of the solution, but it will play certain hygienic function — in such a frozen solution, insects do not start.
Proportions
As mentioned above, complex solutions include several ingredients, and they must be used in appropriate proportions. Here are a few recipes used by stove-makers (compound):
- Asbestos, clay, sand - 0.2 : 1 : 2.
- Asbestos, clay, lime, sand - 0.1 : 1 : 1 : 2.
- Portland cement, sand, asbestos, clay - 1 : 2 : 0,1 : 1.
- Guyps stswarming, slaked lime, fiberglass, sand - 1: 2 : 0,2 :1.
When preparing such a solution, it must be remembered that gypsum hardens faster than the other components. process it monolithization starts in five - seven minutes after kneading. Gypsum goes well with lime, as attaches her strength. But, given its ability to quickly set, it is necessary to knead a small amount of the solution with water, and only after working it out, proceed to the preparation of the next portion.
- Asbestos, slaked lime, sand - 0.1 : 1: 2.
Preparatory work
Before proceeding directly to the application of plaster on the folded structure, it is necessary to carry out some preparatory measures. Without them, conditions for a better quality of adhesion will not be created, and the plaster will not adhere well to the surface.
- If there is old plaster on the stove or fireplace, her must be removed and thoroughly cleaned of remaining dust.
- If the oven is new her also need to be cleaned, as the surface of the new structure may contain particles of dust or dirt, which will interfere with the good adhesion of the plaster mixture.
- Further, how in the first and in the second case, it is necessary to slightly deepen the seams between the bricks, about by 0.7—1.0 centimeters. This will also help the plaster adhere better to the surface.
- After deepening the seams, the walls are again cleaned of dust.
- next step goes the process of coating surfaces with a special primer.
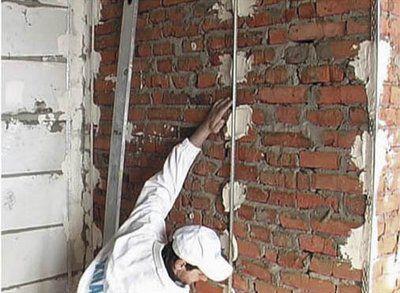
- If you plan to apply several layers plaster, sometimes it is necessary to cover the structure with a reinforcing metal mesh with medium-sized cells. It will better fix the layer of plaster on the brickwork and extend the life her operating under regular thermal shocks. The grid is fixed with nails with large heads are driven in into the seams.
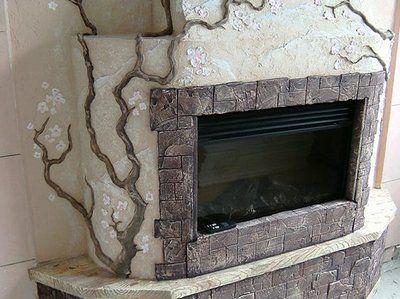
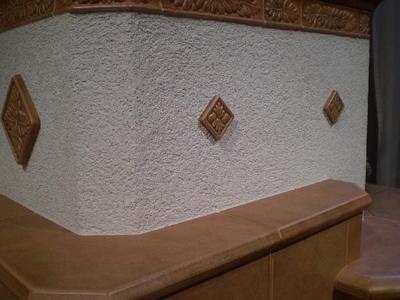
Plaster can be given the desired decorative effect ...
Bake using plaster, you can make it perfectly smooth, with roughness, or you can combine two techniques when relief patterns are placed on a smooth or rough surface.
Plastering the stove and laying ceramic or stone tiles — in this case, the plaster mortar is applied in a thin layer.
Processss prpreparation of the solution, immediately before application
Properly mixed solution — this is also one of the success factors. For its preparation, a drill is often used, in which a mixer nozzle is installed.
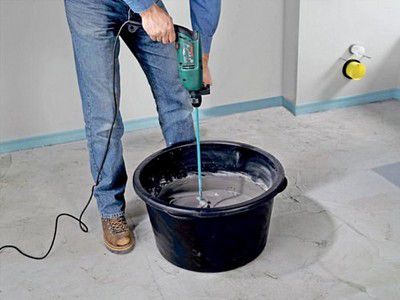
Mixing the solution
But before kneading, you need to carry out more and a number of preparatory activities:
- If clay is included in the solution, it requires soaking, about, at 24—36 hours. It is necessary that it is well saturated with moisture and swells. If the clay absorbs water, then liquids should be added from time to time. more.
- Sand must be sifted, otherwise large fractions will interfere with plastering work. More one point in the manufacture of a benign solution is the use in German only dry sand — this will help to correctly calculate the proportions.
- Lime can be called an excellent plasticizer for compounds. Her good viscosity promotes adhesion, and this is important for the plaster mixture used for fireplaces and stoves. Including lime in the solution, you must also remember that it tends to harden quite quickly.
- Mark cement usually chosen based on its strength index. Good fit M-400. Its hardening begins after 15—20 minutes after kneading it, but this processss dlit's about 3—4 hours. The final setting occurs after 10—12 hours. inflicted on the walls the solution reaches estimated high strength only after 25—30 days.
The process of plastering a stove or fireplace with your own hands
First way
The plaster layer on the walls of the furnace must be at least 8—10 millimeters.
- In order not to make a mistake and apply it evenly, special beacons are installed. They are fixed on a thin layer of gypsum freezes quickly and gives opportunity to continue working.
Installation of beacons
- next step goes wetting masonry with water — this is done for better adhesion of the solution.
- Further, the first layer of plaster is applied. She must have creamy consistency. This layer is smeared with intense movements so that the solution penetrates into all the cracks of the masonry. inflicted plaster must be allowed to dry.
- The next layer should be 8—10 millimeters. It is applied and leveled on the beacons. It is left to dry completely.
- Then there is a control alignment, this layer given drying time.
- Until the surface is completely dry, her sanded using matting soaked in water.For uniform drying of the plaster, the plastered oven is covered with a damp burlap. When she dries her carefully removed, and all cracks that appear must be immediately rubbed and smoothed.
- Separately, it must be said about the removal of the corners of the furnace. They are arranged by fixing the corner of the rail on one side, and it is displayed along it. uncovered part. After her drying, the rail is removed and fixed on the aligned side, now the second side is aligned.
The corners of the stove or fireplace are preferably somewhat "rounded"
- It is best to make several corners rounded, so they will be safer for small children and will not be prone to chipping, for example, when rearranging furniture.
Second way
The second method of plastering is applying the mortar to a metal mesh that reinforces the structure.
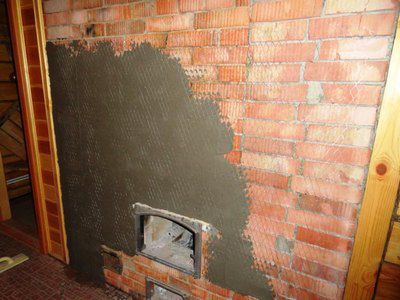
Plastering on a fine mesh netting
- The mesh is fixed in such a way that it moves away from the brickwork to two three centimeters. To do this, wire or slats of the required thickness are placed under the grid.
- The plaster is also applied in several layers up toachieving complete closure of the grid with a solution. This method has the advantage over the others in that the alignment to the grid is much easier and the finishing more durable, reliable and more durable. But it should also be noted that for the price it cost slightly more expensive than the first finishing method.
- Further the plaster is dried, cracks are smeared, then the surface is polished — and it is ready for further decoration.
decoration
If you have already decided to plaster the stove or fireplace, consider some important points of the process so that you do not have to redo all the work after the first firebox.
- Can't plaster right away erected construction. And even when it dries well, you need to give time to shrink the masonry. To do this, the oven must be operated two three months, and only after that you can do her transformation.
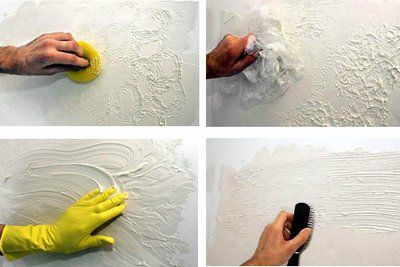
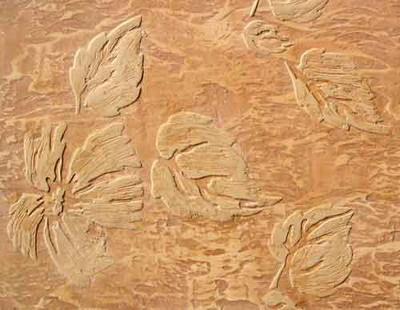
Several techniques for giving the plaster the desired surface texture
- Often, after the plaster has dried, they resort to her staining. This process must also be carried out correctly, choosing the paint. It must be necessarily water-based, since compositions containing chemical solvents or drying oil, when heated, will emit unpleasant odors into the room, which, in addition, more and harmful to health.
- Without waiting for the complete drying of the decorative design, it is covered with the chosen color or painted with several shades.
Video - finishing the fireplace with "Venetian" plaster
many home craftsmen and experienced professionals prefer not to prepare the mortar themselves, but to use special building mixes, dry or even ready-to-use, that can withstand the extreme temperature conditions of the stove or fireplace. With the help of such compositions, you can give the structure a special decorative effect.
When taking on plastering work, you need to remember that this is the most crucial moment in the final stage of the transformation of a fireplace or stove. Therefore, if there is no self-confidence, it is better to entrust this processss profficial.