Summer gazebo with barbecue oven will undoubtedly become a place of attraction for your entire suburban area. In the event that you protect the building from the wind, you will be able to receive guests in it from early spring until late autumn. In order not to run from the gazebo to the house, they build stoves for gazebos, on which you can not only cook delicious shish kebab or pilaf, or simply follow the fire dancing in the firebox.

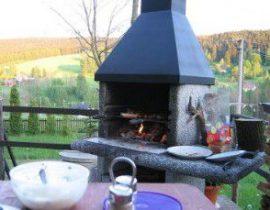
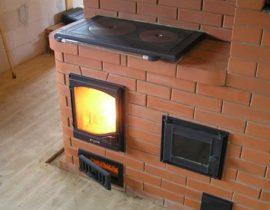
Furnace in the gazebo - photo
Content
Getting ready to build a gazebo and stove
The question of building a furnace in the gazebo must be considered at the construction stage. A solid brick oven with a barbecue area and a hob simply cannot be built in a light wooden gazebo - its base will not withstand the solid weight of the device.
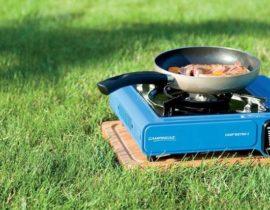
In a light gazebo, you can put down a simple portable barbecue grill or a portable stove, you can even equip portable grill, but the capital stone oven will become a reliable anchor for meetings of your friends.
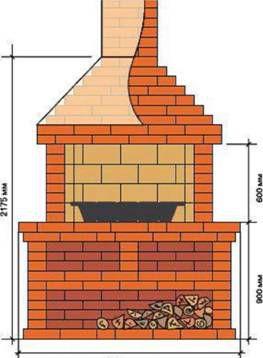
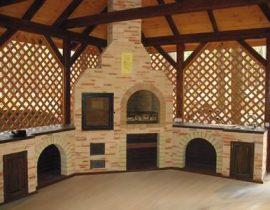
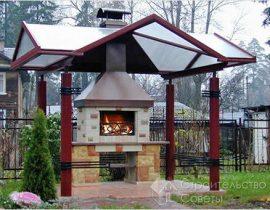
exemplary project
In the event that the gazebo has been built for a long time - and you have a desire to build a capital stone oven - you will have to dismantle part of the floor and make a concrete foundation.
In addition, it is necessary to prepare the following building materials:
- Refractory brick. It is usually red in color and has no voids.
- Clay or cement-sand mortar for laying brick rows.
- Cut sheets of metal for the device of the chimney and hood. You can also purchase a ready-made chimney with a cap that protects it from precipitation. Sheet metal can also be used to create a charcoal tray.
- It is necessary to create a heat-resistant coating around the furnace, so prepare porcelain stoneware or durable floor tiles.
- When arranging a cutting table, prepare the tabletop according to the design of the furnace.
- To connect the parts of the device together, you will also need two types of sealant. The connection between the hood and the pipe is sealed with a heat sealer, and the places where the countertop adjoins the brickwork are sealed with waterproof silicone.
Laying the foundation for the furnace
The geometric dimensions of the foundation base will depend on the size of the furnace base. The edges of the foundation should extend beyond the base of the stove by about 15 centimeters.
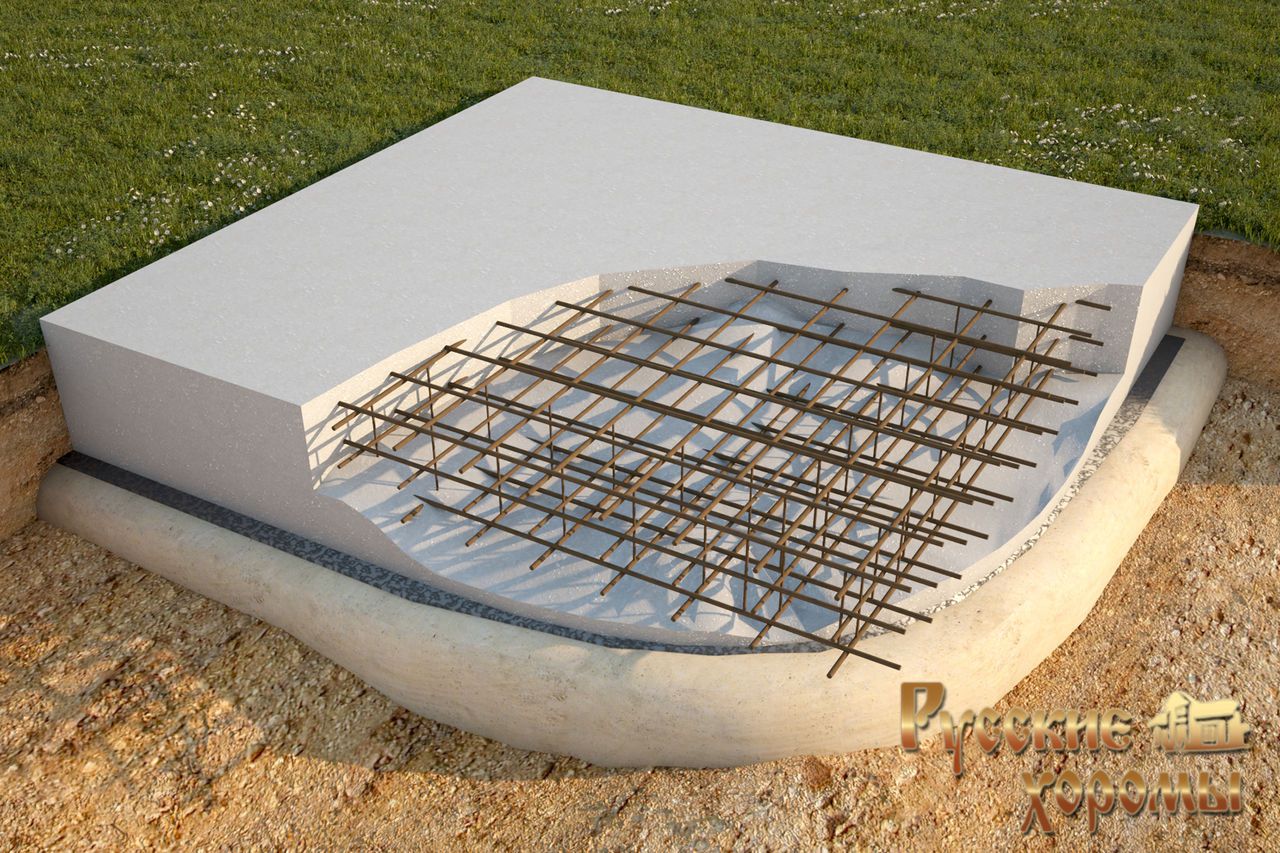
foundation-slab
For the furnace, we will pour the foundation in the form of a monolithic slab. To do this, we will carry out the following operations:
- Digging a foundation pit. Its depth should be 30 centimeters.
- At the bottom of the foundation we lay a pillow of sand and gravel, which should be carefully compacted.
- A thin layer of concrete mortar can be poured onto the pillow to fix it.
- We build a formwork for the foundation along the perimeter of the pit. We use durable boards or chipboard boards. We control the geometry of the formwork using the building level.
- Inside the formwork, a reinforcing frame is constructed from metal reinforcement, interconnected by wire.
- Pour the concrete solution into the prepared bed.Please note that the metal reinforcement should not protrude beyond the surface of the resulting concrete casting.
- Ready-made concrete mortar matures for about three weeks. In hot weather, during ripening, it is spilled with water.
Putting a brick oven
The wall thickness of the oven for the gazebo should be half a brick. The laying of the brick walls of the furnace is carried out in the following way:
Outside the foundation, we stick reinforcement into the ground and pull the cords around the perimeter of the future stove. In order to align right angles - we stretch the cords and diagonally - they must be equal. When marking the perimeter of the furnace, we shift it back a little, so that a space is formed in front of the front wall for the installation of a corner.

Foundation scheme
We begin to lay out the first row of bricks. We very carefully align the outer boundaries of the future furnace.
To connect the bricks, we use a solution that can be prepared in the following ways:
- We mix cement, sand and red clay in a ratio of 1 to 3 to 2, or,
- We mix porcelain stoneware glue, sand and cement in a ratio of 2 to 7 to 5.
In order for the clay to get wet enough to mix the solution, it must be soaked in water in advance and kept for about two days. The soaked clay is thoroughly mixed, foreign inclusions are removed from it. After that, the clay is mixed with sifted building sand, and after that - with Portland cement.
A solution based on glue for porcelain stoneware is prepared according to standard technology.
Masonry mortars of any type must have a consistency that excludes both sticking to trowels and spreading over the surface of the brickwork.Excess stickiness is eliminated by adding sand, and excessive fluidity - by adding building sand. The resulting mortar should slide off the trowel when it is tilted 45 degrees.
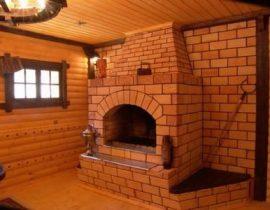
The first rows of brickwork for the furnace are led, forming a structure in the form of the letter "Sh". In our project, half of the masonry will be used for the construction of the oven itself, and the second part will have a cutting and serving table.

brick laying
When laying the second and subsequent rows of bricks, each of them is checked for horizontality using a building level. Bricks are tapped at the place of laying with a trowel handle. If necessary, the solution under them is removed or added. Do not forget to apply the fixing solution to the side ends of the bricks for vertical fastening.
Starting from a strictly row, half a brick is laid at its beginning. Thus, the vertical connecting seams will not be located above each other, but with a shift of half a brick, which will give additional strength to the structure. Cut the brick with an angle grinder. It gives a straight cut. Professional masons split the brick with a precise and sharp blow.

Installing the support under the countertop
As the rows rise, depending on the project, ledges are created for the installation of grates, a drip tray and a barbecue grate. In our project, these rows will be the sixth, tenth and fourteenth. However, in what place and what size to create ledges is up to you, according to your project. With a standard brick height, the fifteenth row will serve as the basis for the cutting table.
The barbecue half of the oven is continued further, but not too high, as in this case the draft in the kindling zone may decrease. The arch of the furnace is formed by laying bricks with a ledge, gradually shifting them to the center of the structure. Also, to form a vault, metal corners are embedded between rows of bricks. The rear wall of the furnace must be left vertical - it will go directly into the smoke oven.

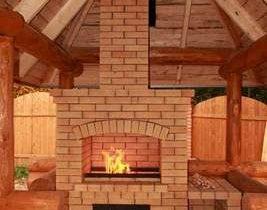
Barbecue area
The front of the stove can be designed in the form of an arch. To do this, a template is laid out from the tree, which is fixed between the walls. Bricks connected with mortar are laid on it. The upper central brick will serve as a kind of castle. After the mortar has set, the wooden template is removed.
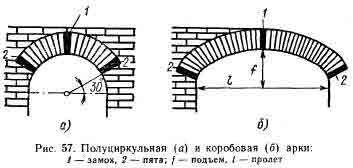
Scheme of building a brick arch
Making a cutting table
A wooden or stone countertop must be ordered according to the size of the formed brickwork. We left ledges of bricks under it - we lay a fitted countertop on them. A waterproof silicone sealant is placed between the brick walls and the edge of the countertop. If desired, a metal sink can be mounted inside the countertop and water can be supplied.
The tabletop can also be made independently from a sheet of durable plywood that is suitable in size. It can be fixed to the brickwork with a cement-sand mortar or special glue. On top of durable plywood, tiles or porcelain tiles can be laid, which will make it more resistant to water and the vagaries of the weather. In addition, you can safely put hot dishes on such a countertop.
We make a grate and a coal pan
Charcoal pallet can be welded or bent from sheet metal.We adjust it to the niche left in the brickwork. To ensure even and good heat, its height should be 10-15 centimeters. Holes can be made in the front of the tray for better air convection. Having made a removable pallet, you will greatly facilitate the process of cleaning the oven. It is inserted on the lowest ledge, on the bricks of the fourth row. A barbecue grill is installed on the following protruding bricks. The third brick ledge is reserved for a smokehouse.
We install the hood and chimney
These devices can be purchased ready-made, or you can make them yourself. They are mounted from sheet metal, the edges of which are fixed with riveting or a welding machine. In order to ennoble this part of the furnace, the metal parts can be coated with a paint that is resistant to high temperatures. To prevent smoke leakage, the joints of metal parts are coated with a heat-resistant sealant.
Please note that when the chimney passes through the roof, it must be isolated from combustible structures. To do this, the pipe in this place is wrapped with asbestos cardboard or non-combustible mineral wool. We mount a protective device on the upper end of the pipe - a sheet metal cone - it will protect the chimney from the effects of precipitation.
We carry out finishing work
The foundation section in front of the stove pediment is laid out with a material that is resistant to falling coals and rough. Porcelain stoneware tiles are ideal. It is fixed on the foundation surface with special glue.
The stove itself can be left unfinished, or it can be plastered or overlaid with decorative tiles on an adhesive that is resistant to high temperatures.Also, the oven can be overlaid with facing bricks or tiles.
In addition to the cutting table, the stove for the gazebo can be supplemented with other elements. It can be a cast iron hob or a nest for a cauldron. The tabletop can be made of natural stone, and the design itself can be supplemented with shelves and hooks.
The stone stove for the gazebo will become a favorite meeting place in your suburban area and will give you many pleasant experiences.
Furnace for gazebo, instructional video