Air conditioning is a necessary and irreplaceable thing, especially on hot summer days, when the air temperature in the living room becomes uncomfortable. The purchase of high-quality equipment is quite expensive and you do not want to spend extra money on installation. If the hands grow from the right place and there is even the slightest experience in working with a construction tool, you can install the air conditioner in the apartment yourself.
This will reduce costs, and the quality of the work performed will completely depend on the owner of the apartment. There are some nuances that should be considered before the wall is torn apart or the connecting structures of the air conditioner are damaged. It is better to sensibly evaluate your capabilities and not take risks than to spend money on repair not yet working equipment.
Content
- Advantages and disadvantages of self-installation
- Nuances, technical features and options for the location of the air conditioner
- Preparing Tools and Consumables
- Step-by-step instructions for assembling and installing the air conditioner
- Layout and installation of the indoor unit
- Outdoor unit installation
- Installation of communications
- Connecting blocks to each other
- FAQ
- Video instruction for installing an air conditioner
Advantages and disadvantages of self-installation
It is no secret that the installation of any equipment by specialists costs money, and a lot of it.In pursuit of savings, many buyers of air conditioners refuse to install in favor of self-assembly. In practice, there are a number of questions and problems that can affect the performance of the equipment.
This leads to the emergence of undesirable situations that, out of savings, turn into a real problem, which cannot be solved without the same specialists. Therefore, before you refuse the help of those who “ate the dog” during the installation, look at the advantages and disadvantages.
Advantages:
- Significant cash savings
- Independent choice of location and scheduling work throughout the day
- Quality is up to the individual
- You can choose the highest quality materials for installation
Flaws:
- High risk of equipment failure and malfunctions due to incorrect installation
- Formation of large amounts of condensate and risks of collapse if the air conditioner is not properly fixed to the facade of the building
In fact, the installation of the air conditioner and its connection will not take much time, but without the skill of working with the equipment, it will be extremely difficult to do this. If you want to test your strength and prove to yourself and others that there is a man in the house, be sure to study the detailed information about the process, the necessary tool and the sequence of actions before work. It is on this that the result will depend.
No need to spoil the nerves for yourself and your family, waste your energy and “maim” equipment in pursuit of savings.
A miser always pays twice, so self-installation of an air conditioner should not be performed if:
- No suitable equipment - a hammer drill or a screwdriver will definitely be needed, it is unprofitable to rent or buy them for the sake of one installation.
- No skill in working with the tool – incorrect movements can damage the exposed parts of the body, as well as the air conditioner itself or its parts.
- No free time - work at night or in a hurry is always accompanied by losses, whether it be material, moral or physical losses.
- The facade of the building is complex, requires special permission for installation - work requires not only skill and accuracy, but also accuracy.
Nuances, technical features and options for the location of the air conditioner
The first thing to do before starting installation is to read the instruction manual. This document sets out the standards recommended by the equipment manufacturer, which will ensure uninterrupted and correct operation of the air conditioner. Do not be too lazy to take 20-30 minutes to note some features that will further affect the operation of the air conditioner.
A few key settings:
- The height from the upper plane of the air conditioner to the ceiling is at least 15 cm, but for a specific model this value is determined by the manufacturer.
- At least 1.5 m to the object on which the flow of cold air will be directed. If the distance is deliberately reduced, then there is a risk of hypothermia and frequent illnesses.
- At least 30 cm to the wall from the end of the air conditioner.
Try to position the air conditioner so that the air flow does not directly hit the person, and the cooling is carried out in a diffuse manner. Avoid headboards, windows, and doorways.
- From the block to the floor - at least 2.8 m, and fragile objects, including aquariums, racks, curtains, should not be located under the air conditioner itself.
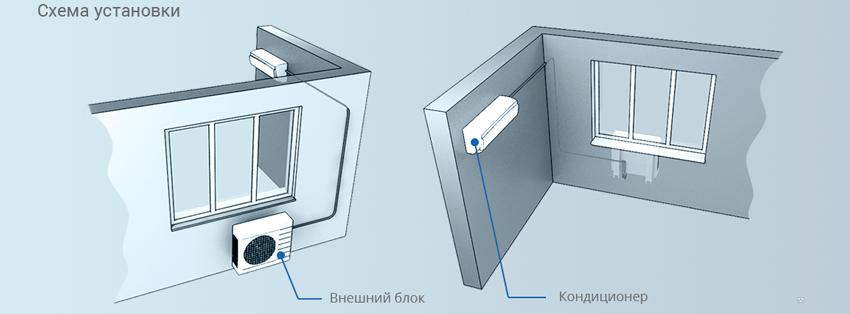
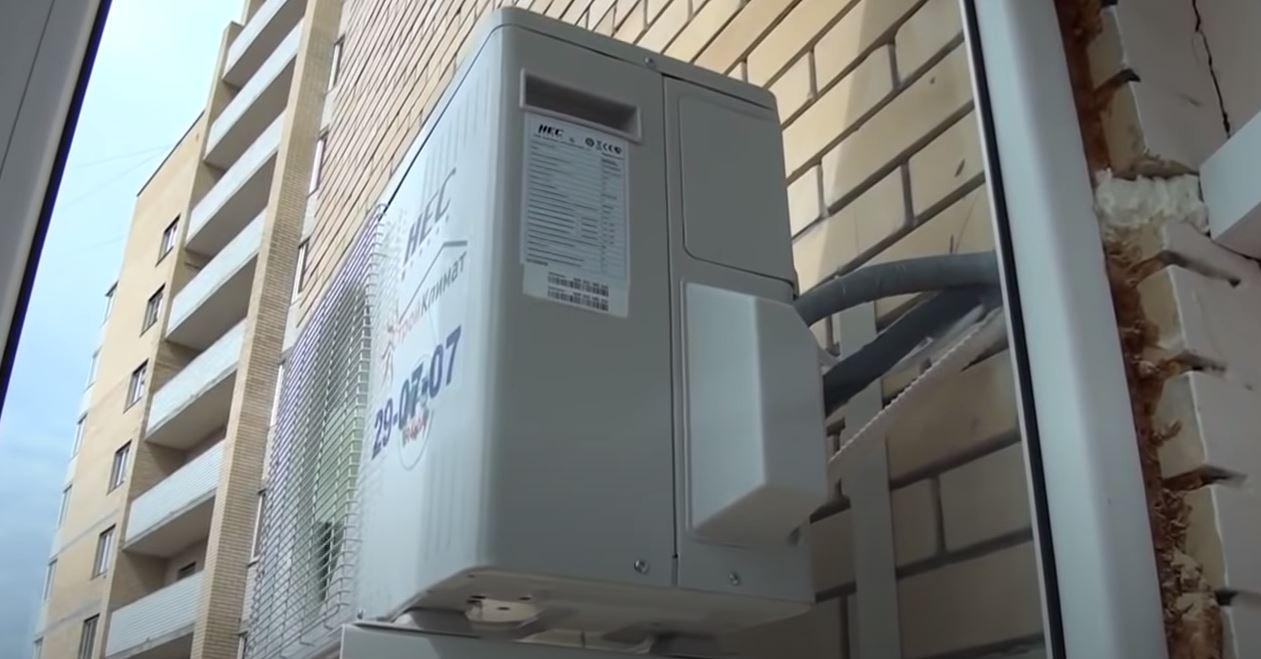
- The outdoor unit is located at the bottom of the window opening, on the side or in the middle so as not to interfere or block the window itself.
- The length of the inter-module route that connects the outdoor and indoor unit of the split system is 3-4 m, but for a particular model, these values vary. It is not recommended to exceed these figures and deliberately lengthen the inter-module route, as additional freon injection will be required. It is easier to remove the excess into the ring so that it does not interfere than to constantly add coolant to the extended inter-module route.
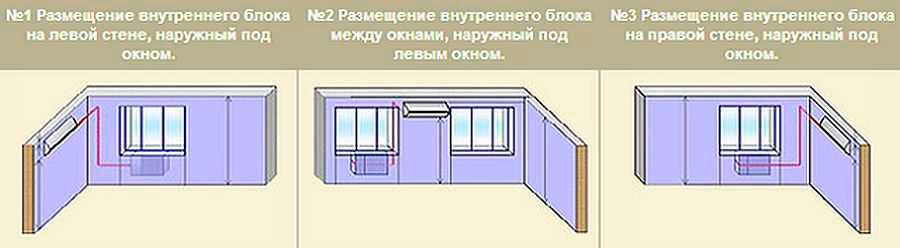
Experts identify several convenient forms of air conditioning arrangement, the installation of which will not cause a lot of inconvenience:
- To the left of the window, the indoor unit + under the window, the outdoor unit - the most convenient and practical scheme, which has many advantages.
- Between windows indoor unit + under left window outdoor unit - it is appropriate if the apartment has two adjacent windows.
- To the right of the window indoor unit + to the right of the window or under the window outdoor unit - a standard scheme suitable for any floor of an apartment building.
Preparing Tools and Consumables
The following tools will come in handy:
- perforator;
- pliers;
- drill;
- drill;
- building level;
- file;
- hacksaw for cutting pipes;
- sandpaper.
The standard list of materials is:
- dowel;
- anchor fasteners;
- pipe insulation;
- power cable;
- copper pipes for the cooling system;
- plastic protection for communications;
- drainage tube.
As for materials, their quantity and technical characteristics must correspond to those declared by the manufacturer.
Some air conditioner models In the configuration they have a complete set of all consumables used in the installation. Their presence should be clarified with a consultant before purchase, so that during the installation process you do not have to run around the shops in search of missing elements.
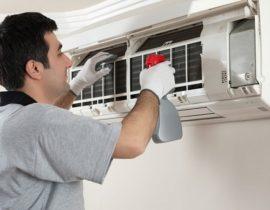
All tools must be in good working order, and the person performing the installation must be able to work with them and know all the subtleties. This is especially true of the perforator.
Step-by-step instructions for assembling and installing the air conditioner
After unpacking the purchase, the question arises, what to do with a bunch of parts and where to apply it all? In fact, everything is much simpler than it seems, but the instructions are still better to read.
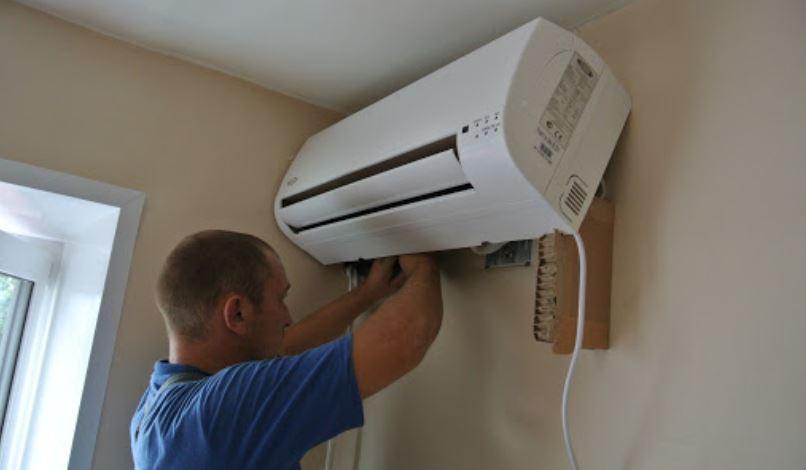
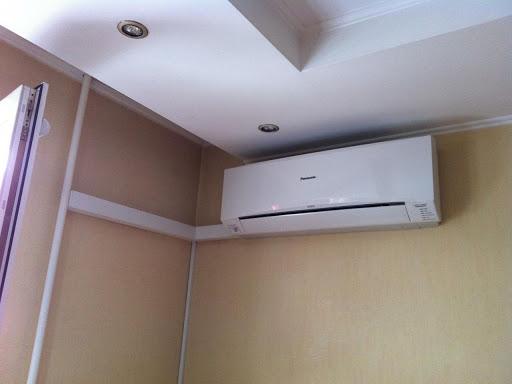
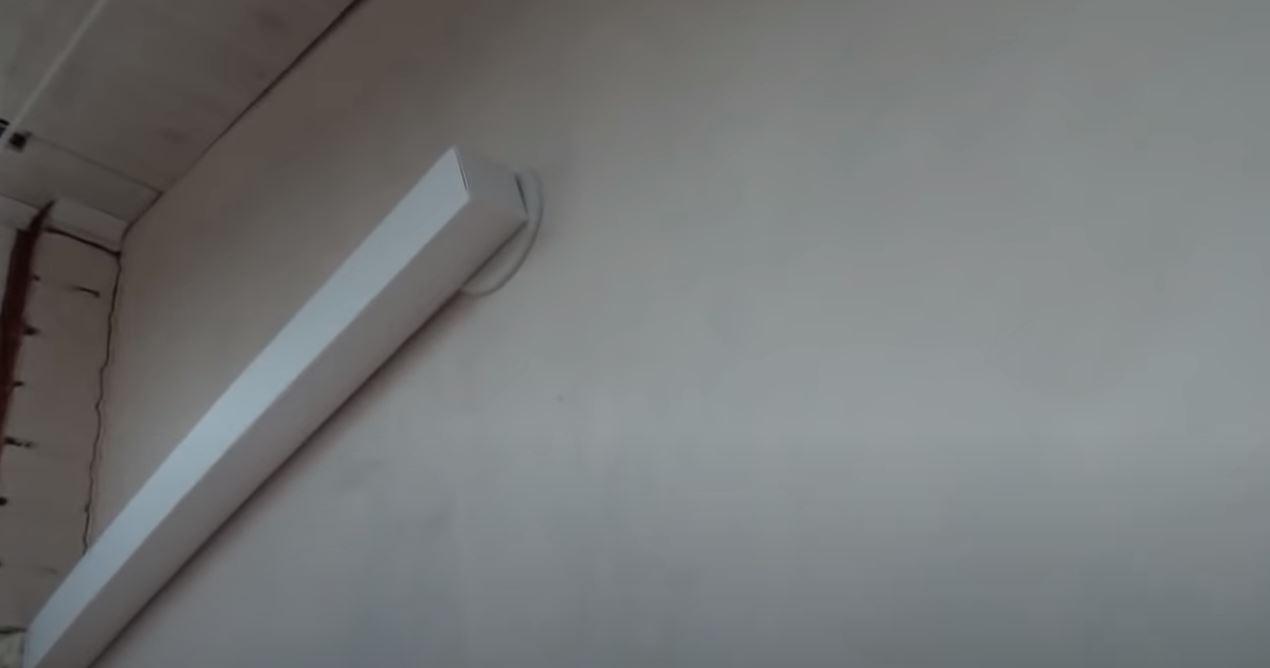
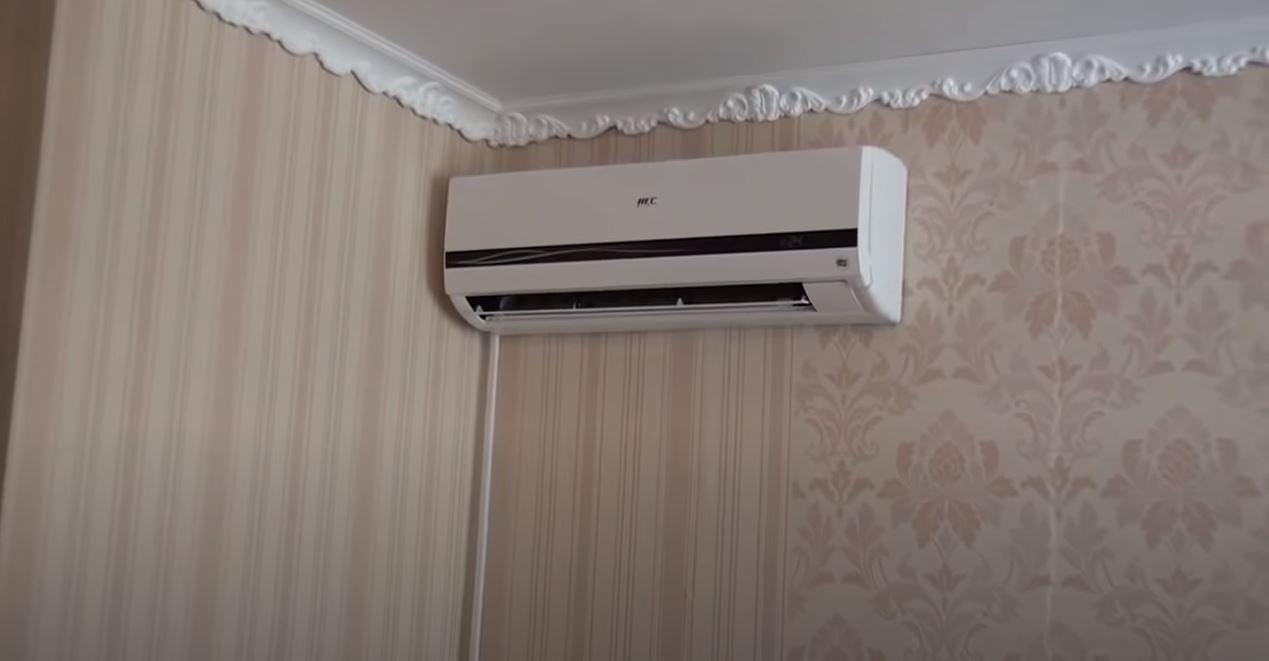
Layout and installation of the indoor unit
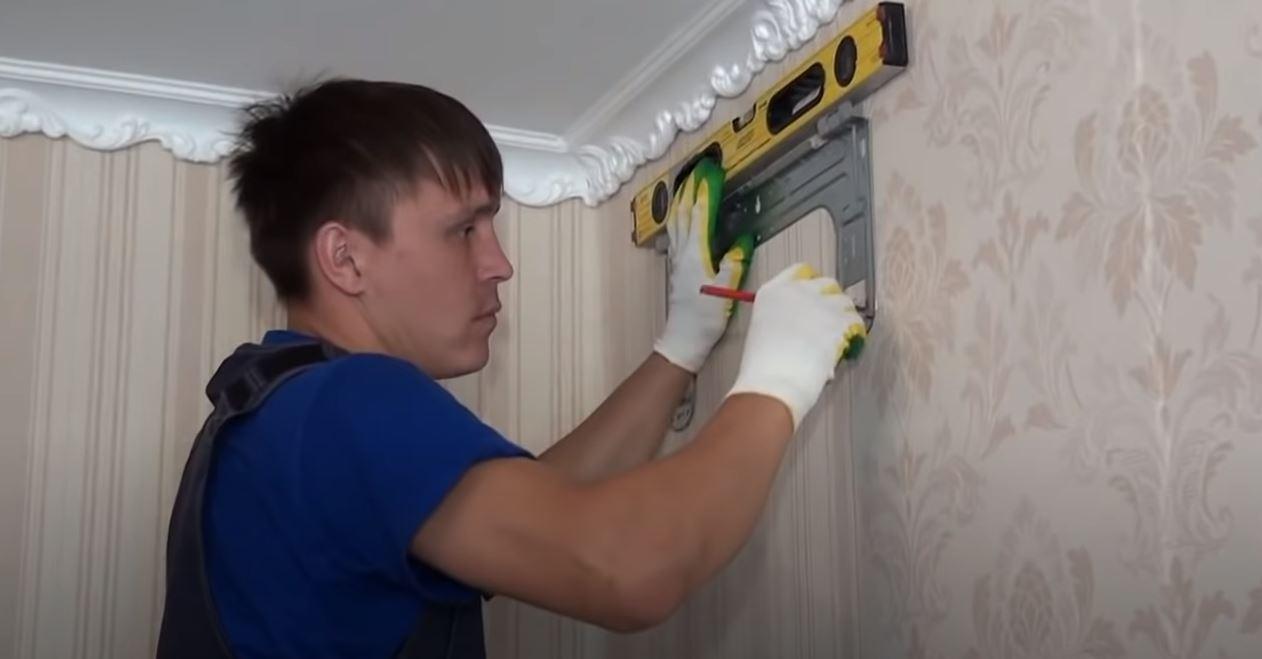
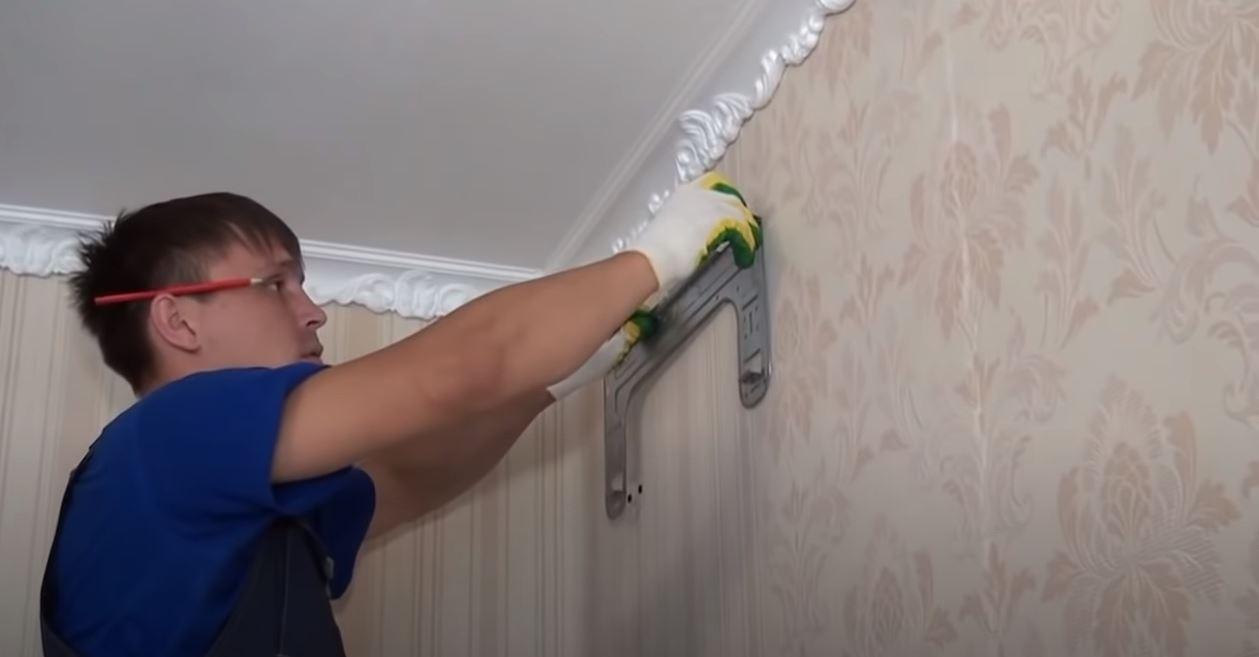
On a wall where there is no electricity wiring, use a level to measure the desired length from the walls and put dots. Dowels will be installed in them, which will become the support for the mounts of the air conditioner itself. It is important that the indoor unit is installed as horizontally as possible.
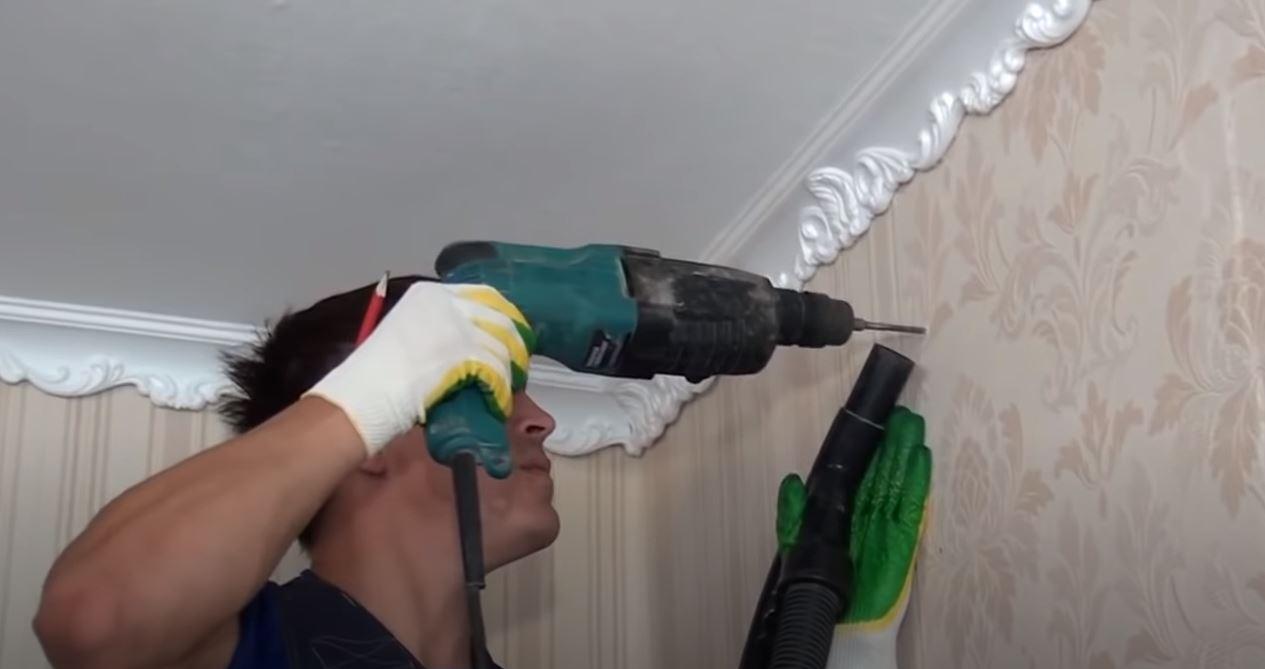
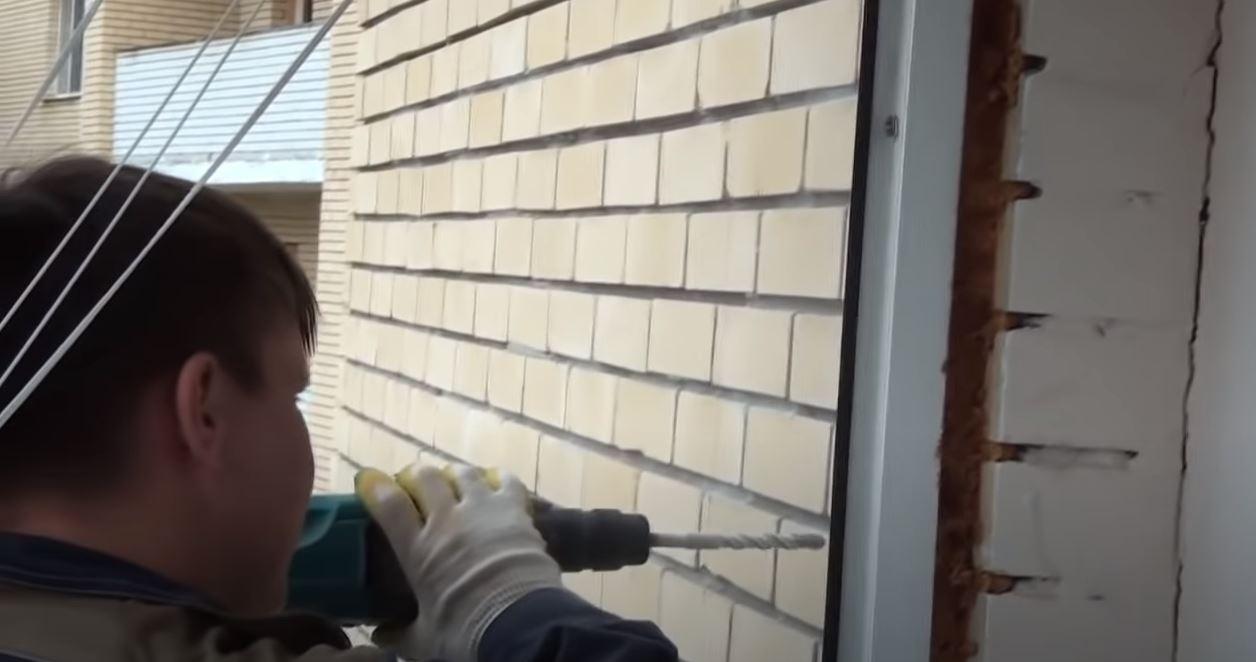
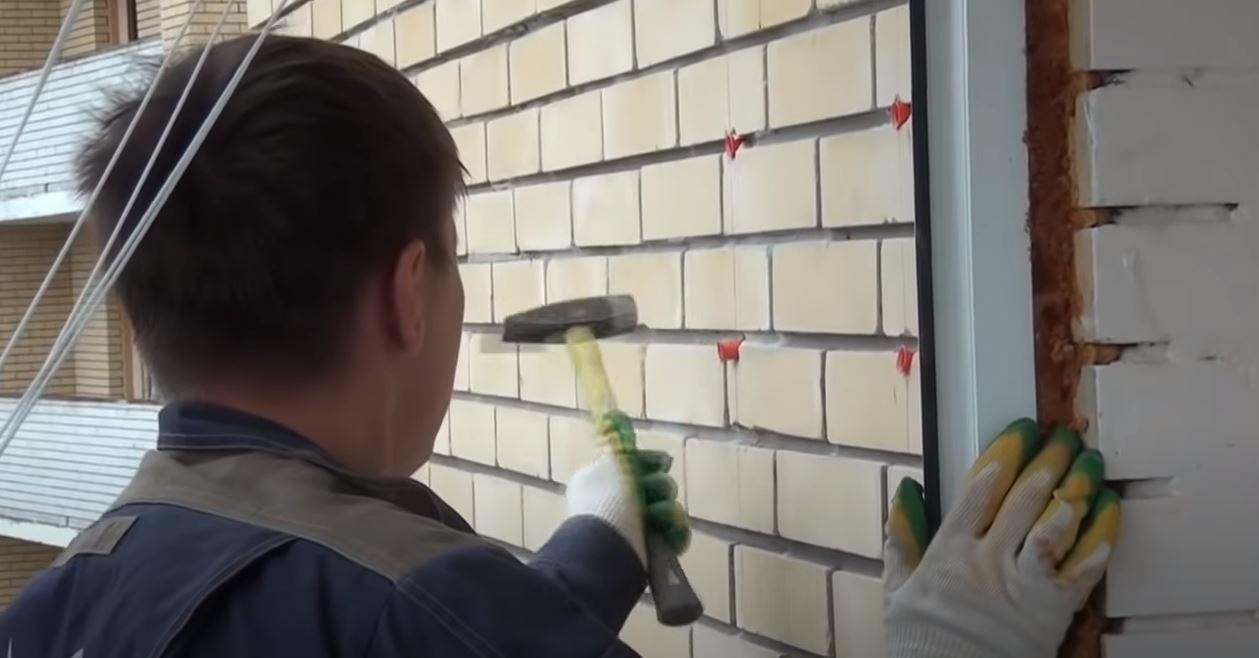
At the marked points, holes are made with a puncher, where plastic plugs for dowels are inserted. Next, the plate and the dowels themselves are installed. After the work is done, it is important to check the level. If there are significant errors, then the holes are drilled elsewhere.
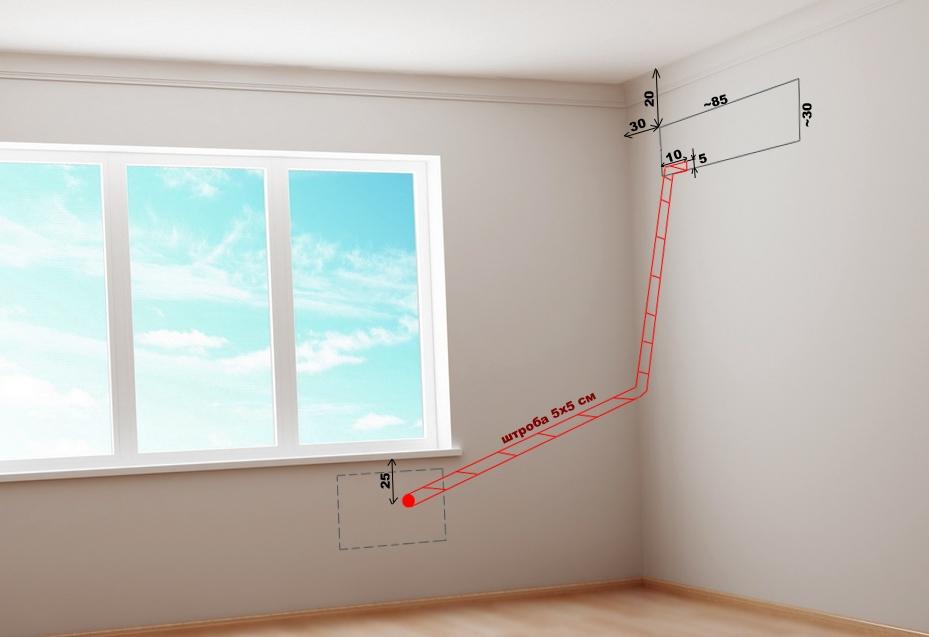
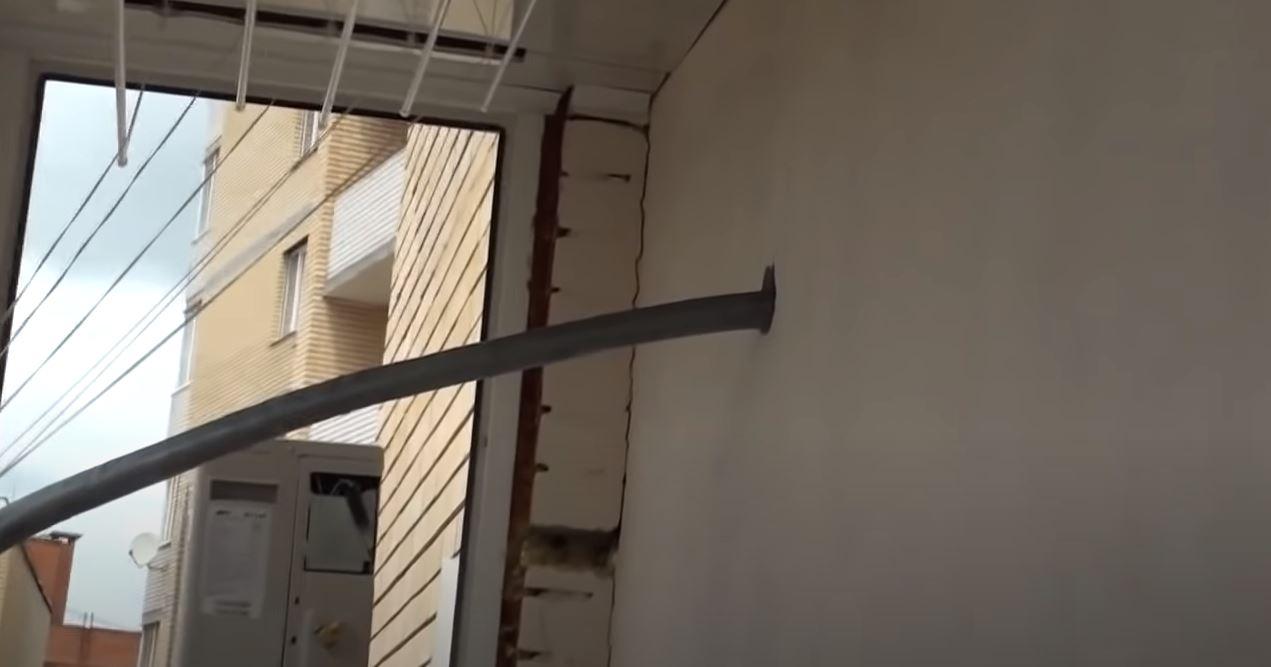
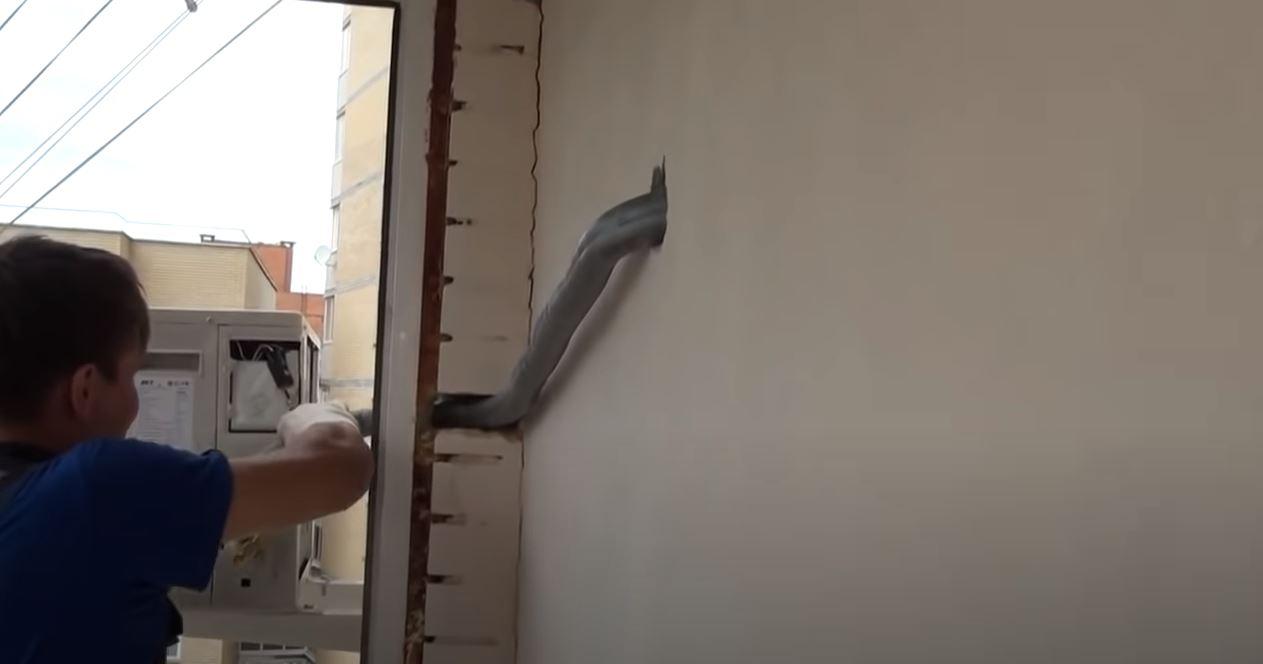
Using a perforator, a through hole is made in the wall through which the hose of the intermodular route will be output. To lay the joints, the wall is ditched or a box is formed. Both methods are good and have their own nuances. It is convenient to lay wires in strobes, but they will have to be covered up in the future. The box involves surface mounting of communications, but outwardly it is not always as beautiful as we would like it to be.
Strobe requirements:
- Slope of at least 1 cm per meter of length – will ensure the correct and uninterrupted circulation of condensate in the drainage.
- Strobe thickness - at least 5 cm so that the drainage and the cable are not in close contact.
The drainage pipe is always laid below the level of the main communications. In any emergency, this will avoid a short circuit.
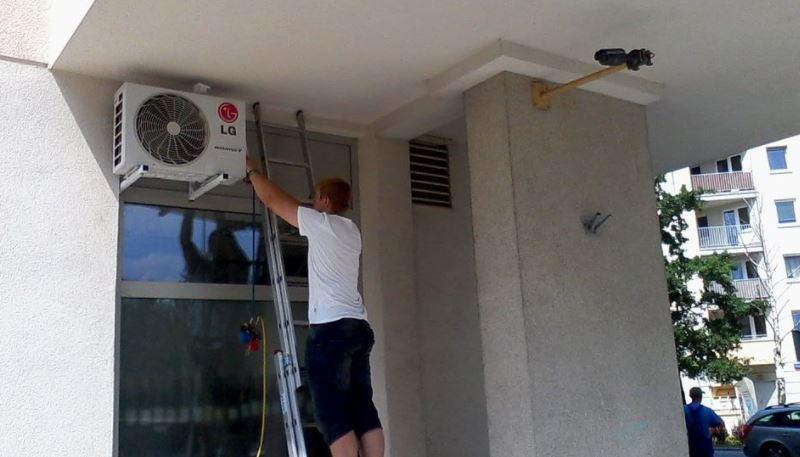
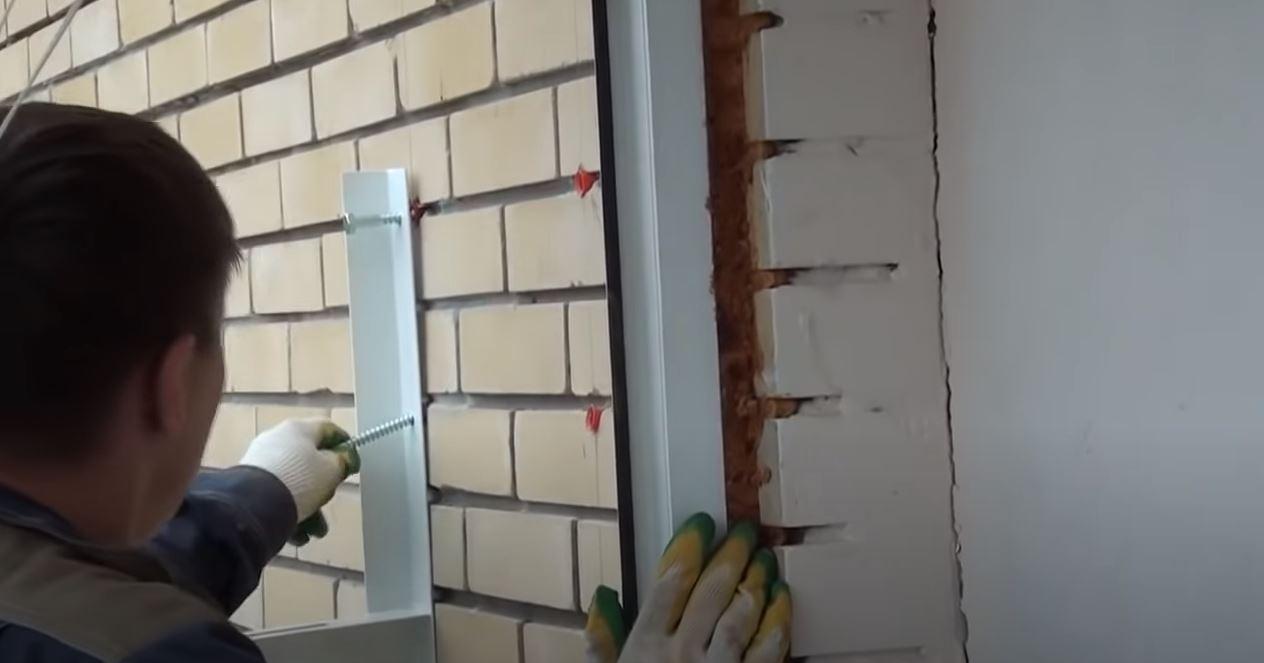
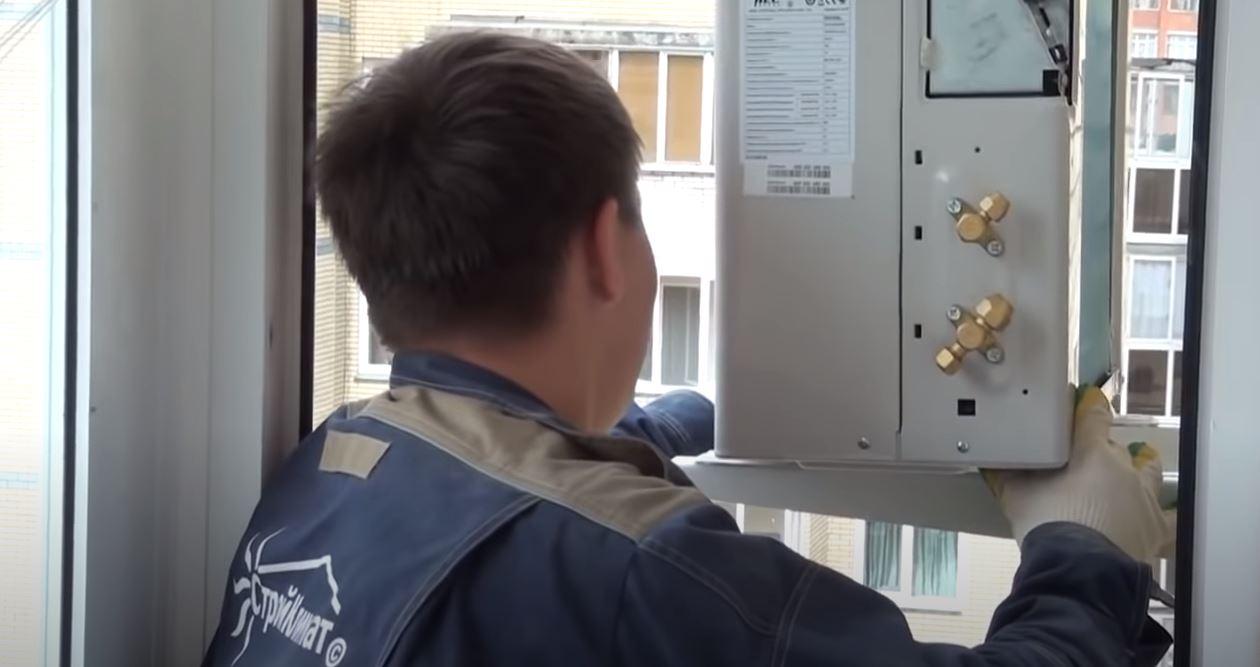
Outdoor unit installation
The installation requirements for the outdoor unit are the same. The main rule is to securely fasten the dowels in the plates holding the block itself. In work, more powerful anchors are used, since the load on the outdoor unit is higher, and safety is paramount.
If installation is carried out in a high-rise building, then there may be problems with outdoor installation. You will need the help of industrial climbers who have the appropriate equipment and experience in performing high-altitude work.
Installation of communications
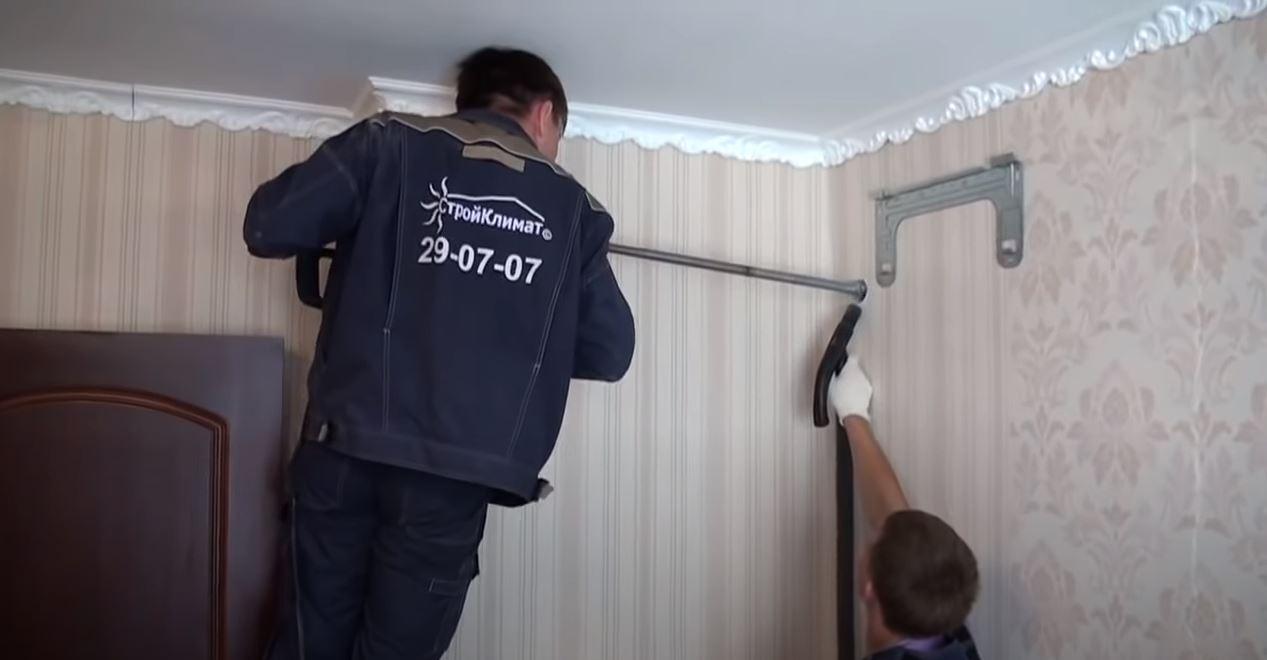
To connect the internal structure of the air conditioner with the external one, it is necessary:
- Lay copper piping - consists of two copper pipes of different diameters, which are cut to the measured length and the edges are processed from burrs. Pipes are insulated along the entire length with a margin for a segment inside the wall. Joints are processed with adhesive tape on a metal basis.
- Lay the cable - the ends of the cable are stripped, terminals are installed on them, which are crimped with pliers. The plate above the connectors for the pipeline is removed, the cable is connected to the corresponding connectors.
- Lay drain pipe - here it is important to correctly calculate the length so that the end of the tube is 60-80 cm from the plane of the outer wall.
After all the systems are laid, they are brought out and temporarily fixed to each other, after which they are mounted to the indoor and outdoor units.
Connecting blocks to each other
In order for the external and internal unit to become a single split system, they should be connected using communications.
The sequence of actions is as follows:
- Drainage - a tube is connected to the beginning of the drainage, fixed with clamps for reliability.
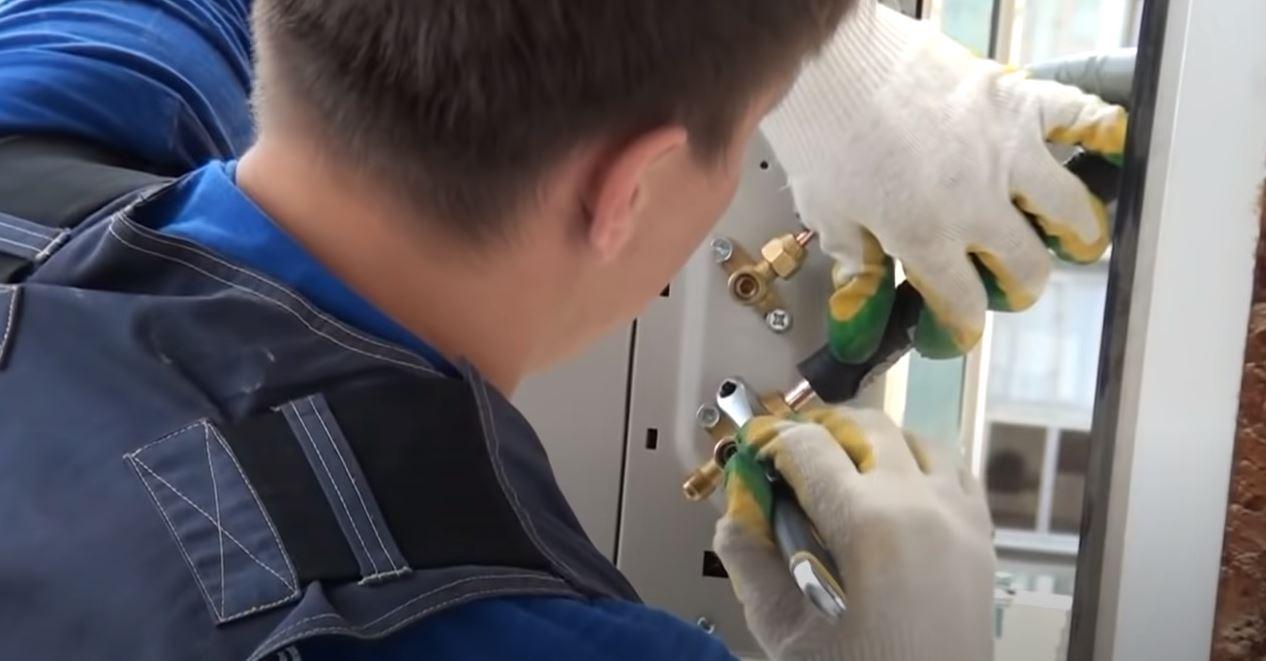
- Freon circulation – First, the pipes are connected to the indoor unit. To do this, loosen the nuts and unscrew them, then roll them.
- rolling - the most important point on which the operation of the air conditioner completely depends. The more carefully the work is done, the tighter the refrigerant circulation system will be as a whole.
Rolling should be carried out in accordance with all the rules. If such manipulation has not been performed before, then you should first practice on scraps of unnecessary pipes.
- Connection - flared tubes are connected to the outlets, after which the copper is deformed, providing the highest degree of sealing. The use of windings and various kinds of sealants is not recommended.
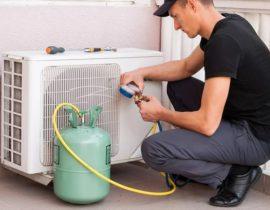
After all the work is done, you can fill the system. The first 10-15 minutes the air conditioner operates in test mode. If there are no malfunctions and the cooling is normal, then the hole in the wall is closed, and the device itself is adjusted to the needs of the room.
FAQ
It is possible if the length between them along the cable is not higher than 6 m. The greater the distance between the blocks, the higher the freon consumption and the more often it will have to be added to the system.
It is not recommended to do this for safety reasons.
In conclusion, it is worth noting that the installation of air conditioners is not an easy job, requiring care, accuracy and knowledge of building tools. Improper flaring and laying of communications will not allow you to enjoy the coolness on a hot day. If there is no self-confidence, then it is better to entrust the work to professionals.
Video instruction for installing an air conditioner


