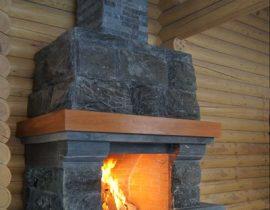
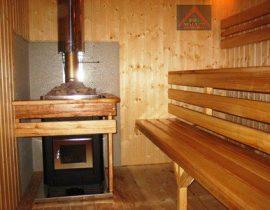
The bath is not just a sanitary facility. A modern bathhouse in a suburban area is a kind of club that involves not only a “clean body”, but also leisurely communication. The "heart" of the bath is the oven.
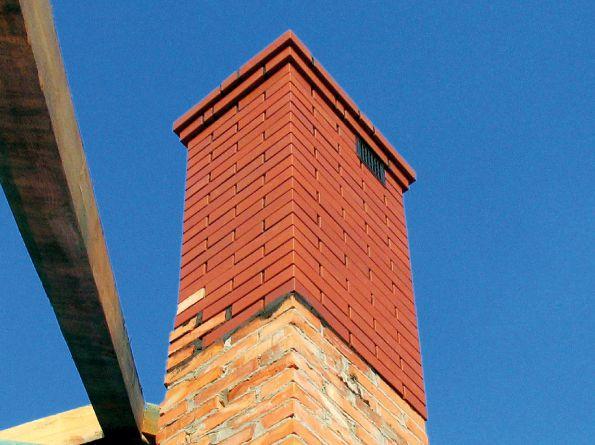
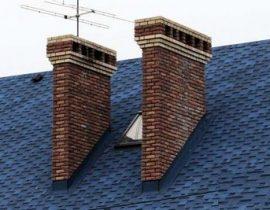
Beautiful red brick chimney
A good stove in the bath has two functions - it heats the heater in the steam room and is a fireplace, near which it is pleasant to gather with the company. In order for the heater to heat up red-hot, and the fire in the fireplace insert to dance merrily, and you not to cough from the smoke and not wince from the fumes, you need to build a good chimney for the sauna stove.
Content
What is a chimney for?
The chimney system of a bathhouse (and any other stove) is designed to effectively remove combustion products. Otherwise, gas and waste will enter the room and you will get a “black bath”, which, of course, is sung in songs, but in reality it does not bring any pleasure.
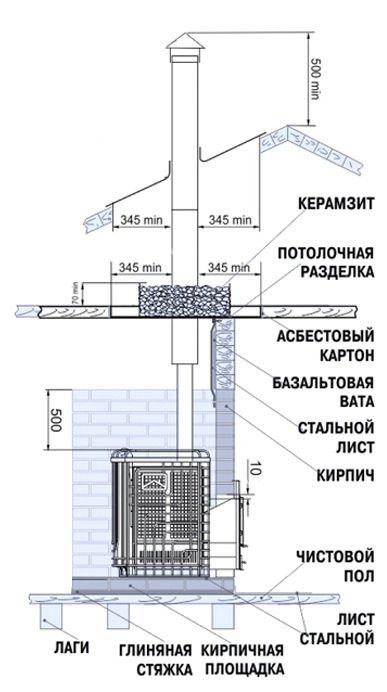
circuit diagram
It is quite possible to install a chimney for a sauna stove yourself, guided by the instructions given by us.
What is a chimney made of?
Before proceeding with the installation of a chimney for a bath, let's figure out what this design consists of and what are the principles of its operation.
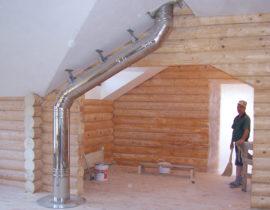
According to the location, chimney systems can be divided into internal and external.
An internal chimney is very easy to install, but the proximity of the hot surface of such a pipe to the wooden elements of the bath seriously increases the level of fire danger.
The external chimney loses heat faster, which can negatively affect the draft level in the sauna stove. You will be adding extra fuel to the oven to bring the bath to normal temperature.
Thus, both installation options have their drawbacks, but all of them can be compensated by reliable chimney insulation. But the creation of an internal chimney system, in terms of technology, is much simpler.
Material used to build a chimney for a bath
There are three main methods for constructing an internal chimney from various materials:
- Metal pipes. This material is quite affordable, but has a very large heat transfer. As a result, it requires very good thermal insulation. Not one or two fires arose due to the burning of a pipe.
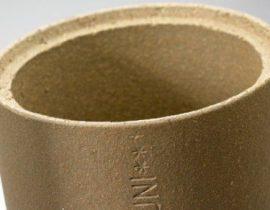
- Ceramic pipes. The most reasonable option would be to use an asbestos-cement pipe. Asbestos cement has excellent thermal insulation properties and the construction of chimneys from it will not require a lot of additional work.
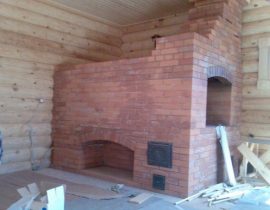
- Brickwork pipes. This is the traditional construction method for Russian stoves. Brick slowly gains heat and slowly releases it - this is a smart choice.
We build a brick chimney for a bath
Consider the process of building a classic brick chimney for a sauna stove. Will it be divided into several successive stages?
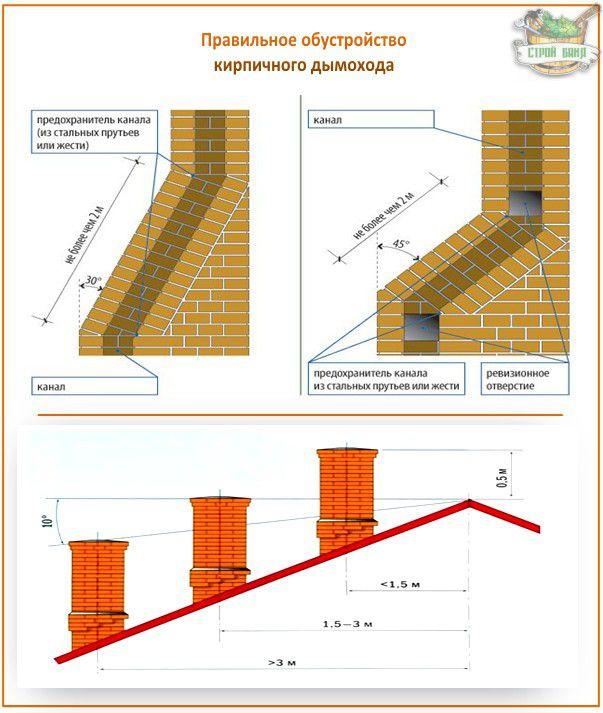
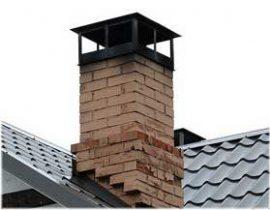
The location of the chimney on the roof of the building
Stage I. Getting ready for work
First of all, you need to create a project. For a wood stove, an ordinary brick pipe will suffice. But now, if you have a gas boiler in the bath, to compensate for the high temperature of the combustion products, a metal pipe must also be placed inside the brick chimney. During the design, the required amount of material is calculated. For a classic brick chimney, you will need:
- solid red brick or special refractory brick for masonry,
- concrete mortar for pouring the foundation,
- metal fittings for power belt,
- boards or chipboard trimmings for foundation formwork,
- clay mortar for fixing brickwork,
- weather vane for mounting the tip of the chimney.
You can easily find ready-made chimney projects on the Internet, here are photos of some of them:
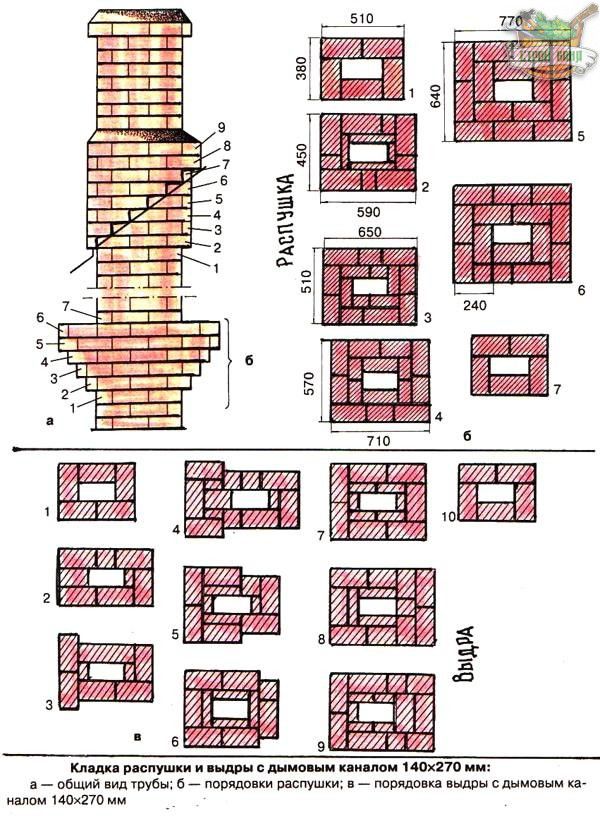
Scheme of the brickwork of the chimney of the sauna stove
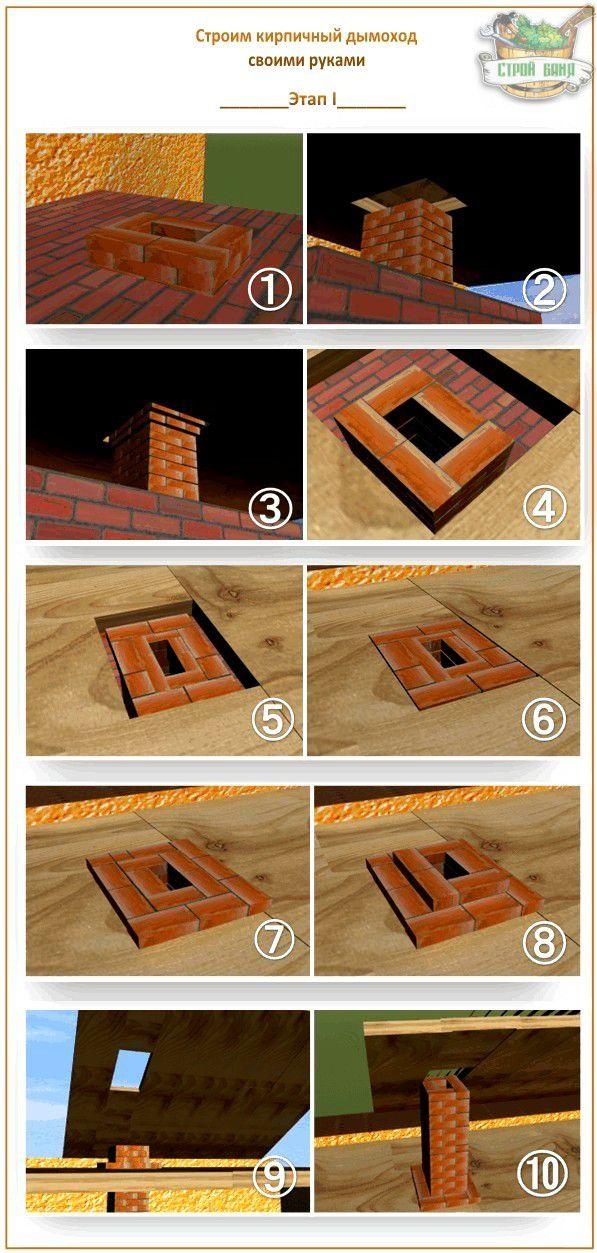
The initial stage of the construction of a brick chimney will be the manufacture of a rectangular or square foundation base. The material for such a foundation can be a concrete slab or solid brick masonry.
In order to make a foundation base, first of all, it is necessary to make a formwork. It is made from wooden boards or chipboard sheets. Inside, the entire space is reinforced with metal fittings. At the intersections, the reinforcement is fixed with a knitting wire. The approximate dimensions of the base for the chimney are about 30 centimeters vertically, and the edges of the foundation should protrude at least 15 centimeters from the outer edges of the brickwork.
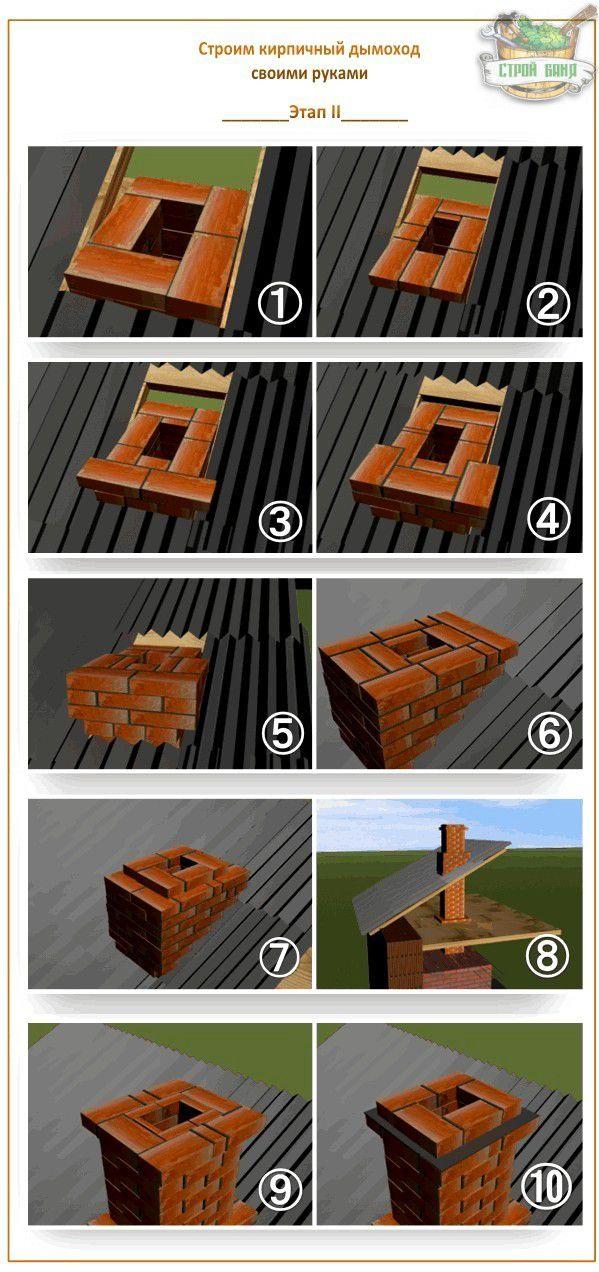
Stage II. We form the brickwork of the chimney
You can make the formation of brickwork according to the scheme provided in this article.
construction sequence
Regardless of the height of the sauna building, we recommend that you lay the height of the chimney itself at least five meters. This will provide confident traction and efficient removal of combustion products.
As for laying the stove structure itself, it is recommended to use a special clay mixture to form the chimney, and not the usual cement-sand mortar. In order to make such a solution, it is necessary to combine clay and sifted building sand. Clay must be soaked in water before mixing. The resulting mixture should not spread over the surface of the brickwork on one side, but should not stick to the trowel either. To reduce spreading, clay is added to the solution, and to prevent sticking, a portion of soaked clay is added.
Please note that you may also need incomplete bricks for masonry. If you do not have sufficient skills to break a solid brick with one blow of a trowel - use an angle grinder - this will allow you to make an even and accurate cut.
The seam between the bricks during laying should be no more than 15 millimeters, but the optimal thickness should be about 5 millimeters. Reinforcing steel bars can be used to strengthen the structure. They are laid directly between the bricks, in the thickness of the seam, but do not cross the smoke passage. The thickness of the brick walls during laying cannot be less than 10 centimeters - this will ensure the required thermal insulation.
Every few meters, holes can be left in the brick wall for subsequent routine cleaning.However, such holes are needed only in those areas that cannot be reached from the upper hole of the pipe, for example, in horizontal sections arranged for additional space heating.
When building a bath chimney, make sure that its inner surface is as smooth as possible. The presence of ledges or niches will lead to the accumulation of combustion products in them, which not only reduce the draft inside the pipe, but can also spontaneously catch fire during the next kindling and cause a fire.
Many experienced stove-makers recommend plastering and whitewashing the chimney after laying. This is due not only to giving it aesthetic qualities, but also to identify places of possible leakage of combustion products. On a plastered whitewashed surface, such places will be easy to identify and correct flaws.
passage through the roof
The upper edge of the brick chimney must rise above the roof surface by at least half a meter. Also, the height of the edge should vary depending on the proximity to the roof ridge. As a general rule, from the top of the skate, you need to draw lines with a decrease of 10 degrees in the ground. This imaginary line will indicate the minimum height of the edge of the pipe.
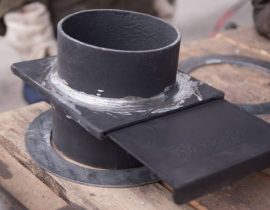
Stage III. We fix and isolate the chimney
It is desirable that the pipe chimney did not adjoin directly to the wooden walls. It can be built near a brick wall and attached to it with metal anchors for reliability. The distance between fasteners should be no more than 300 centimeters. For the purpose of fire safety, the outer wall must retreat from flammable structures (for example, from the walls of a wooden frame or from rafters) by at least 15 centimeters.And the places where the chimney passes through wooden floors must be insulated with additional sheets of asbestos or fiberglass. For reliability, roll the heat insulator in several layers.
The outer part of the pipe, rising above the roof, can be overlaid with decorative facing bricks.
For more reliable insulation, an asbestos-cement pipe, round in cross section, can be inserted inside the brick square of the chimney. With this approach, the space between the pipe and the inner surface of the brick is filled with a cement-sand mixture.
Video: Rules for building a brick chimney