The work of a stove-maker can be deservedly called an art, since it requires special skill and knowledge. It is possible to fold the oven in accordance with all the rules, only after carefully studying the instructions and the layout of the masonry device.
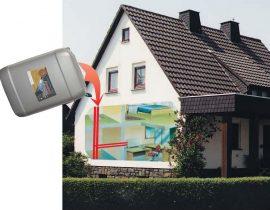
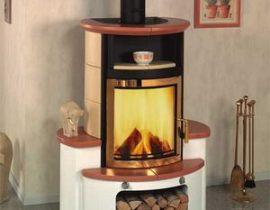
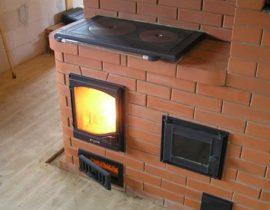
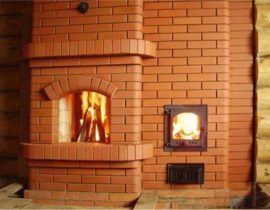
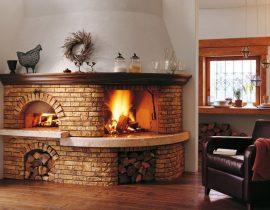
The appearance of a heating wood-burning stove made of bricks
If you decide to try yourself as a stove-maker and do not want to make mistakes, follow everyone rules of work and the choice of the necessary material. In order not to have problems with the fire inspection, you need to know that chimneys and stoves are installed in accordance with SNiP 41—01—2003.
Content
Types of brick heating stoves for the home
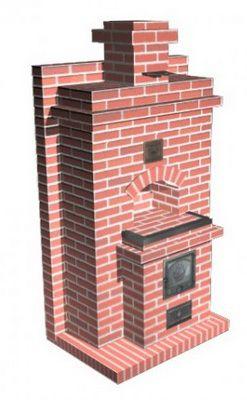
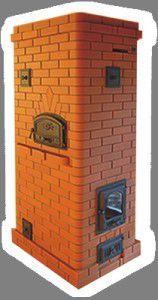
There are a large number of furnace designs. They are large or small in size. Which one to choose will largely depend on the area of \u200b\u200bthe house that will be heated by it, and the place her erection. Of the most famous, one can name the Dutch, Swedish and Russian stoves.
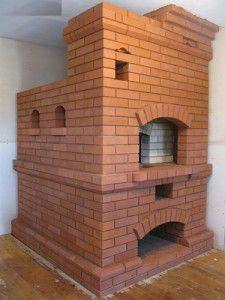
Russian oven

Swede oven
dutch oven
According to their purpose, stoves are divided into cooking, heating and heating-cooking. In areas where there is no gas heating, sometimes stoves become the only source of heat in winter, so they remain popular today. But it should be noted that stoves and fireplaces are installed not only when necessary - lovers of comfort and living warmth, if possible, too want to have in his house it wonder creation. And if the heating stove is laid out with your own hands, you will treat it differently, do not forget to clean and repair it.
Choosing a place to install the oven
The choice of location for the device of this structure is also important. Most often bake arrange closer to the entrance from the room, near the main wall of the house. It should stand so that the heat creates a curtain of cold from the front door, and evenly warms the room.
An important condition in the location is accessibility to all her walls, it is necessary to control her maintenance, cleaning and purges.
Materials and tools for work
Before starting work, you need to prepare all the materials and tools for masonry, so that later you do not have to be distracted from the process.
Required Tools
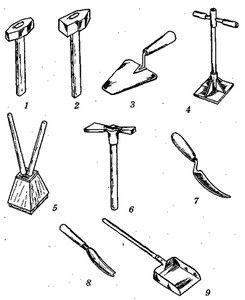
what is required for work
1. and 2. - Sledgehammers are needed to separate bricks and punch holes in the masonry.
3 - A trowel (trowel) is necessary for any work with a solution of concrete or clay. The solution is placed on a brick with a trowel, and the excess is also picked up with it.
4. and 5. - Rammers when installing a furnace are necessary to compact the soil in the place where her design.
6. — Pickaxe hammers are needed for splitting bricks into several pieces and hewing them.
7. and 8. - Joints are designed for sealing in mortar joints and giving masonry clarity drawing. They help make stitches. buried or convex, rectangular, round or double-cut triangular. With this tool, wetted water, spend on the uncured solution in the seams, without making any effort. After each holding, the jointing is cleaned of the solution.
9. - Mortar shovel — you can’t do without this tool when mixing the mortar for masonry.
10. — Besides, you need to have tools to control the accuracy of masonry and her verticality — these are aluminum and wooden rule, plumb line, square, level, tape measure and folding rule.
Required metersmaterials
Not difficult guess that the quality of the selected material will depend on the performance of the furnace and her durability. So don't skimp on them. Although you decided to save money on building a furnace with your own hands, you can’t save on materials!
- Refractory red brick — its quantity will depend on the design of the stove you have chosen. This material is quite caustic, and therefore it must be handled very carefully during transportation.
- Fireclay bricks are needed for the firebox. Usually 40 pieces are enough, but after all its amount also need to be calculated based on the chosen design. It is more refractory and can withstand temperatures up to 1500about. For this part of the oven, you can not use another type of brick, as it will not heat up well enough, which means and heat the room. In addition, it quickly collapses from high temperatures.
- The masonry mortar is made on the basis of clay. Experts recommend using borovichevsky solution, it involves the addition of a refractory mixture, but ordinary clay of suitable grades can also be used.
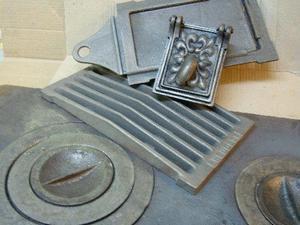
Cast iron parts required for work
- Cast iron elements of the furnace: hob, furnace and blower doors, grate (lattice for the furnace and blower), valves, as well as a door for the cleaning chamber.
- metal capacity for heating water (if it is included in the design of your stove).
- Steel wire for fixing cast iron parts of the structure.
Instructions for building a wood-burning heating brick ovens
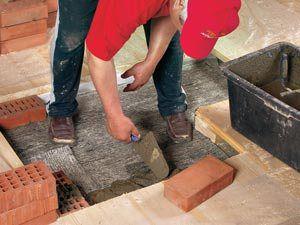
- The first thing to do when starting the oven — is to prepare the place. Priming under her it is necessary to strengthen well with rubble, and carefully tamp. A layer of sand is laid on it, then reinforcement and formwork.
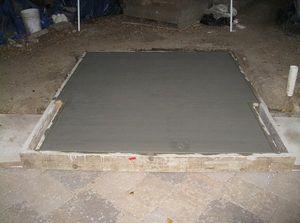
foundation pouring
- Further foundation is established. You can’t do without it, since the design of the furnace is quite massive, so install her on floors or simply on compacted soil is impossible. Concrete is poured into the formwork and leveled.
Usually, the furnace foundation is made immediately when building a house, but it is possible to make it later. If the floors are wooden have to cut out the desired area and free up space.
- If a bake will be located near a wooden wall, insulation must be laid between them. It must be environmentally friendly and not emit toxic fumes when heated. Such materials include : asbestos, metal-stainless steel, fire-resistant drywall, fiberglass, natural stone, etc.
- After the concrete base has hardened, it is best to lay one or two sheets of roofing material on the foundation, it will serve as an excellent waterproofing.
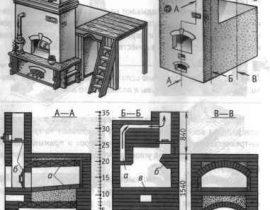
- Further starts ordinal masonry. For each furnace design, there is a special scheme that must be followed when laying out each row of bricks. If a small Dutch oven is conceived, fit the diagram below.
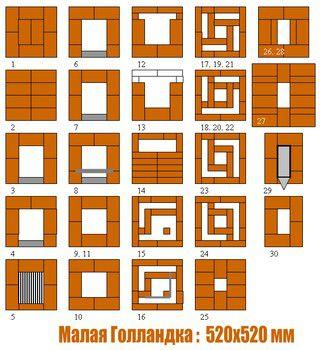
Scheme of laying out the Dutch stove
- The work of laying the stove is very responsible and if you take per her the first time, you should practice. Following the scheme, fold with your own hands ordinal at least half of the entire structure without the use of a solution, so to speak, dry. Only when you figure it out in the intricacies of rows, only then can to begin mortar laying.
- To to maintain even angles and the ideal vertical of the structure, it is imperative to use plumb lines, corners and a level. Corners, poles and joints must be laid, adhering to a proven scheme for years:
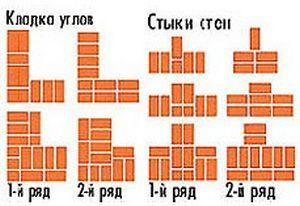
Scheme of laying corners and joints of the heating furnace
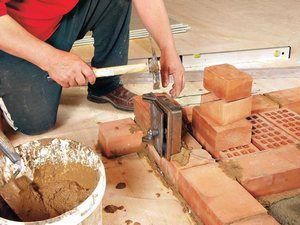
- When you start your main job, all equally, each row is first laid out dry in order to pick up the bricks in size, and if necessary, correct them. And at the same time figure out how to properly arrange a row.
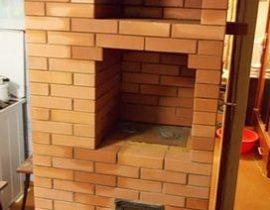
- Always start laying from the corner. The first brick laid should cover the joints of the bottom row.
Beginning of masonry
- High-quality masonry on the mortar is obtained if the clay is laid in thin layers, well her ramming.
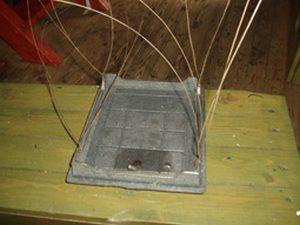
- According to the scheme, having reached the row on which the blower door and the grate are installed, they are fixed using steel wire.
blower door installation

blower door fixing
- Further process goes ordinalbased on the drawing. Approximately at the level of the seventh row, the grate of the furnace is installed and her door. The niche formed behind the grate is filled with a clay solution.
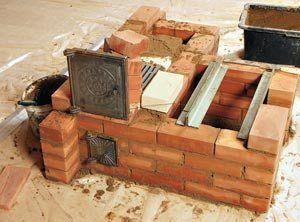
Installing the firebox door
Firebox door fixings
Do not forget that the firebox of the heating furnace is laid out with silicate bricks. Having arranged her, then we work according to the scheme.
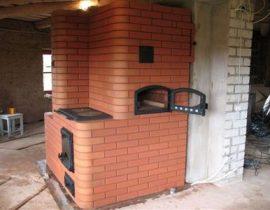
- When making an oven with a hob, you need clearly track thenon which row it should be laid. Her it is better to put it on a metal corner welded into the frame, according to the size of the panel.
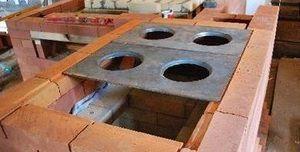
Installing the hob
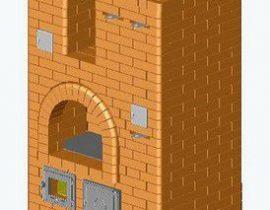
- Based on this vertical diagram, you can see where the cleaning door is installed.
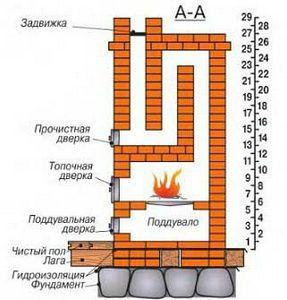
Cross section of the oven
- Also, having reached the row indicated on your drawing diagram, install a water tank (if provided). He too settles on steel strips. In each design, it is at different levels.
- The chimney can be made of brick or stainless steel. It should have the size of the furnace chimney opening on which the valve is installed. Formwork is arranged around this structure, and in her the concrete composition is poured.
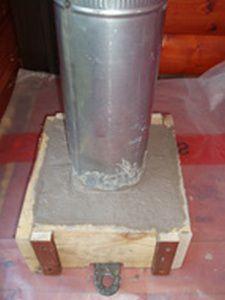
Installing the pipe in the masonry
- If the ceiling is wooden German it is necessary to install a metal sheet through which the pipe will pass. Then the furnace rises more for a few ranks to the ceiling so that you can make an interfloor transition. AT German the pipe is lined fireproof mineral wool, and the pipe is led to the attic. Further it is displayed on the roof and insulated with sealant.

Piping through the ceiling
- If the chimney is laid out of brick, it is necessary to strictly follow the rules for laying corners, and keep the chimney opening throughout the entire height of the chimney.
Our specialists have prepared a video with step-by-step instructions for laying out a brick oven, we highly recommend that you familiarize yourself with it:
Drying ovens
After work is completed, the oven must be dried well.
- Natural drying takes place within 6—8 days. To do this, open all the doors and latches. To activate the process, a 200 W light bulb can be placed in the furnace for the entire drying period.
- Further goes forced drying. Her carried out with the help of dry firewood with all doors and valves open, except for the furnace. This processss prcarried out daily for 8—10 days according to the following system: no more than 2 are burned on the first day—2.5 kg of firewood, in the following days, 1 kg is added to them.
- When after another furnaces after 2—For 4 hours no more condensation appears on the doors, the stove is considered dry, and it is possible to carry out a control fire using a large amount of firewood.
- If cracks appear after the control furnaces, do not rush to close them right away - you need to track how the process will proceed for 3—5 months. And only after that it is necessary to carry out the repair of the necessary places.
What needs to be foreseen?
It's great when the house is warmoh and ucool, but you need to watch thenso that the fireplace or stove does not become a source of danger:
- so that carbon monoxide does not enter the dwelling, it is necessary to check the tightness of the masonry seams;
- the appearance of smoke in the room when melting the stove talking about not good enough traction — the reason may be in clogged chimney or in a closed valve. To this did not happen, the chimney needs to be cleaned once a year.
Proper operation and regular maintenance of this beloved structure is a guarantee that it will not become a source of danger, and there will always be warmth in your home.oh and uut.