Electric underfloor heating under laminate is a combination of comfort and quality in any room. In the nursery, he will eliminate the need to lay additional rugs or mats to protect the child from the cold. The bedroom will allow you to start the day with the most pleasant sensations, meeting the morning with a feeling of gentle warmth under your bare feet. The living room will provide a comfortable evening rest. You can install the heating system yourself, you just need to study the basic rules and take into account the recommendations of specialists.
Content
Criteria for choosing a laminate

Choosing an electric underfloor heating
A warm floor under a laminate is an additional heating system used in conjunction with the main one and independently, with sufficient energy efficiency of the building. The use of such systems is especially important in rooms where there is nothing to heat the floors from below. For example, there is an unheated basement below, or we are talking about a balcony, where there will be a street under the ceiling. However, not every type of laminate will withstand constant heating and work effectively.
A working underfloor heating implies the operation of a floor covering in a non-standard mode.If the tile heats up and “does not feel” the changed conditions, then not every laminate will endure such an impact without consequences. And it's not just about thermal expansion, which can warp and swell the laminate, especially if it's installed incorrectly. Some varieties are such good heat insulators that they simply will not let heat through from below, greatly reducing the efficiency of the electric floor.
The layers from which this floor material is made are glued together. When exposed to temperature, the glue will gradually dry out and lose its qualities. The boards first begin to creak, then crack and warp.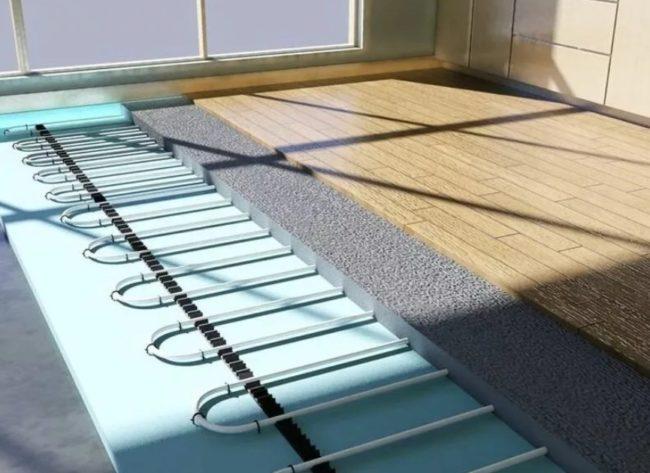
Therefore, it is impossible to lay a low-quality laminate on a warm floor. Manufacturers today offer special models designed for laying underfloor heating. They are able to transfer heat with minimal expansion and at the same time effectively pass heat through themselves to the surface. Their structure is denser.
Special types of laminate are marked with a working temperature. The values indicated in it are not recommended to be exceeded, since in this case a qualitative result is not guaranteed.
The technical specifications also indicate the coefficient of thermal resistance, from which you can find out how well the material will transmit heat. For example, according to the standards established in Europe, the value of this indicator should not exceed 0.15 sq./m per 1 K/W. If it is higher, then the heat will not pass efficiently.
A comparison table will help you navigate the characteristics of the material:
| Thermal resistance coefficient | The indicator reflects the thermal insulation properties of the floor covering: the higher it is, the better these properties are. The coefficient should not be higher than 0.15 m2 K/W.This value is also influenced to a certain extent by the characteristics of the substrate - the greater its porosity, the lower the thermal resistance coefficient. |
| Material class | This is not the most important indicator, but the more expensive the laminate, the better materials were used for its manufacture and the less formaldehyde it will emit. And yes, it will wear out more slowly. Experts do not recommend laying laminate flooring below class 32 on a warm floor! |
| Maximum floor temperature | It is important to know the limiting values of heating the laminate, at which it will not lose its properties. It's about +30 degrees. It should be remembered that the lower part of the lamella will have a higher temperature than the upper one. Therefore, it is better to stock up. |
| Way of connecting lamellas | You can not take the material that involves the connection with glue. It will dry out and cracks will form. It is preferable to choose a laminate with a lock connection. |
| Lamella thickness | Thick laminate does not conduct heat well. But thin is rather fragile, has weak connecting elements. It is best to buy material of medium thickness - 8 mm. |
If you are planning to have electric floor heating under a substrate, such as cable or heating mats, then the resistance of the substrate, which is also a heat sink, should be added to the resistance coefficient.
What type of underfloor heating to choose
The manufacturer offers 3 types of electric floor heating. They differ in the feature of work and installation rules. The choice of a warm floor for a laminate depends on several factors. The conditions of the room, its characteristics, the allowable budget and the desired heating power play an important role here.
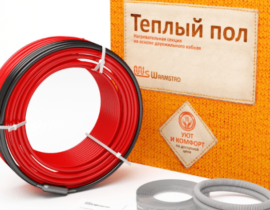
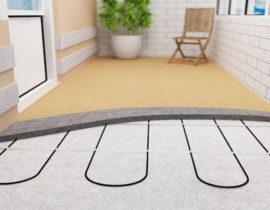
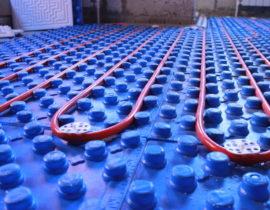
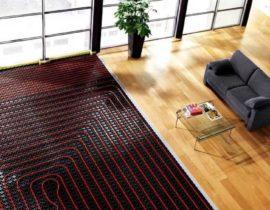
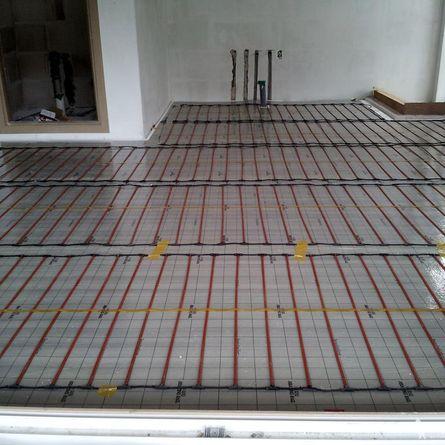
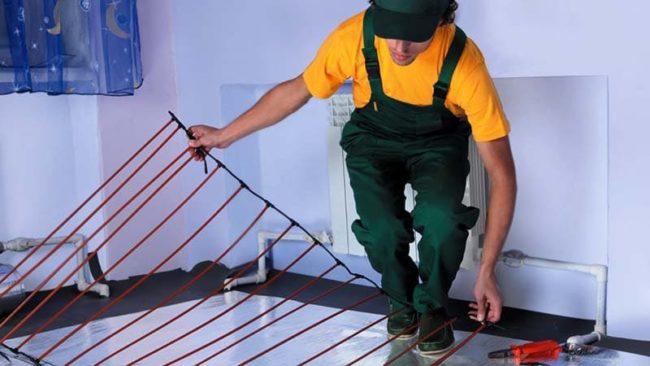
Cable
It is a resistive system, which, when current passes through them, begin to heat up, due to the sufficiently high resistance of the conductor - the heat released heats everything around. The design itself consists of a single cable through which electricity passes. It is laid on a special mesh cover in the shape of a snake or snail. The length of the cable depends on the size of the room and its main parameters. The cable is laid out in a screed according to a pre-designed scheme. This type is rarely used for laying laminate on top.
Advantages and disadvantages of this type of floor:
- easy installation;
- universality;
- availability;
- economy.
- a lot of heat is spent on a concrete screed;
- uneven heating: first the screed, then the substrate.
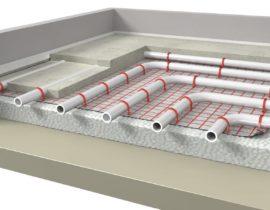
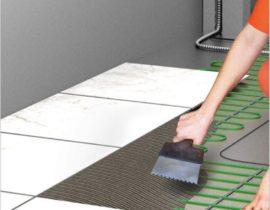
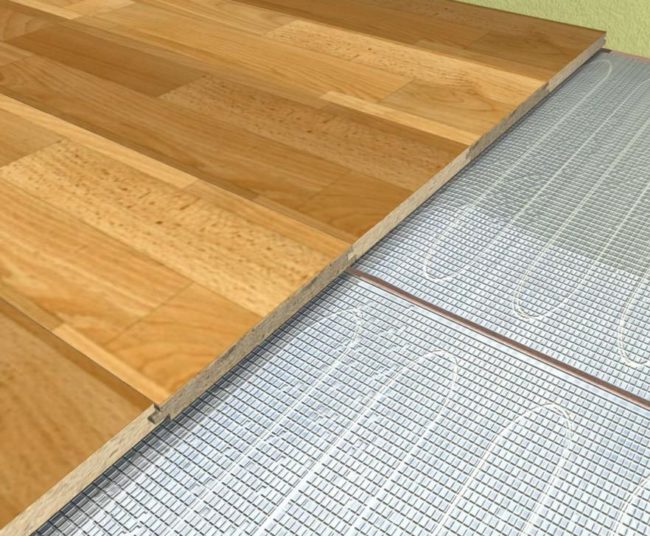
Matte
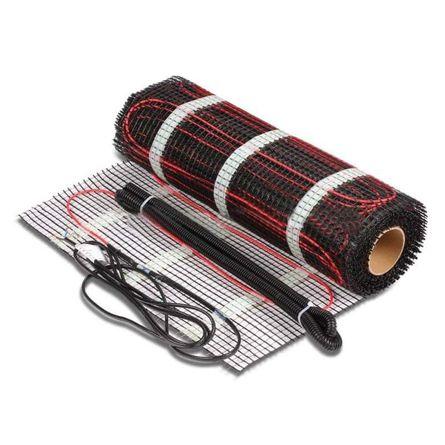
Heating elements are fixed on mats or rolls of special material, forming the shape of a snake. All mats are arranged vertically in length, so you need to calculate their number based on the parameters of the room. The basis is fiberglass. The mats are attached to the subfloor with a special tape or tile adhesive.
Advantages of heating mats and disadvantages:
- no need to make a concrete screed, the floor level does not rise;
- ease of installation: you need to spread the rolls around the entire perimeter of the room and fix them with glue;
- heats up quickly and retains heat for a long time.
- the cost of materials is higher than that of a cable heating system.
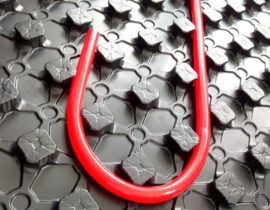
Carbon rod
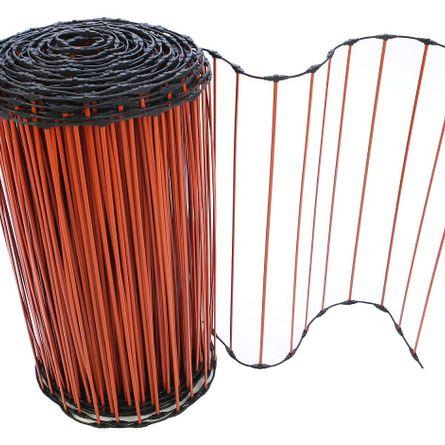
Carbon rod underfloor heating is a device consisting of self-regulating carbon rods arranged in parallel. It is able to regulate the level of heating in the room, depending on the ambient temperature.
Powered by current, when it is supplied, infrared waves are emitted, they generate heat and heat the room.
The pros and cons of this system:
- due to the parallel connection of the rods, when leaving one standing, the entire structure continues to function;
- the floor tolerates moisture well;
- can be laid under laminate with or without screed.
- The main disadvantages when installing in a screed are the complexity and duration of work, and a decrease in heat transfer.
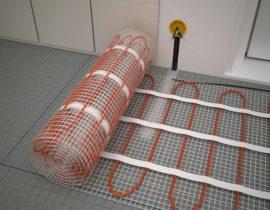
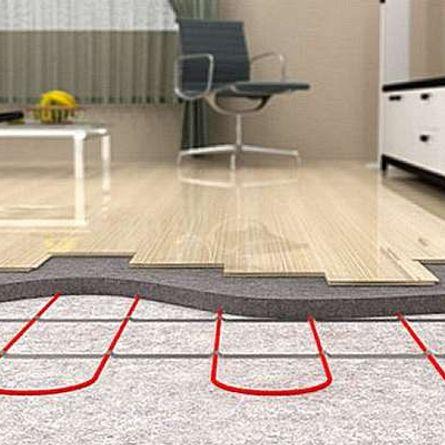
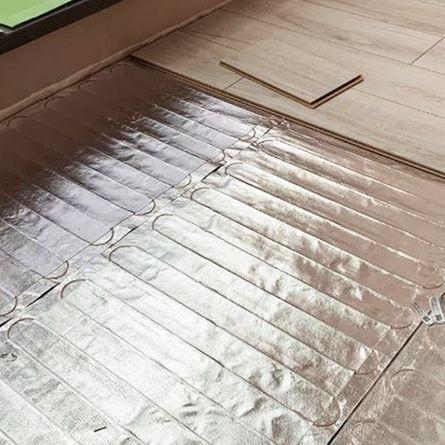
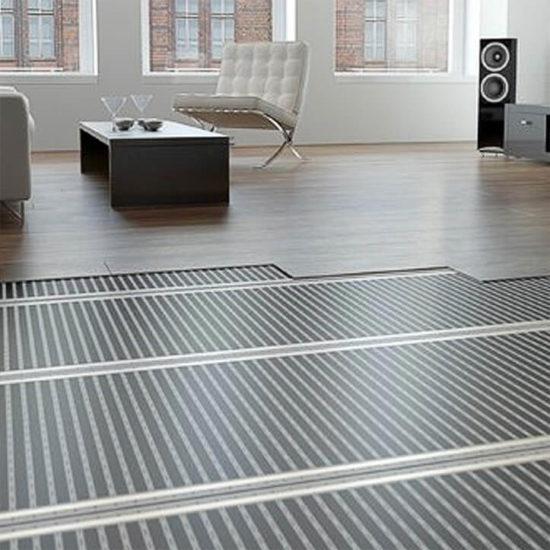
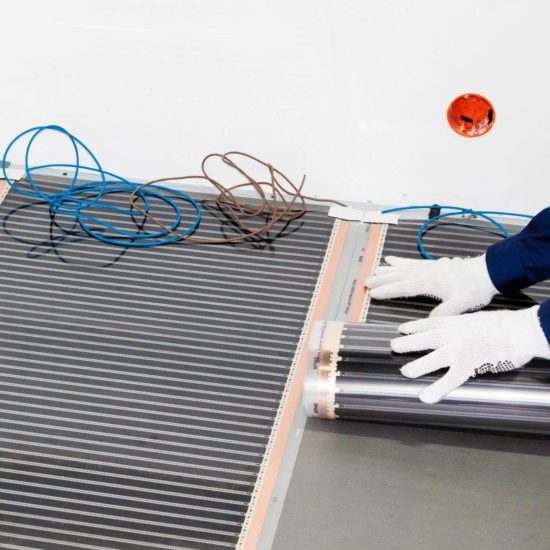
Infrared (film)
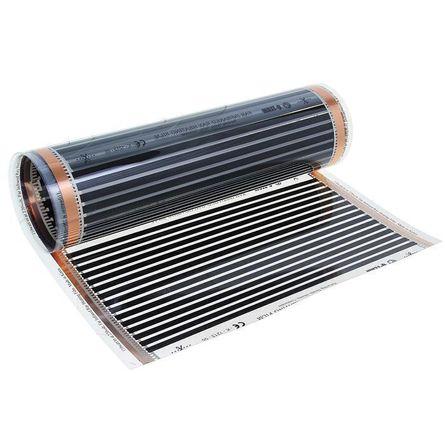
It emits rays into space in the appropriate range, warming objects around, that is, there is no convection effect. Under the laminate, this heat source is best suited. This is due to its versatility and ease of installation, as well as technical characteristics.
The system is a thin matter that emits electromagnetic impulses. It consists of several heating panels that provide heat supply around the entire perimeter of the room.
Advantages of IR film and disadvantages:
- the panels do not emit a substance harmful to the human respiratory tract - formaldehyde, since the infrared heating method does not contribute to its evaporation from the composition of the lamellae;
- systems do not need to be poured with a concrete screed, and therefore raise the floor level. A substrate is immediately placed on top of the heating elements, and only then laminate boards;
- there is no harmful effect on the coating: it does not crack, does not swell, and the locks do not diverge, which can happen with other heating methods;
- saves energy and at the same time evenly distributes heat over the entire surface.
- No disadvantages have been identified for this type, since even its cost is low compared to analogues.

This material simply spreads on a leveled surface, does not need glue or other fixing elements. In the film and there are special heating elements. The system does not raise the floor level.
Best for laying under a laminate infrared floor heatingbecause it is equipped with upgraded heating technology, which can not only effectively heat the floor surface, but also save energy.
Rules and installation steps
Rules and steps for laying underfloor heating under laminate
Installation of a warm floor under a laminate takes place in several stages. On each of them, you must comply with all the requirements and nuances, so that later there are no problems with the operation of the coating.
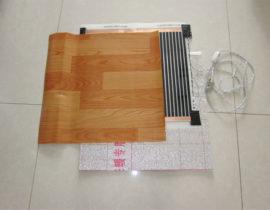
A set of tools and materials
First of all, you need to stock up on all the required tools and materials. These include:
- kit that comes with the device;
- thermostat;
- heating heat-reflecting film;
- pliers;
- screwdriver;
- scissors or stationery knife;
- special adhesive tape.
The kit must necessarily include clamps, connecting electrical cables, special insulation. After selecting and acquiring tools, you need to draw up a plan for a warm floor installed in the future. Based on all calculations, the location of the thermostat is verified to maintain the optimum temperature in the room and control its change.
It is important to pay special attention to the choice of substrate. It is best to purchase extruded perforated polystyrene. Good options are penofol and cork. In general, manufacturers offer to purchase special substrates for underfloor heating, which are on sale in specialized stores.
Penofol is not used as a substrate for laying an infrared floor!
Foundation preparation

It is important to prepare the base well
The first stage of work is the removal of the old foundation. You need to get to a concrete slab or a rough wooden floor.After cleaning up the garbage, you can begin to prepare the base for the electric floor:
- Find and fix all foundation defects: chips, notches, cracks, etc. With significant irregularities on the concrete floor, the easiest option is to pour a thin screed based on cement and sand. Additionally, a damper tape must be laid along the entire perimeter of the room along the walls. This is a kind of compensation layer that will help restrain the thermal expansion of all layers laid on the floor base.
- Lay vapor barrier material over the screed or boards: membrane or polyethylene film.
- The next layer is insulation. Ideal heat insulators specifically for the underfloor heating system are heaters with foil.
To level the wooden base, choose one of the following options:
- Troubleshooting of floorboards - replacement of old floorboards with new ones and subsequent rallying of the floor structure with final grinding.
- Laying plywood sheets over the floorboards, which are attached to the very base with self-tapping screws and adhesive. The sheets must be stacked in a run with an offset of half the size and must be treated with drying oil on top. The gaps between the sheets are filled with putty. Sometimes plywood is laid in 2 layers, then not only the sheets are stacked with an offset, but also the layers relative to each other.
Installation of heating elements
After careful preparation of the base, you can begin laying the heating elements. Stages of work:
- Thermal reflective material. A layer of foil material is laid on the draft surface and fixed with a construction stapler or metallized tape. Between themselves, the sheets are fixed with a special adhesive tape. When laying, do not allow gaps between the rolls of heating material.Then the circuit will be closed and more efficient. In the absence of heat-insulating sheets, there is a risk of poor thermal conductivity to the coating.
- Laying of heating elements. A roll of thermal film is rolled out so that the metal strip is located at the bottom. The number and order of rolls must be taken into account when drawing up a project plan. If the sheets are too long compared to the room, they are trimmed. This can only be done in places specially designated for this from the manufacturer, otherwise a short circuit may occur, or the system will not work. All rolls are placed according to the laying pattern. It is not necessary to use fragments of the same width. It is important that they do not find each other. But there should not be a large distance between the strips, otherwise the heating will be uneven.
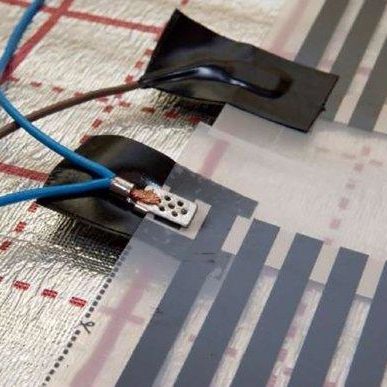
- Insulation connection. On the places where the roll was cut, special bitumen stickers are attached. They are positioned so that it covers all contacts and copper surfaces. Then you need to carefully connect the wires to the contacts through which the electricity will flow, providing heating. The contact itself should be located on one side inside the film with a heating element, and on the other - on top of the foil tape. The contact is clamped with pliers and the floor layers are fixed with adhesive tape. It is required to ensure that the layers retain their places and do not move. An electric cable is placed in the contact, then the wires are fixed there with pliers. Bituminous stickers fasten the floor and the contact points of the heating element.
- There may be some difficulties with connecting the film if there are more than three fragments. The way out in this situation is to install a terminal of a suitable shape at the ends. The ends of the wire are stripped of insulation, twisted and placed in the "leg" of the contact. Then clamp with pliers.It turns out one contact, which is easier to make.
- The next step. After connecting all sections of the film, the sensor, with the machine turned off on the shield, line wires are brought to the corresponding terminals.
- Connecting a thermostat. A temperature sensor is mounted under the heating film. You can fix it with an insulating layer of paper. A hole must be made in the heat-reflecting material for such a sensor so that the floor does not change its level of inclination. For all wires and other equipment, it is also better to make small holes in the base. Cables are connected only with special insulating tape. Connecting wires are connected to the thermostat installed on the wall, which are passed through the circuit breaker in order to avoid unforeseen emergencies.
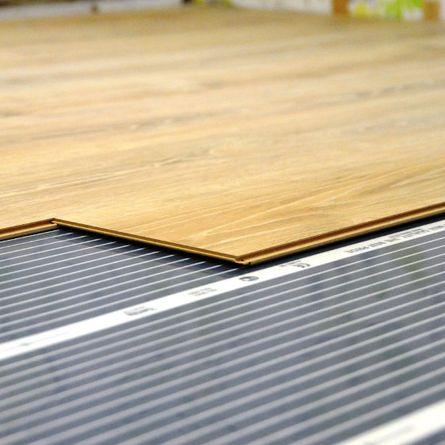
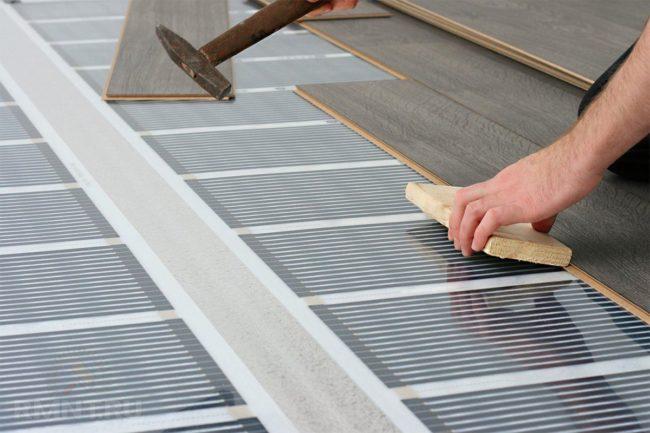
System check and laminate installation

Features of laying laminate
At the last stage of the installation of a warm floor under the laminate, the operation of the equipment is checked. This must be done for each strip of underfloor heating separately in order to accurately determine the malfunction, if any.
The procedure for testing the system:
- turn on the thermostat, check the operation of the main device;
- check each strip for faults;
- inspect the wire connections.
Elements should not overheat, spark or show other uncharacteristic signs. If all the nodes are in order, you can immediately start laying the plastic film on which the substrate will be mounted. Next, I lay out the laminate panels and carry out the final installation work. If everything is heated normally, you can install skirting boards.
Rod floor installation
Features of laying a core warm floor
Laying a rod electric floor under a laminate is similar to arranging a film system:
- You need to start by installing a thermostat, and punching a strobe for the wire on the wall from it.
- Next, prepare a rough coating. A heat-insulating two-layer substrate is laid on it - foamed material and lavsan film.
- The next step is laying the core mats. They are fixed to the insulation, then the device is connected: a temperature sensor is installed, the wires from it and the mat are connected to the regulator.
- After testing the system, the rods are poured with concrete or tile adhesive. Screed layer no more than 3 cm.
- After drying the solution, you can proceed with the installation of the laminate.
Features of the operation of a warm floor under a laminate
Commissioning of the underfloor heating must be carried out no earlier than on the fourth day after the end of the laying of the laminate. As soon as the heating season begins, the temperature must be clearly regulated: the floors gradually warm up to the optimum temperature (the power is gradually increased by 5-6 degrees every day). The reduction should also be gradual.
FAQ
Can. But then the warm floor will work continuously at full capacity. You will have to manually control the temperature in the room by turning the system off and on.
Yes it is possible. Dismantle the thermostat, insert the sensor into the corrugation and connect to the thermostat. Then install its thermostat in its original place.
The heating cable heats up to +130 degrees. The operating temperature of thermostats is on average + 30-50 degrees. When connected directly, the plastic housing of the thermostat will melt and a short circuit may occur, which will lead to the failure of the thermostat.