For space heating, different types of heating systems are used, of which underfloor heating is considered the most comfortable and economical option. It provides uniform heating of rooms over the entire area, and the absence of convection eliminates the constant presence of fine dust suspension in the air.
Underfloor heating is one of the most effective design options that can be used in conjunction with floor tiles. Administrative prohibitions and some features of the device made it one of the most popular and sought-after ways of heating cottages and private houses. Laying a water heated floor under the tiles can be done independently. Consider the rules and features of this process.
Content
The design of a water heated floor

Water heated floor under the tile
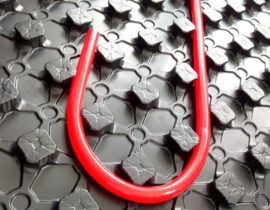
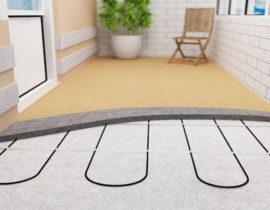
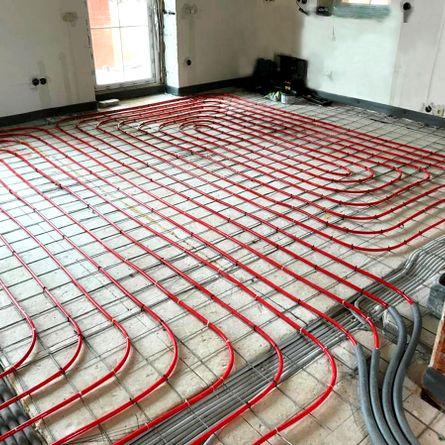
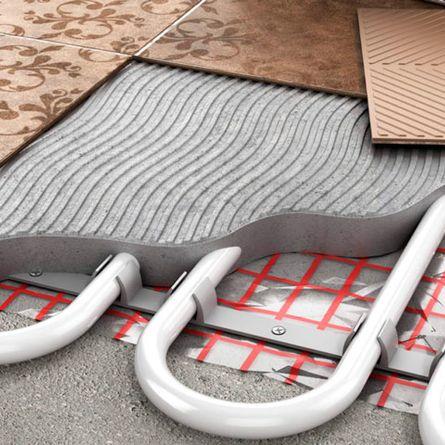
A water heated floor is a pipeline with a circulating coolant distributed over the entire area of \u200b\u200bthe room. Heating efficiency depends on the scheme and density of laying the pipe, the type of flooring and the conditions of its laying. The intensity of heat transfer depends on the density of contact between the tube and the floor covering. The best option is to pour the tube into the screed and lay the floor tiles. In this case, the loss of thermal energy is minimal.
A feature of the design of a water heated floor is the absence of independent generation of thermal energy - a pre-prepared coolant enters the tube, which, moving, gives off thermal energy and cools down.
Therefore, the temperature of the tube at the beginning is higher than at the end. Therefore, to save thermal energy and optimize the process of reheating the coolant, not one long tube is used, but several identical segments - loops. They are connected to a switchgear that supplies the coolant and receives it after passing through the circulation cycle.
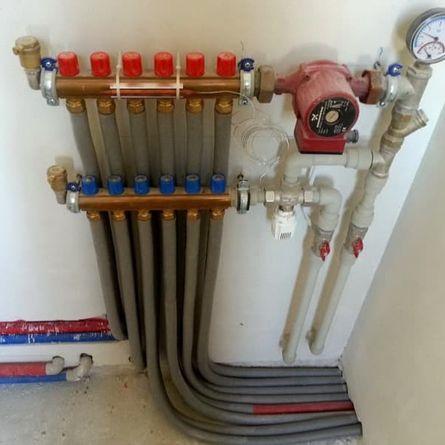
The main nodes and the principle of operation of the system
Water heated floor consists of the following units:
Underfloor heating loops

Collector
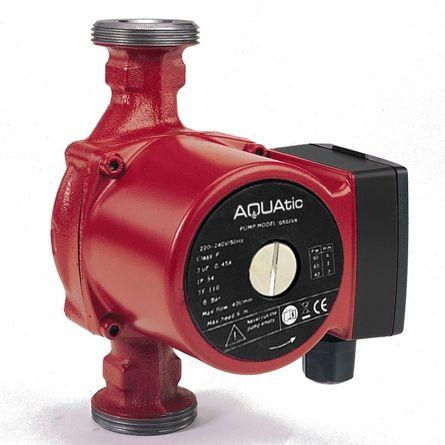
Circulation pump
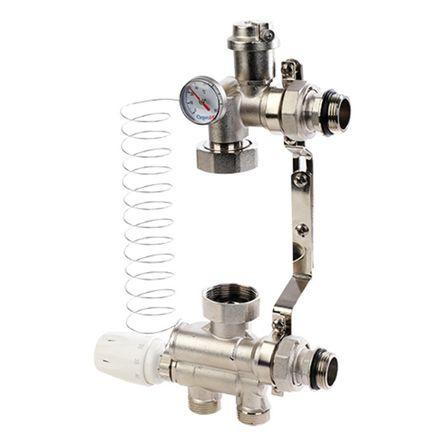
Mixing unit
Boiler
The functioning of the water floor heating system is as follows:
- the coolant receives heating in the heating boiler and is discharged into a straight supply line;
- enters the mixing unit, where it is combined with a colder return flow in a given proportion, obtaining the required temperature (usually 40-45 ° C);
- from the mixing unit, the coolant passes into the collector (usually, to save thermal energy, they are connected into a single unit) and diverges through the loops. If for some reason some hinges are not needed (for example, massive furniture is installed in this corner of the room), they can be turned off using their own shutoff valves;
- passing along the entire length of the loops, the coolant enters the return line collector, from which it is sent back to the boiler for heating.
One cycle of coolant circulation is described. Analyzing the principle of operation of a water heated floor, it becomes obvious that its effectiveness depends on the density of contact with the surface of the finish coating.As a rule, water systems are poured into a screed, which plays the role of a heat accumulator.
The only type of floor covering capable of conducting thermal energy is floor tiles.
Its surface provides optimal heat transfer, comfort for users and savings in resources needed to heat the coolant.
The procedure for installing a water-heated floor
Having understood the design of the water-heated floor, you can proceed to the direct assembly of the system. The work is quite complicated, as you will have to perform several specific procedures. Consider the installation process of the system in stages:
Training
Preparatory work
The preparatory work consists of two procedures:
- calculations;
- subfloor preparation.
The settlement part is a selection process scheme and pipeline type. These are interrelated operations, since each laying scheme requires a certain diameter and minimum bending radius of the pipes. The best option for solving the problem is to create a room plan on a scale and apply a laying pattern, taking into account all distances and lengths.
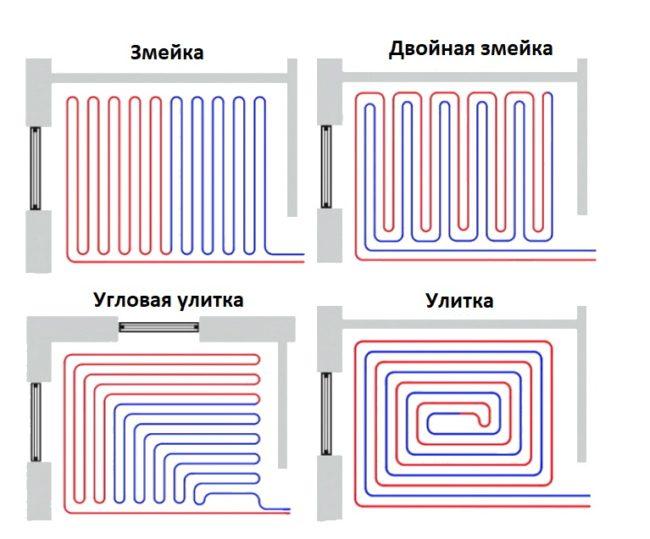
There are many laying schemes:
- snake;
- spiral;
- snail;
- zigzag, etc.
It should be noted that there are no fundamental differences in the laying of loops. The only recommendation that should be given when choosing a scheme is to use a double option. This is a method of laying loops in which the tube is folded in half and stacked in the desired order. It turns out the alternation of warmer and cooler sections of the loop, which ensures uniform heating of the floor.
In the process of calculations, it is often difficult to determine the length of the pipeline when choosing one or another scheme.In order to speed up the calculations, it is recommended to use an online calculator - there are a lot of them on the network, it is easy to find the necessary resource by the corresponding search query. To obtain more correct results, the calculations should be duplicated on another online calculator.

Preparation of the subfloor takes place in the following order:
- the entire floor area is cleaned of all layers, flooring and old coatings. It is necessary to obtain a clean concrete surface;
- inspect the floor, determine its condition. All potholes or protruding elements (rebar, concrete sags, pipes, etc.) should be removed, achieving the most even plane. If necessary, pour a rough leveling screed.
It is impossible to leave pits, protrusions or other defects on the surface - this will cause problems during the operation of the water-heated floor. You should not take this moment lightly - any leak will require either turning off the defective loop, or a complex repair with a breakdown of the screed and a complete replacement of the system section.
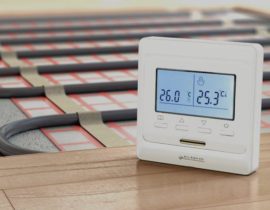
Mounting controls
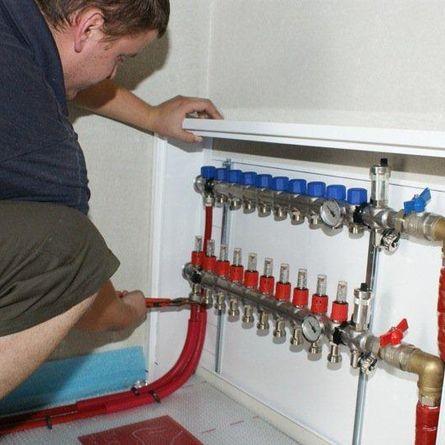
After preparing the subfloor, it is necessary to install the controls. It is impossible to leave this procedure “for later” - the screed is poured with filled tubes with a working pressure of the liquid.
Procedure:
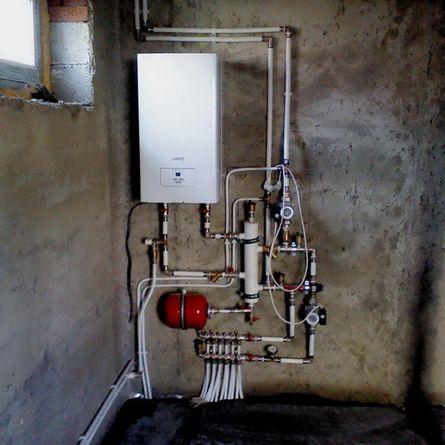
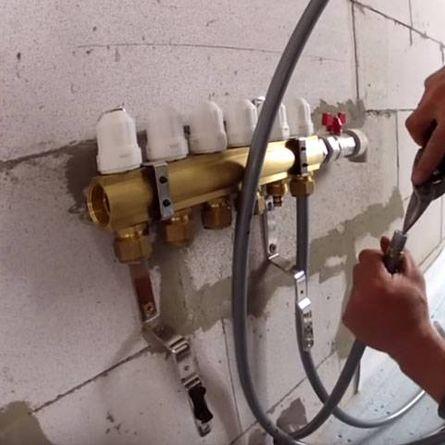
- at a pre-selected place, a collector group with a mixing unit is attached to the wall. If possible, it is better to take it out into the corridor or office space. In the living room, the presence of a cabinet with a working circulation pump and tubes coming out of it is undesirable;
- the collector group is connected to the heating boiler. It is recommended to consider the routing of the connecting pipeline - the longer it is, the greater the heat loss. Can be placed pipes in a foam or polyurethane shell so that the temperature of the coolant does not fall on the way from the boiler to the collector;
- check the build quality, install all the necessary safety elements (taps and valves that allow you to urgently turn off the fluid supply to the system).
If possible, you should check the quality of the connections by first blocking all the outlets of the collectors. If there are no complaints about the build quality, proceed to the next stage of work.
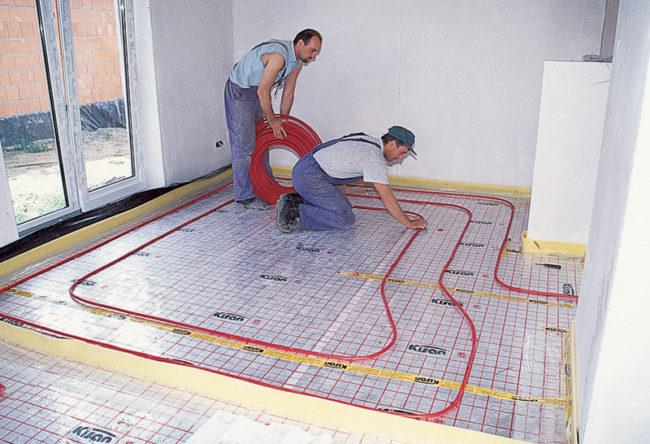
Underfloor heating installation
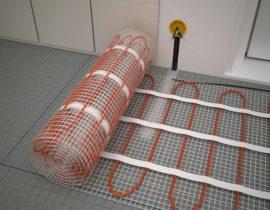
Laying of loops is made on the prepared subfloor. The work is performed in the following order:
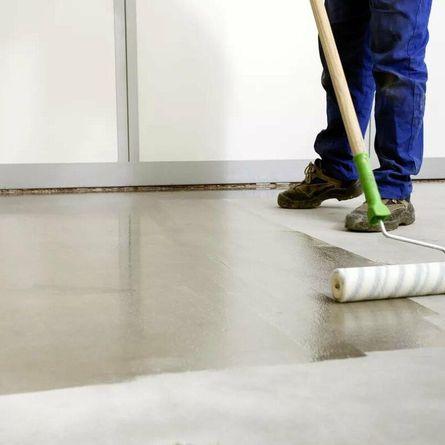
A double layer of deep penetration primer is applied, which acts as an impregnating waterproofing
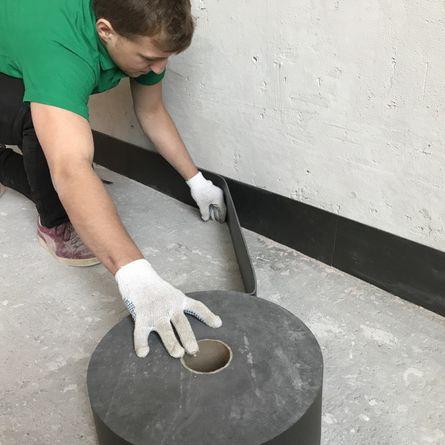
A damper tape 5 mm thick is glued around the perimeter of the room on the lower part of the walls.
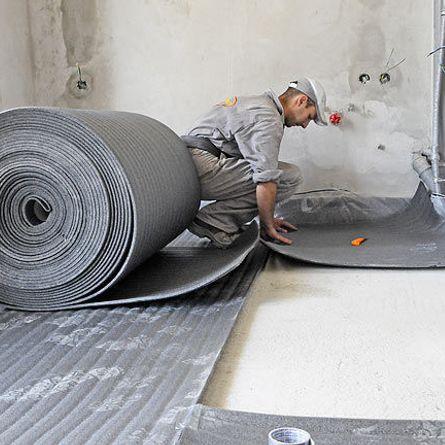
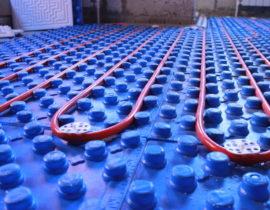
The surface of the floor is covered with a layer of thermal insulation. The best option is high-density foam with a thickness of at least 15 mm. Plates are laid tightly, without cracks or gaps. If they do appear, use mounting foam for filling
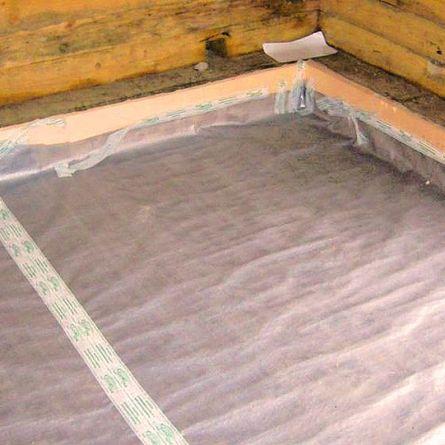
A continuous sheet of polyethylene waterproofing is laid on top of the heat insulator. The material is laid in overlapping strips of at least 10 cm, the joints are glued with adhesive tape
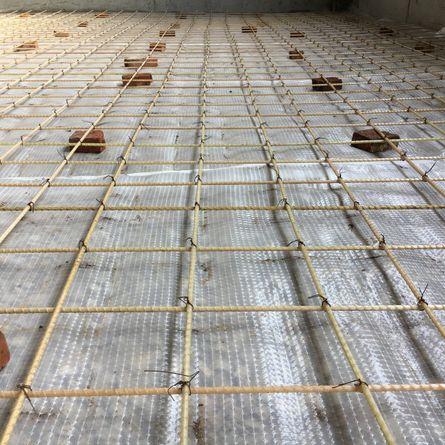
A fiberglass mesh is laid on top of the waterproofing
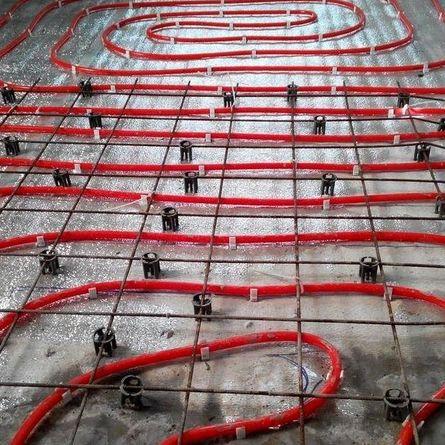
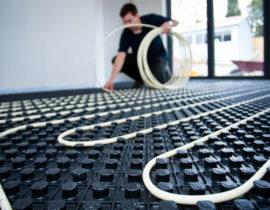
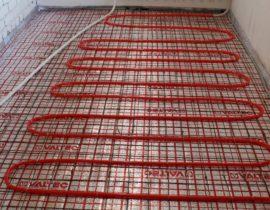
Underfloor heating loops begin to be laid on the grid, attaching them with nylon clamps. When laying, a pre-calculated scheme is used
Loops are connected to collectors. They check the accuracy and quality of the connection and supply the heat insulator, raising the pressure to the working one, and then to the pressure test. If there are no complaints, reduce the pressure to the working value
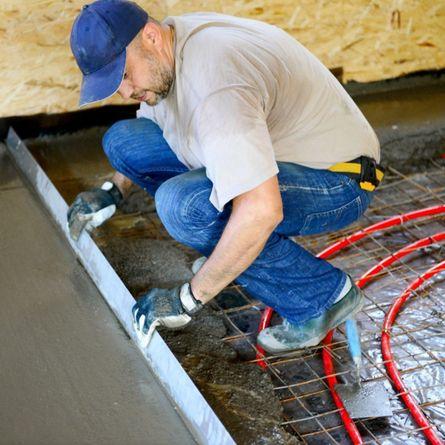
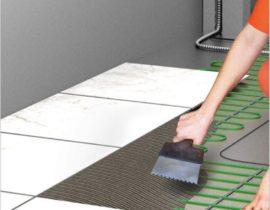
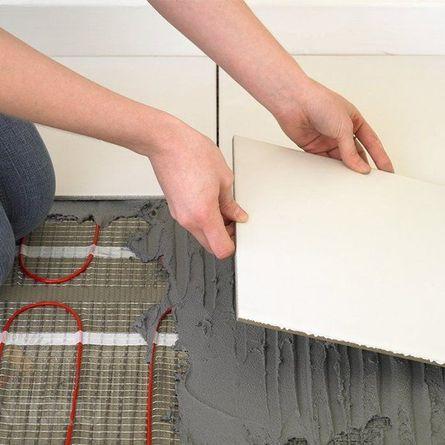
Pour a layer of screed. Its thickness above the tubes must be at least 30 mm. When the screed hardens, you can start laying the flooring
The network has recommendations regarding the thickness of the screed. Some sources advise to immediately fill the gaps between the tubes with adhesive and lay the tiles to save money. This should not be done - the surface will be uneven, and it will not be possible to achieve high-quality tile laying. In addition, a large consumption of tile adhesive will require considerable cash costs.
What tiles to choose for laying on a warm floor
For laying on a warm floor, any floor tile of large thickness (not wall tiles) is suitable. The best choice would be porcelain stoneware - it has a balanced set of working qualities. When choosing a coating, one should take into account not only decorative qualities, but also ensure safety for users.
It is recommended to use a material with a slightly rough surface, an embossed pattern or an anti-slip coating.
The glossy surface, which is very attractive in appearance, often becomes dangerous with a little wetting. This point should be taken into account and try to protect yourself and your loved ones.
FAQ
Yes, you can. the metal mesh is more rigid and holds the underfloor heating loops more securely. However, it is necessary to work with it with extreme caution - it is very easy to damage the polyethylene waterproofing.
There is a method of laying on a wooden base, in which instead of a screed flooring is used from sheet materials - plywood, chipboard or OSB. However, this layer is a heat insulator and significantly reduces the efficiency of heat transfer from the underfloor heating loops. In addition, laying tiles on such a base is very problematic.Therefore, the best option is to screed and install the flooring in a regular way.
There are many recommendations on the net regarding this option. However, it must be taken into account that polyethylene foam does not have sufficient strength. It will sag pretty soon, the screed will be covered with a network of cracks, and the underfloor heating loops will receive an excess load and may leak. Therefore, a dense and durable heat insulator is needed.
Copper tube is much more expensive and more difficult to install. You will need to make a lot of soldering, which significantly increases the risk of leaks. Therefore, it is not advisable to choose copper pipes.
Yes, all the time the loops must be filled with coolant. This is an important point. Otherwise, after the fluid is supplied under pressure, cracks may occur on the screed.