Electric underfloor heating is a heating element distributed over the entire area of the room. It can be used as the main or auxiliary source of heating for residential premises. Unlike water systems, electric underfloor heating can be used in apartment buildings.
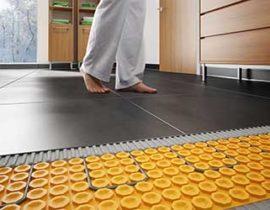
This makes the design in demand and popular, since the microclimate and the level of comfort in rooms with a similar heating method are much higher than when using radiator heating systems. At the same time, the greatest effect can be achieved when laying tiles on the floor. In its normal state, it is perceived as a cold and often slightly damp coating. However, in conjunction with a warm floor, tiles become an effective and most practical solution.
Content
Types of electric floor heating
When planning to lay a warm floor under a tile, you need to have an idea about the varieties and design features of electric heating systems.
There are two types in total:

heating (resistive) cable

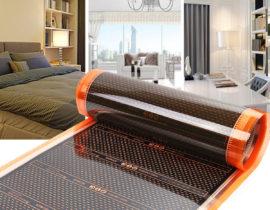
infrared film underfloor heating
The first type is a heater that releases thermal energy due to the resistance of an electric tone passing through it. This is the principle of operation of all heating elements, electric stove spirals, etc.The second type is a set of carbon emitters laminated in two layers of lavsan film. They emit infrared rays that heat objects. The film itself does not heat up.
Only a resistive cable is chosen for laying tiles. It fits well into the screed and demonstrates efficient operation without loss of thermal energy. However, the film underfloor heating is not laid under the tile. There are a lot of recommendations on the network about installing a film infrared floor in a screed, but all of them, in fact, are rewritten from one erroneous source.
Infrared film is designed to work under floor coverings that are not tightly adjacent to it - laminate, linoleum, carpet. If a screed is poured onto the film, the warm floor will quickly fail due to overheating. This point must be taken into account at the stage of selection and design.
The heating cable is available in two types:
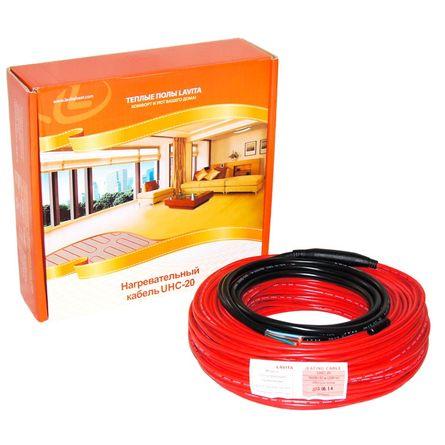
the cable itself (a segment of a certain length, which is laid in the chosen order)
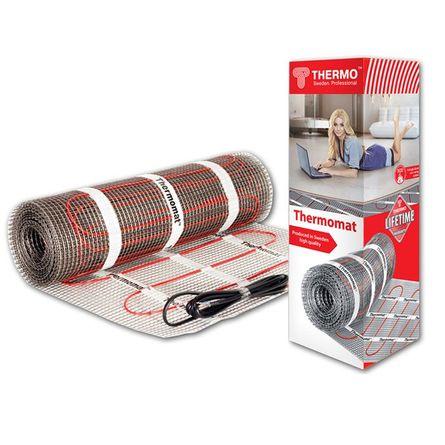
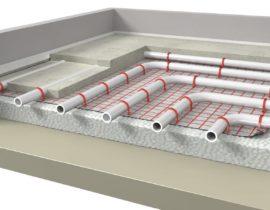
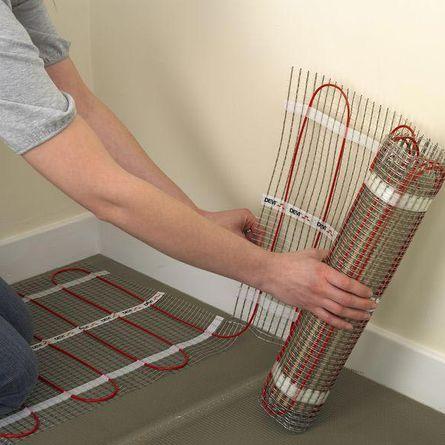
cable mats (rolls of glass mesh, on which a resistive cable is already installed in a zigzag shape)
The first option requires more complex laying, therefore, it is used for installation in rooms of a certain size, where it is impossible to lay a heating mat. in other cases, heating mats are usually chosen - they are easier to work with. It is only necessary to prepare the surface and simply spread them along the length, connect them to the control unit and pour them into the screed.
Installation of electric underfloor heating under tiles
Features of installing a warm floor under a tile
The installation procedure for an electric underfloor heating is determined by the type of finish flooring. If laminate, carpet or linoleum, two laying options can be used - pouring into a screed or laying under a sheet flooring without pouring a concrete layer. However, only the first method is suitable for tiles - pouring the screed with subsequent installation of floor tiles.
The process consists of several stages:
- subfloor preparation;
- installation of the control unit;
- laying a heat insulator;
- laying and connection of resistive cable or heating mats;
- pouring screed;
- laying tiles.
The optimal sequence of operations is given. Inexperienced users often violate it, planning to install the control unit almost last. This is a serious mistake, since the wall for hidden cable placement should be ditched before the heat insulator is laid.
Consider the stages of manufacturing a warm floor under the tile more carefully:
Training
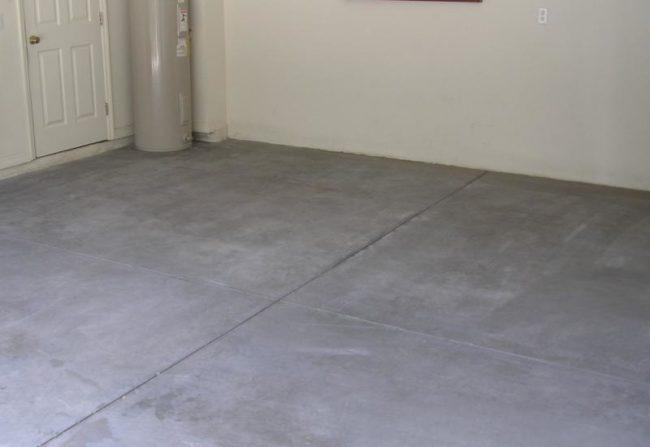
Surface preparation for laying
Preparatory work consists in freeing the surface of the subfloor from all upper layers - from coatings (linoleum, carpet or laminate), boardwalk with lags (if any) and other layers. As a result, only the concrete floor slab should remain. It is inspected and assessed. It is necessary to repair all potholes, get rid of protruding objects (remnants of fasteners, pipes, wires, etc.).
If noticeable cracks or potholes are found, it is necessary to repair them with a layer of mortar. If the number of defects is too high, a rough leveling screed is made. This step should not be neglected, otherwise a constant deforming pressure will be exerted on the heating cable.Sooner or later, it will lead to an emergency, and repairing a heated floor in a screed is a very time-consuming and expensive procedure.
Mounting the control unit
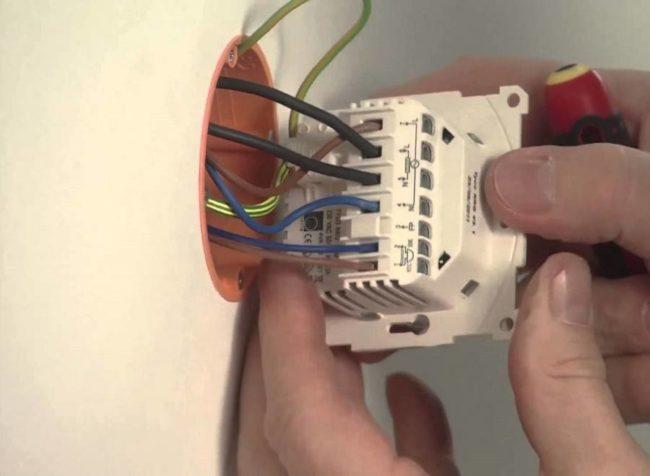
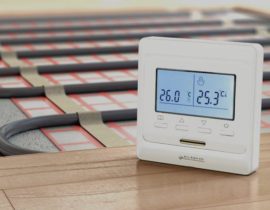
Mounting the thermostat control unit
The control unit (thermostat) is installed on the wall, in a pre-selected location. It is recommended to choose the mounting point so as to avoid laying too long wires.
The device itself is small. Most of them are designed for overhead installation, but there are also built-in designs. For them, you will have to make a nest in the wall. In addition, you will need to make a strobe in order to carry out a hidden supply of the power cable and connecting wires for the heating cable. You can’t just turn on a warm floor in a socket; for it, you need to connect a separate cable from the shield with its own RCD.
Strobes must be strictly horizontal and vertical. Inclined grooves cannot be made, this is contrary to the requirements of the PUE and SNiP. The horizontal strobe should be located no closer than 150 mm from the floor slab. All these works are dusty, give a lot of debris and concrete chips. That is why it must be done immediately, so that later it is not necessary to sweep concrete chips between the bends of the laid heating cable.
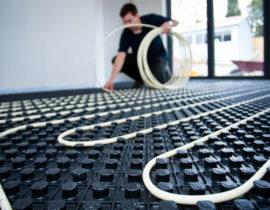
Laying a heat insulator
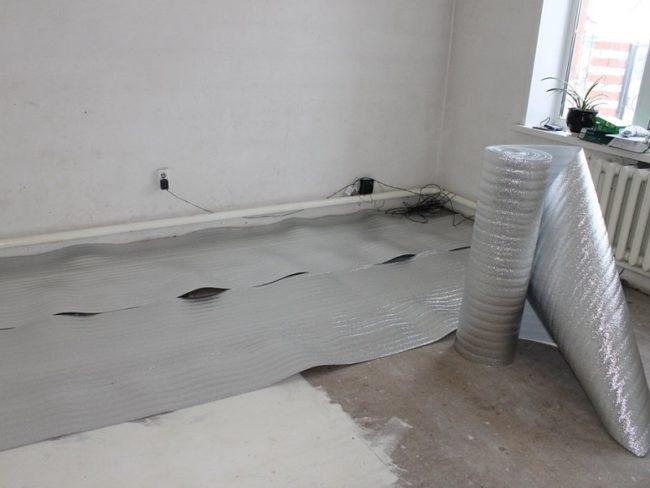
Laying thermal insulation
The next step is laying the heat insulator. It is necessary to purchase the required amount of material and lay it tightly on the surface of the subfloor. Many sources on the network are advised to purchase penofol. However, this is a dubious recommendation - penofol is good for wall insulation, but the operational loads on horizontal planes are excessive for it.The material will sag sooner or later, cracks and failed sections will appear on the screed.
The best option would be dense foam. It is stronger, more resistant to stress, has high performance.
Plates are placed on the floor tightly, without cracks and gaps. If they do appear, mounting foam is used for sealing. The minimum layer thickness is 15 mm. You can use a thicker insulator, but you cannot reduce the thickness - the heating cable will begin to give off thermal energy to the ceiling, which means unproductive losses.
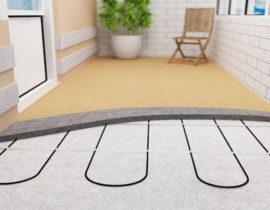
Heating cable laying
When the heat insulator is laid, proceed to the main stage of installation - laying the heating cable. The procedure can be performed in two ways:
fiberglass flooring
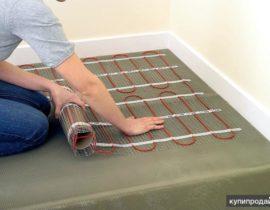
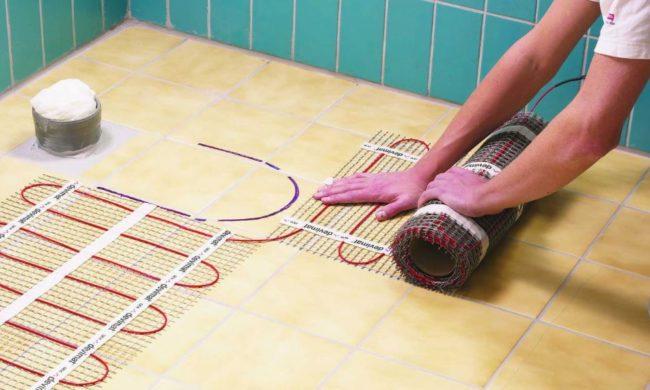
installation of prefabricated heating mats
The first method is usually used when installing a warm floor in rooms with an abundance of equipment (for example, in a bathroom), where there is simply nowhere to lay the mats. The second option is optimal when laying underfloor heating in fairly large rooms.
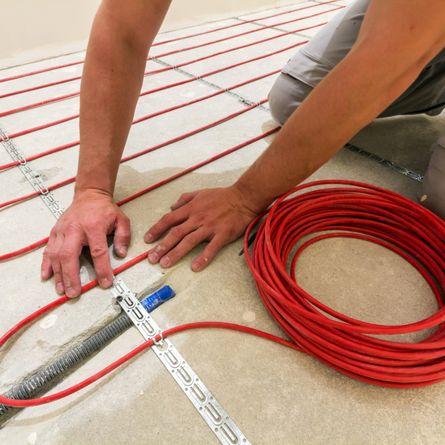
Laying heating mats is a simple procedure. The roll is unwound on the surface, periodically fixing its position with the help of double-sided tape. The distance between adjacent strips must be at least 10 cm. The laying direction is chosen arbitrarily, guided by the location of the control unit on the wall.
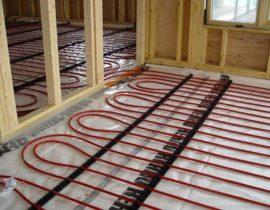
More difficult is the procedure for laying a resistive cable on the grid. Here you must first select a suitable installation scheme, take into account the configuration of the room and the length of the cable.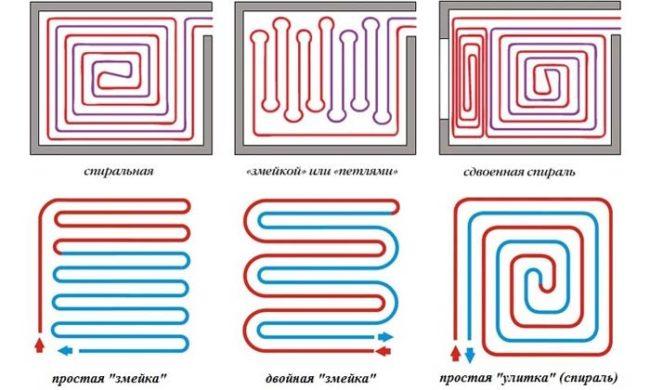
There are many laying schemes:
- spiral;
- snail;
- snake;
- zigzag, etc.
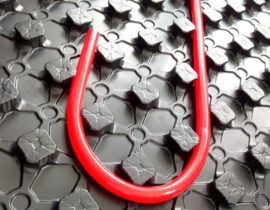
The cable must be laid in such a way that the distance between the turns is about 20-25 cm.the coils are laid on a fiberglass mesh and attached to it with nylon clamps.
In addition to the cable itself, it is necessary to install a temperature sensor. For it, a nest is cut out in the heat insulator, choosing a place so that the device is surrounded on all sides by turns of a resistive cable (not from the very edge). The sensor wire is attached to the heat insulator with pieces of adhesive tape, ensuring a fixed position of the sensor and connecting elements. Some manufacturers recommend placing the temperature sensor wire in a corrugated pipe, for which a nest is cut out in a heat insulator. This method will allow you to replace the temperature sensor in case of failure.
To connect a resistive cable, it is necessary to connect the power wires and the temperature sensor to the corresponding terminals. In order to perform the procedure without errors, you must first study the instructions. When the connection is completed, it is necessary to start heating and check the operation of the system in all modes. If any problems are found, they are corrected immediately.
Filling the screed
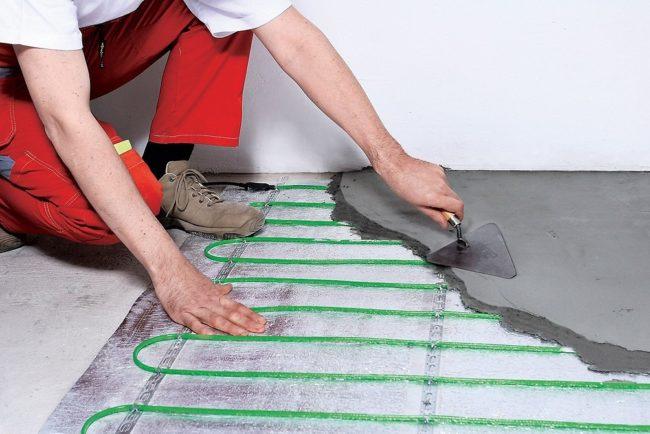
Features of pouring the screed
After laying and checking the performance of the heating cable, it is the turn of pouring the screed. Its thickness should be 40-50 mm (at least 30 mm above the top of the resistive cable). For pouring, it is recommended to use a ready-made screed mixture, which is purchased in a store and diluted in the right amount of water immediately before pouring. The ratio of the mixture and water is indicated on the package. The information should be carefully studied, as some specific conditions for the performance of work are possible.
Before pouring, a damper tape 5 mm thick is glued to the walls around the entire perimeter of the room. It is needed to compensate for thermal expansion of the screed.The mixture is poured onto the surface and carefully leveled, achieving the most even and horizontal plane.
You can turn on the electric floor heating only after the screed has completely solidified. It is generally accepted that the time is determined by the thickness of the screed - 7 days are allotted for each centimeter. That is, a 5 cm screed will dry for 35 days.
However, this is the time for complete drying. To perform further work, it is enough to wait for the screed to gain structural strength, which occurs approximately twice as fast. At the same time, it is recommended to hold the screed under the tile a little longer, since the coating is almost impervious to moisture and significantly slows down the process of concrete crystallization.
Laying tiles
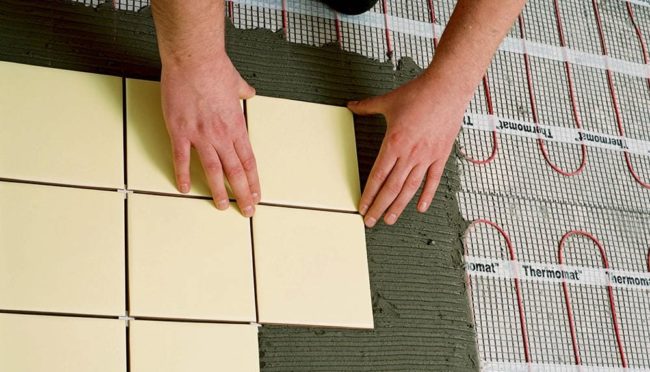
Laying tiles
Tiles are laid after the screed has dried. It is necessary to use floor (not wall) tiles with a thickness of 8 mm or more. The best option would be porcelain stoneware - it has a balanced set of working qualities and shows itself well in conjunction with a warm floor.
It is recommended to turn on the heating only after the tile adhesive has hardened and the joints have been grouted. This will allow the adhesive and grout to dry normally and gain maximum strength.
FAQ
This issue is considered from an operational point of view. If the house (apartment) is used for permanent residence, it is better to use a screed. But, if people appear in the room only occasionally, and there is no other way of heating, it is better to lay a warm floor under the tiles.The fact is that it can take up to 20 hours to warm up the screed, while when laying under the tiles, a comfortable temperature in the room will be reached in an hour.
To do this, consider the technical characteristics of the cable. If it is of medium or low power, you can lay it in tile adhesive. However, for powerful heaters, a screed layer of at least 5 cm is required.
These heaters differ only in power. Therefore, you can use any type, the main thing is not to make a mistake with the choice of the thickness of the screed layer.
The most popular is the usual sand-cement mixture. However, there is a more effective material - thermoconcrete. It is not yet so common, but the performance of such screeds is noticeably higher.
No, the underfloor heating system under the tiles can not work in a constant mode, but only periodically. The screed acts as a heat accumulator and cools rather slowly. It remains only to set the temperature range in which the heating will turn on and off.