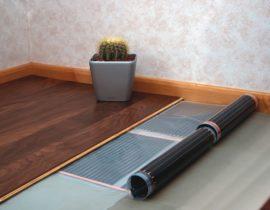
Installation of a film underfloor heating is simple and lacks serious repair procedures. All work can be done independently, you just need to study the technology of laying the canvas and learn the criteria for choosing components and related materials. Before starting installation, you should perform preparatory work and purchase all the necessary materials and tools.
Installation should be started only after checking the completeness of the underfloor heating and fully mastering the sequence of operations. This will allow you to get the best result, high-quality installation and performance of the film underfloor heating. Consider the features and procedure for laying an infrared film underfloor heating with your own hands.
Content
Features of film underfloor heating
Features of installation of film underfloor heating
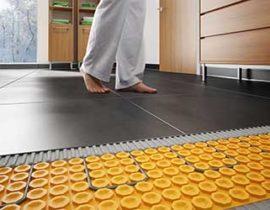
Film underfloor heating is an infrared emitter that is placed under the floor covering. It does not require separate screeds or flooring, you can lay the canvas on the existing subfloor. The main condition is only the presence of a flat surface without protruding sharp elements.
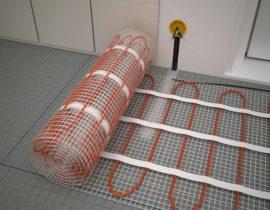
The infrared film floor is a cascade of emitters (carbon or graphite strips) connected by copper-silver linear elements.From above and below they are protected by an electrotechnical lavsan film, which provides complete protection against moisture, mechanical influences and other external factors. There are different types of underfloor heating film on sale, but they all have almost the same structure and differ only in power level.
 Film underfloor heating has a high degree of strength and resistance to abrasion. It is spread over the entire area of \u200b\u200bthe room, retreating from the walls by 10-20 cm. Often the canvas is not laid in the installation areas of cabinet furniture, beds and sofas, and other massive objects - it is not advisable to heat their lower surface. All strips are interconnected along the length (parallel connection), for which there are special contacts on the side edges of the film. It can be cut to length only in specially marked areas, and special contactors and copper stranded wires are used for connection.
Underfloor heating is controlled by a thermostat. It is connected to a power source, an underfloor heating mat and a temperature sensor. The device supports the set heating mode and allows you to configure it as you wish.
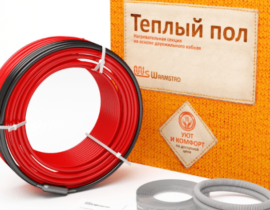
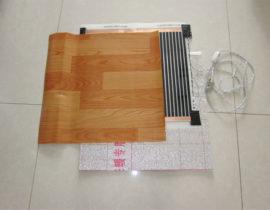
What is included in the kit
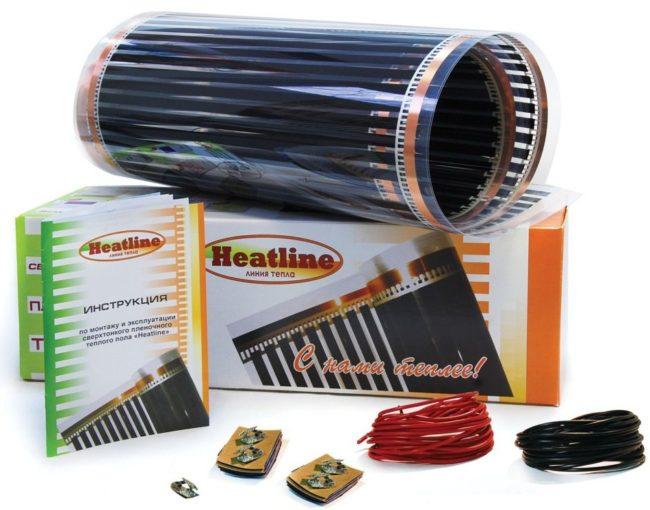
The composition of the film underfloor heating kit
Before starting work, it is necessary to purchase all the components necessary for the operation of the heating system. The kit should include:
- thermal insulation with a reflective surface;
- film warm floor;
- butyl rubber insulation, which is installed on the free ends of the strips and on the connecting elements;
- connection terminals;
- thermostat (each room needs its own device);
- temperature sensor.
In addition, it is necessary to prepare tools for cutting the film (scissors, a sharp shoe knife), as well as ordinary locksmith tools for connecting contacts and wires (pliers, screwdriver, stripping device). You will have to make a strobe in the wall for hidden connection of the thermostat. To do this, you need a wall chaser or a grinder with a diamond wheel. (this is not necessary, the wires can be laid in an overhead type cable channel).
Procedure
Installation of infrared film underfloor heating is a sequence of procedures that logically follow from one another. Trying to simplify the task and ignore any steps should not be, as the result of this may be the failure of the heating cloth. Consider the stages of creating a film underfloor heating:
Calculations
Before starting work, you need to calculate everything correctly
Before starting work, it is necessary to calculate the amount of materials and draw up a scheme for laying the radiating fabric. It is necessary to draw a plan of the room on a scale and indicate on it the order of furniture arrangement. All free space (indented from the walls by 10 cm) will be the laying area of the underfloor heating film.
It is better to lay thermal insulation and a protective film over the entire area of \u200b\u200bthe room in order to avoid the formation of steps and height differences. After the amount of all materials is known, they acquire a complete set of underfloor heating and proceed to the next step.
Installing a thermostat
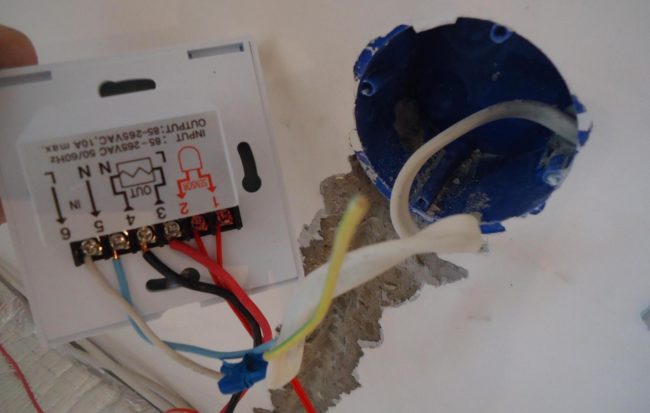
Mounting the thermostat
The installation of the thermostat is carried out immediately after the completion of the calculation part and the acquisition of all components. The location of the device is marked on the wall, after which the strobe line for the wires is marked.They make a vertical (not inclined) recess to the very floor, into which all the wires (power supply, connection of a warm floor, temperature sensor) should fit. Use a wall cutter or a grinder with a diamond disc. Alternatively, a perforator with a special nozzle is suitable.
This procedure is performed first of all so that later you do not have to clean the floor from dust and concrete chips. Many novice craftsmen make the mistake of first laying all the elements, and only after that proceeding to install the thermostat. This option is only suitable for open wiring (in a plastic cable channel).
The installation location of the thermostat is chosen so as to minimize the length of the connecting wires. The best option is to install on a wall, the plane of which is perpendicular to the direction of the underfloor heating strips.
Subfloor preparation
The floor surface must be cleaned and freed from the old coating. Be sure to align it, remove all protruding objects - old nails, screws, other hardware. If the floor is uneven, you will have to perform a series of actions and level the surface as much as possible. In the most difficult cases, a screed layer (or self-leveling floor) is poured, providing the most even and horizontal plane.
Laying thermal insulation
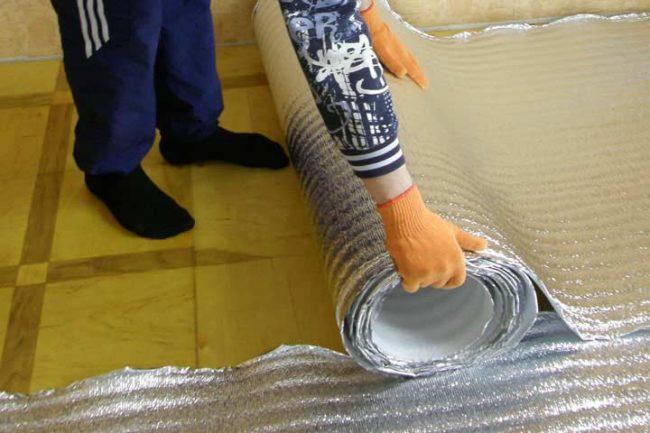
Features of laying thermal insulation
When the surface is ready, start laying the thermal insulation. The best option is considered to be a 3-mm Marpe polymer heat insulator that does not conduct electricity and is not capable of creating a short circuit. The insulation sheet is laid end-to-end, connecting all seams with adhesive tape.
This material is safe and easy to use - it is easy to make recesses for laying connecting wires in it. In addition, the material is quite dense, which eliminates excessive mobility of the floor covering after installation.
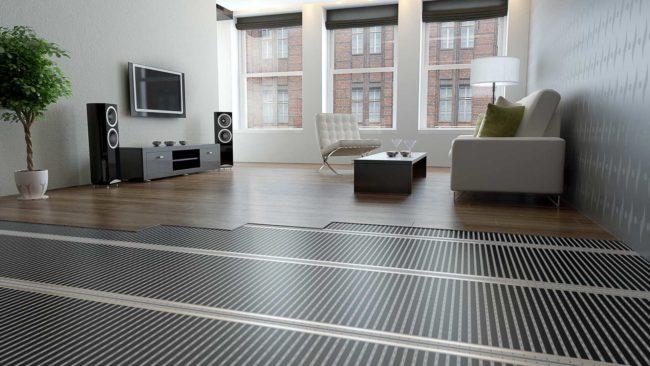
Installation of the film web
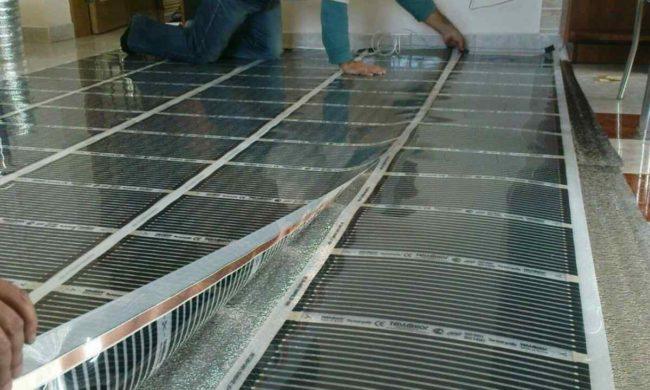
You can start laying the film web
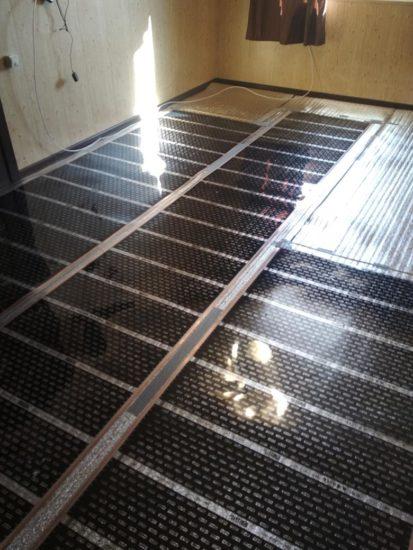
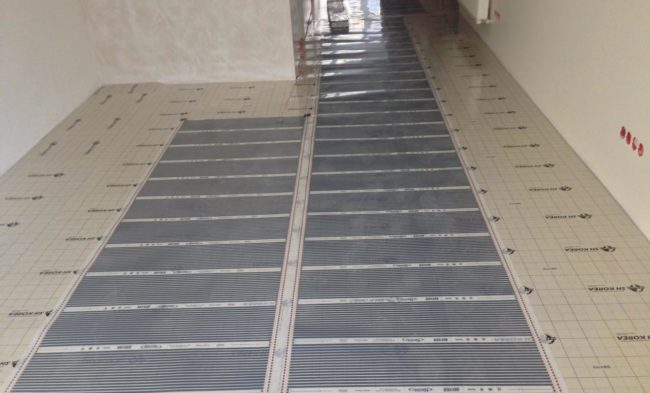
The film is laid with an indent from the walls of at least 10 cm. When cutting and placing the strips, they are guided by the diagram drawn up during the calculation part. At the same time, it is necessary to take into account the step of cutting the film - 250 mm. It is impossible to lay the strips closely; there must be a gap of at least 10 mm between them. It should be noted that the maximum length of the strip is 8 m. If the room is large, you will have to change the configuration of the web.
The strips are attached to the heat insulator with pieces of adhesive tape (it is impossible to fasten with a continuous strip). After that, clamps are installed at the ends of the strips to connect the web into a single radiating complex. In order for the clamps not to protrude above the plane of the warm floor, a nest is cut out in the heat insulator, into which the clamp will be completely recessed.
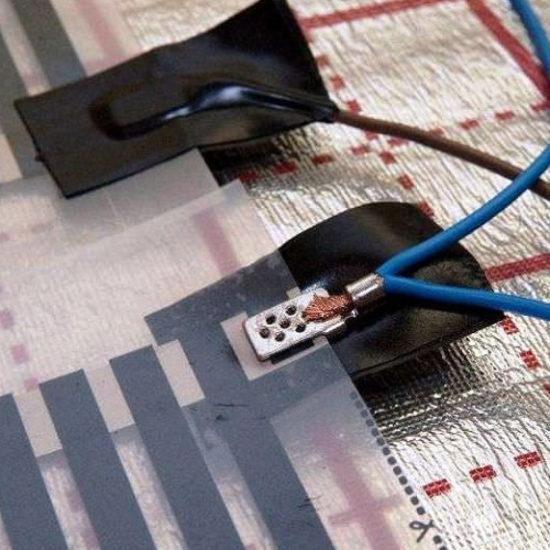 The parallel connection of the strips with copper wire is carried out so that the wiring can later be hidden under the plinth. All contacts are carefully crimped with pliers and an insulating layer of adhesive tape is installed. They also close the free end of the strips.
Attaching the temperature sensor is usually done by fixing it with adhesive tape in the center of the second section. The sensor is placed under the film, a nest is made under it in a heat insulator. The wires are brought out and connected to the thermostat.
The connection procedure must be carefully studied in the instructions for thermostat and the warmest floor.Different manufacturers may have their own connection methods, therefore, it is necessary to keep the instructions at hand and constantly refer to them in the course of work.
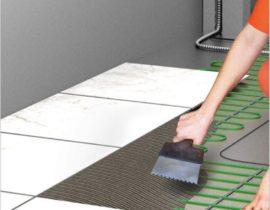
Floor covering
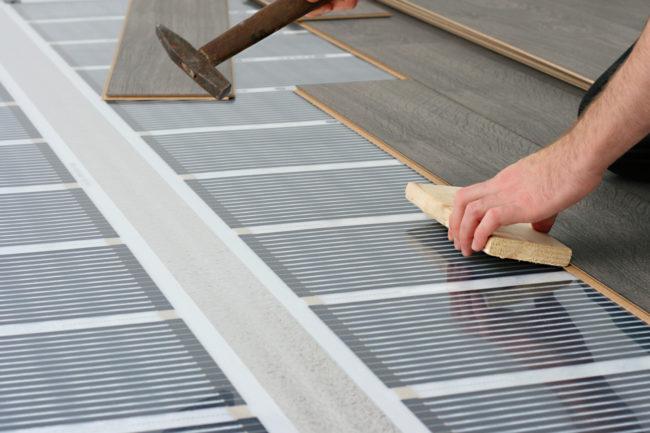
Floor covering
After completion of all work, a trial run of the underfloor heating should be performed. If no complaints or flaws are found, a protective layer is laid on the film (as a rule, this is a substrate for laminate or other floor coverings) and the installation of the floor covering is started. It is performed in the usual way, but taking into account the specifics of the underfloor heating. They use special types of coatings (there should be an icon on the reverse side - a snake with arrows, indicating readiness to work with warm floors).
FAQ
The level of electromagnetic radiation of an infrared warm floor is about 20 times lower than sanitary standards. Therefore, there is no reason for concern.
Most often, massive and voluminous pieces of furniture remain in their original places. If the rearrangement affects a large part of the area, it would be more correct to re-lay the warm floor with a change in the radiator configuration.
If we talk about the cost of the kit itself, then it all depends on the size of the room. When it comes to energy costs, the amount of energy consumption is comparable to an oil cooler. At the same time, the warm floor does not work constantly and can be much cheaper.
Aluminum foil or spraying can cause a short circuit of the web elements.This can happen after a long shutdown of heating, if condensation has appeared in the underfloor heating pie. In addition, with poor-quality contact insulation, direct breakdown through a metallized surface is possible, therefore, the best option is to use a polymer substrate without a foil layer.
It is recommended to lay a heat-insulating layer over the entire area of the room. firstly, this will eliminate the height difference, which affects the laying of the flooring. In addition, furniture may need to be rearranged during operation. If the heat insulator is laid over the entire area of the room, you only need to change the shape of the radiating sheet.
A distance of 1 m must be made from the fireplace. Other heating elements must also be indented, the size of which depends on the size and method of installation when