Underfloor heating is a popular way to organize space heating. It is chosen for reasons of economy, combined with high efficiency. Installing such heating equipment can reduce energy costs by an average of 25 - 30%. Additionally, you can save money if you install a warm water floor with your own hands.
Content
System Design Features
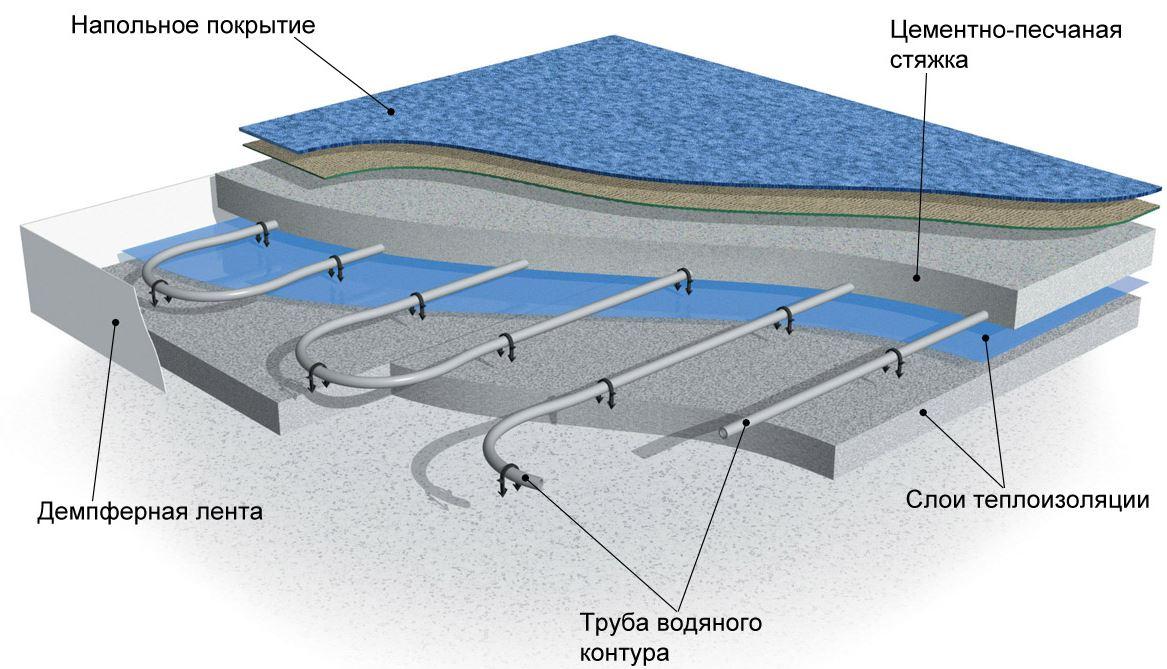
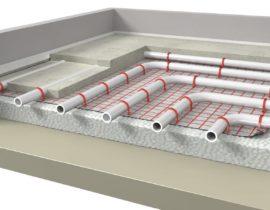
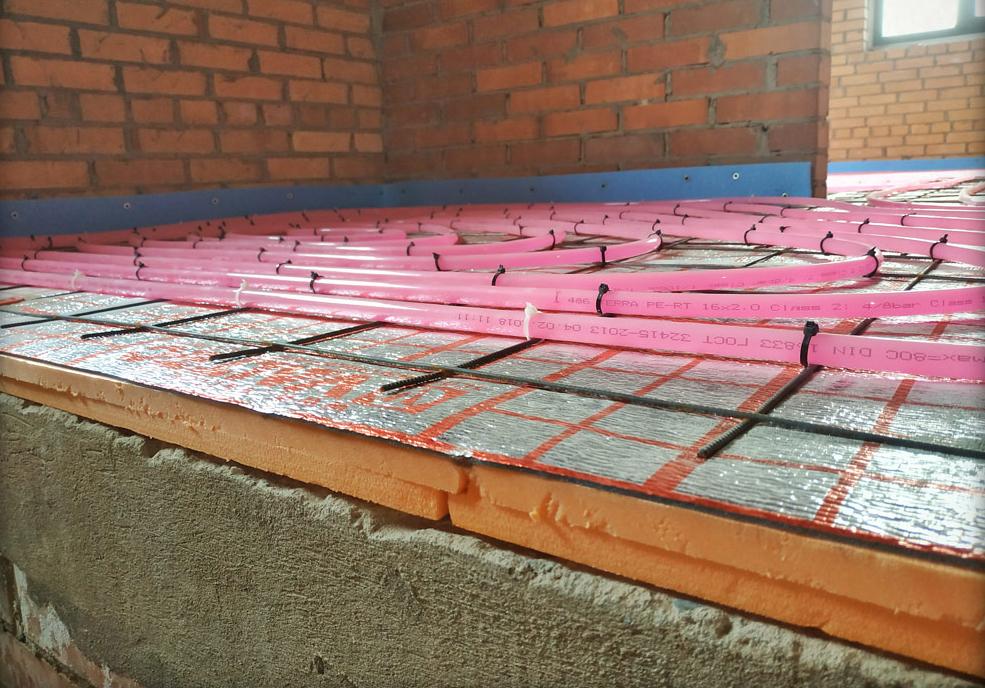
 Water heated floor is a complex structure consisting of the following layers:
- base;
- hydro and heat interlayer;
- reinforcing elements;
- pipes;
- concrete screed.
On the upper concrete screed, the finishing floor covering is laid.
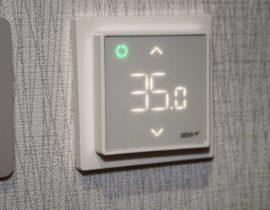
The coolant is supplied to the pipes from a gas boiler. It is also possible to connect pipes to a solid fuel boiler, but economically this option will be less profitable. Purified water or antifreeze is used as a heat carrier. In addition to pipes in the floor, radiators are installed in the room. But in most cases, with high-quality thermal insulation at home, they are rarely used.
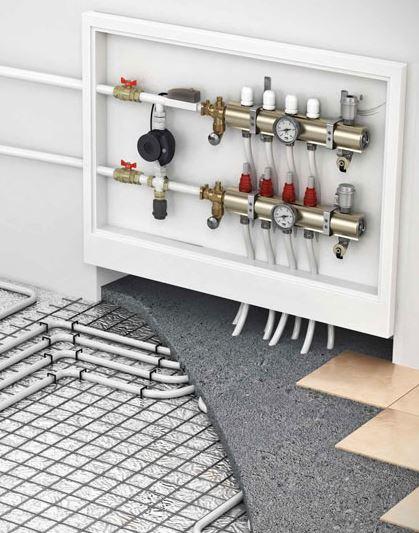
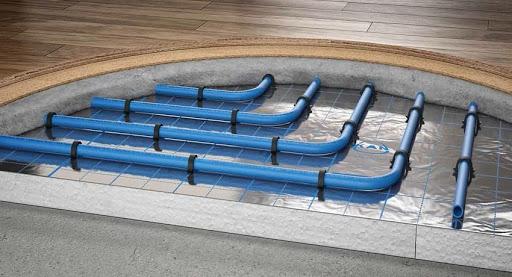
General scheme of a water heated floor
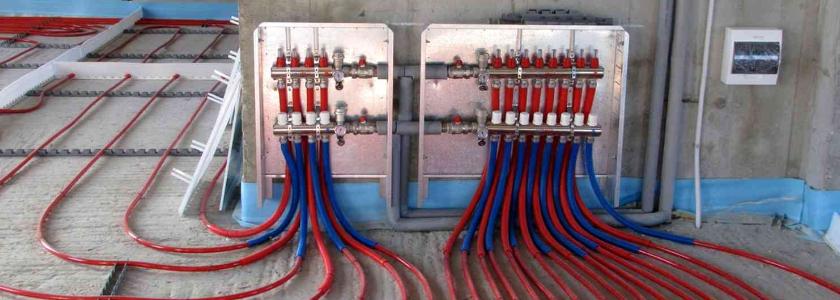
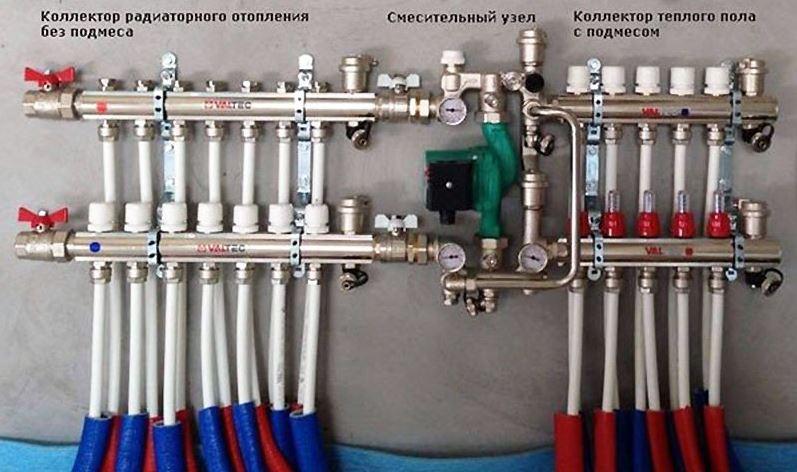
A distribution unit is connected to the boiler, which consists of a circulation pump, a mixing unit and a collector group. It carries out the "wiring" of various heating circuits and allows you to adjust their heating.
Advantages and disadvantages of the system
Water heated floor private households is rapidly gaining popularity. This is due to the advantages of this system:
- high energy efficiency;
- reliability;
- long, at least 50 years, service life.
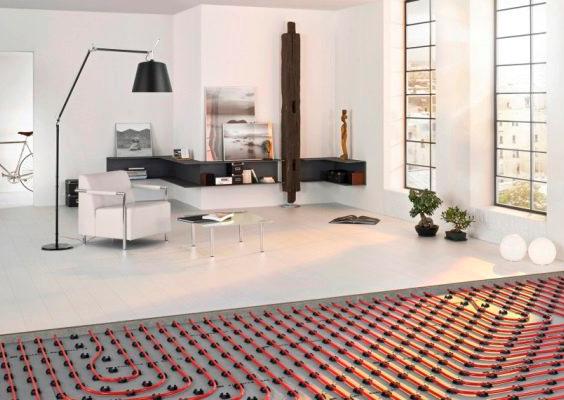
VTP can be the only source of heating in the room. This allows you to abandon the radiators and more efficiently use the space of the room. This moment is especially important in small rooms.
Along with the advantages, the system has a number of disadvantages. The most significant is the inability to use it in apartment buildings with central heating.
Theoretically, you can submit an application to the organization servicing the MKD, go through an endless cycle of checks and approvals and get approval for the installation of the system. In practice, a positive solution to this issue is rather an exception to general practice.
Illegal insertion into the heating system is an administrative offense for which a fine will be issued and an order will be received to return everything to its original position.
The refusal of the Criminal Code to install a warm floor in an MKD is quite justified. The pressure and temperature in the centralized heating system is high, so even the slightest mistake during installation can result in the most unpleasant consequences for apartment owners and neighbors below. In the event of an accident, the upstairs neighbors will also be left without heating for a long time.In this regard, in apartment buildings it is worth stopping the choice on installing an electric floor heating.
When choosing a solid floor, it is important that the house has good thermal insulation.
The disadvantages also include the high cost of equipment and the duration of the installation process. It takes at least 30 days to lay all layers of the pie.
Laying a water-heated floor: step by step instructions
The process of arranging a water-heated floor is both complex and simple. An important condition is the observance of technology at all stages of installation, from the preparation of the base to the choice of material for the finishing coating.
Project development

The ECP design stage begins with deciding whether the system will be the only source of heat or whether radiators will be additionally installed in the premises. If the installation of batteries is not expected, all circuits are connected directly to the boiler, without installing a distribution unit. With this scheme, the boiler is set to a temperature of up to 45 degrees, and the coolant flows directly into the pipes.
When combining pipes in the floor and radiators, the installation of a mixing unit is mandatory. For the batteries to work, the coolant must be heated to 70 degrees, and for a warm floor this is too high a temperature. In the mixing unit, the coolant will cool down before being fed into the pipes.
Before starting the installation, a detailed project for the placement of collector units and mixers is drawn up. Masters recommend placing them in the center of the entire system so that the length of the pipes in all rooms is the same. This will help you make precise adjustments.
The next design stage is a sketch of the pipe laying scheme. There are 2 options:
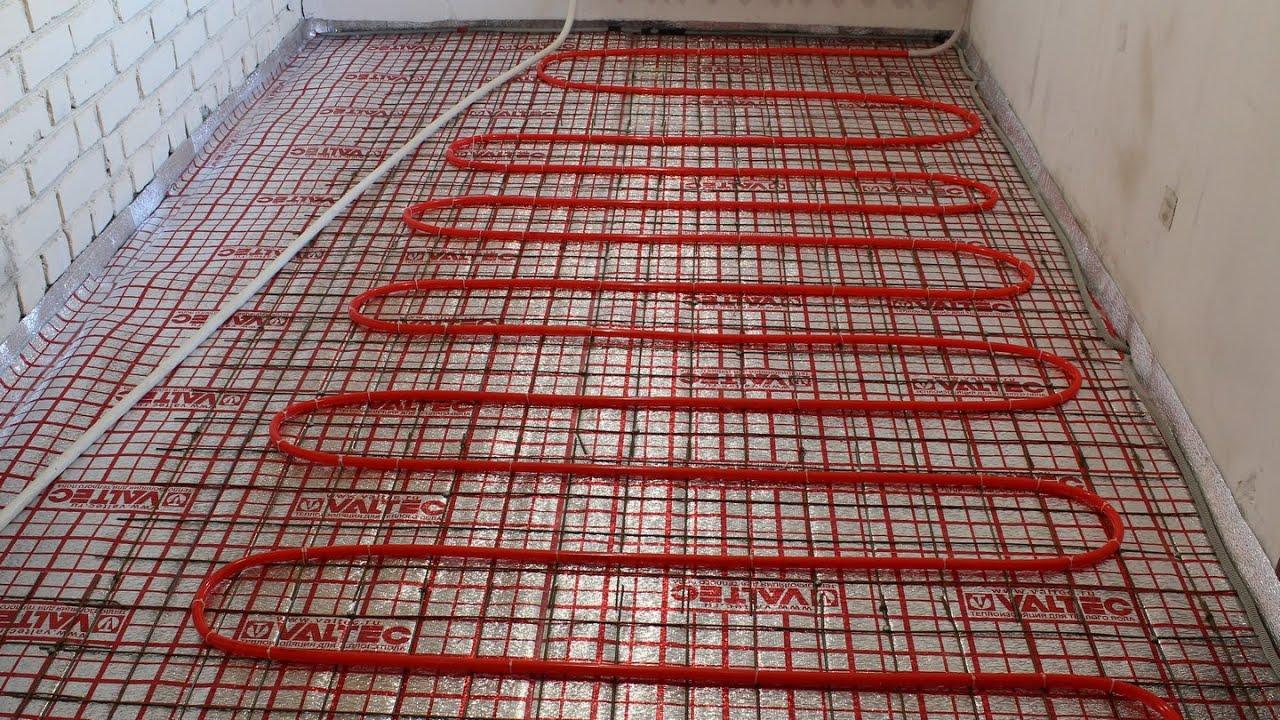
- For small rooms (less than 10 sq/m) - parallel laying with a "snake" in increments of 20 - 30 cm.
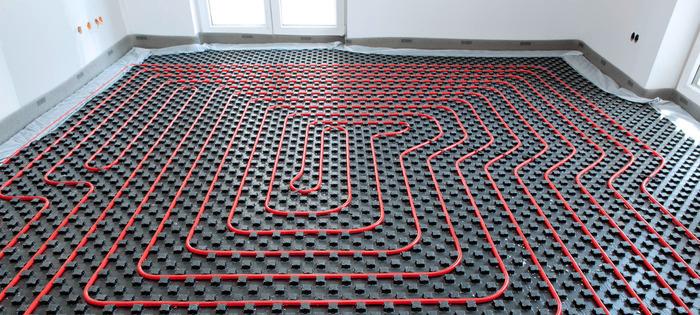
- In large areas (from 15 sq/m) - spiral. This method is more laborious, but provides uniform heating of pipes over the entire area. Snake laying in large rooms can lead to pipe breakage due to excessive bending and uneven heating in different corners of the room.

Spiral laying option
For rooms from 10 to 15 square meters, both laying patterns. The pitch between the pipes can be increased up to 35 cm if additional radiators are to be installed.
If the room is large, divide it into several circuits. They must have the same size, the difference is allowed within 15 meters. In the presence of good thermal insulation, the standard step is 15 cm.
The standard formula for determining the size of the contour:
- the heated area in squares is divided by the laying step in meters.
- the size of the curls and the distance to the collector are added to the result.
How to choose a collector and pipes
More often, users choose inexpensive collector models. But if there is no need for savings, then it is better to buy a model with servo drives and mixing units. Such a device allows you to automatically adjust the degree of heating of the water entering the pipes
A mandatory attribute of the collector is an air vent valve and a drain cock for emergencies. In order for the device to work normally, it is possible to adjust all valves once according to the required parameters.
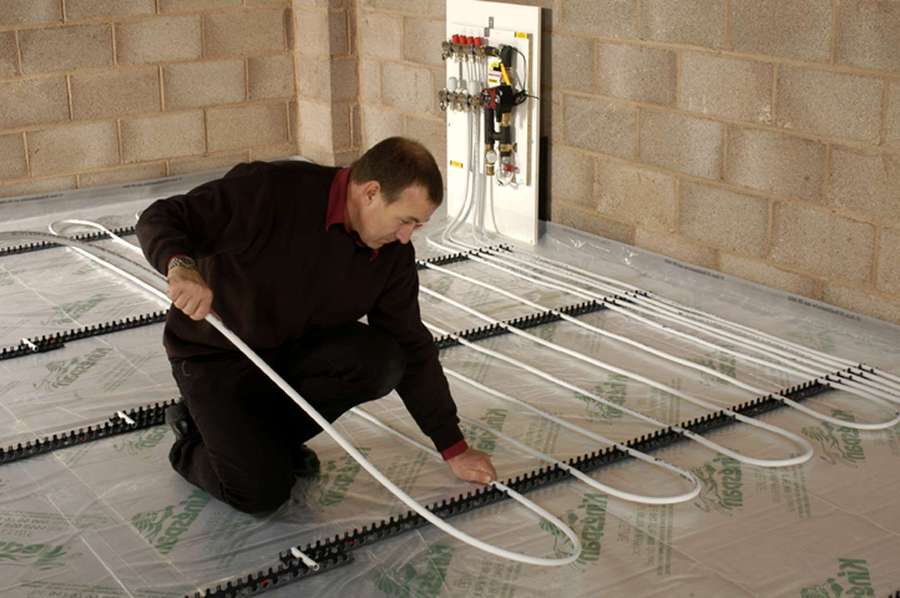
You will also need a cabinet to install the collector. The best option is to use ready-made cabinets that are factory assembled and tested.
In this case, you only need to select the required number of collector groups, the power of the circulation pump and the mixing unit, if necessary. The cabinet is mounted into the wall and a heating circuit from a common riser and circulation circuits of the warm floor are connected to it.
The standard option is to install the cabinet in the wall
The only drawback of using a ready-made collector cabinet is its relatively high price, but when it comes to increased reliability and safety, it makes no sense to save.
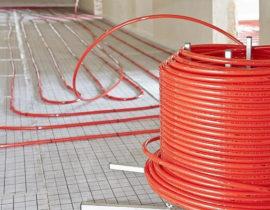
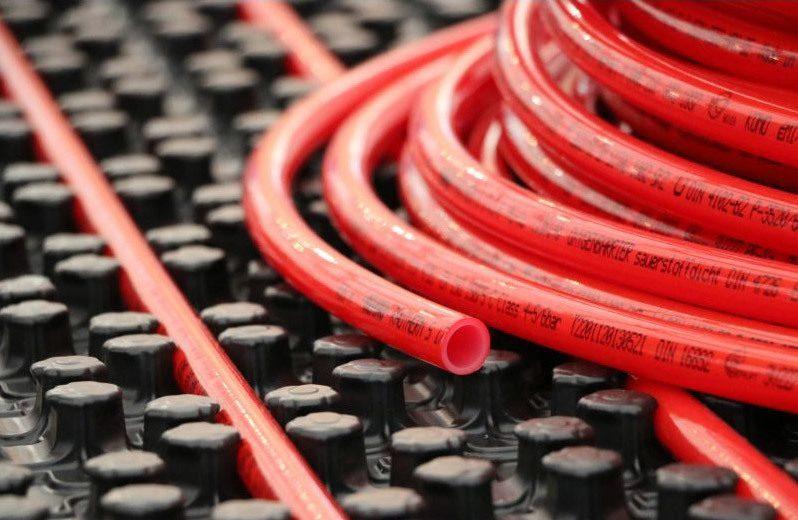
For a rough estimate of the required number of pipes, one can proceed from the calculation of 5 linear meters of pipe per 1 square meter of floor. Optimal in terms of price and quality are polymer pipes made of cross-linked polyethylene. They are lightweight, unpretentious in installation and have a service life of at least 50 years. Metal ones last longer, but they are more expensive and more difficult to install.
Foundation preparation
The area for laying pipes must be perfectly flat, with a height difference at the location of one circuit of not more than 6 mm. A concrete screed is used as the base. A layer of insulation is laid on it.
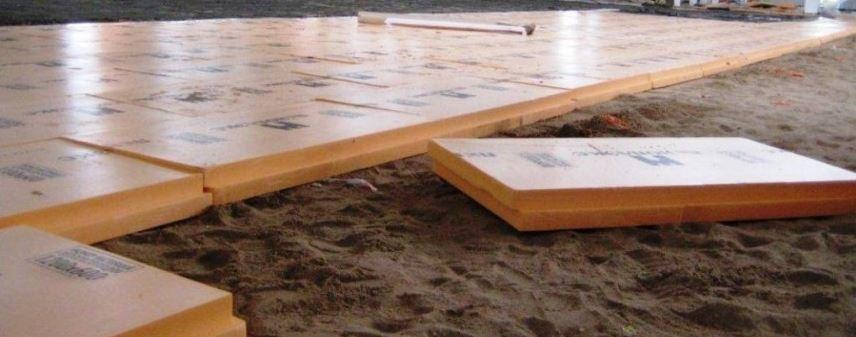
Extruded polystyrene foam is often used for the base.
Experts advise using extruded polystyrene foam - the degree of thermal conductivity is low and high mechanical strength. This material is not exposed to moisture and does not absorb it. This type of gasket is produced in slabs 50 by 1000 mm or 600 by 1250 mm in size, and 20, 30, 50, 80 and 100 mm thick. The product is equipped with snap-in grooves, this will allow you to make a strong docking.
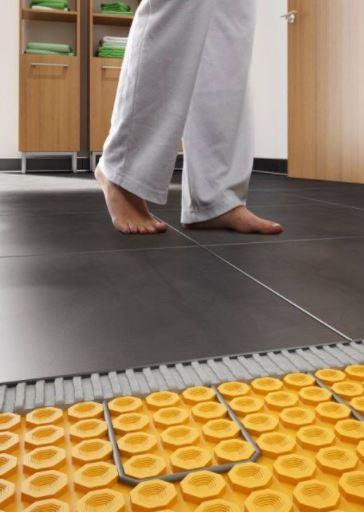
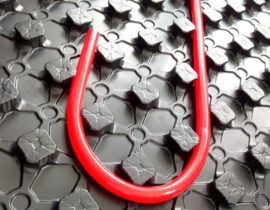
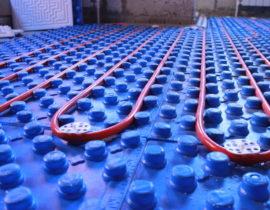
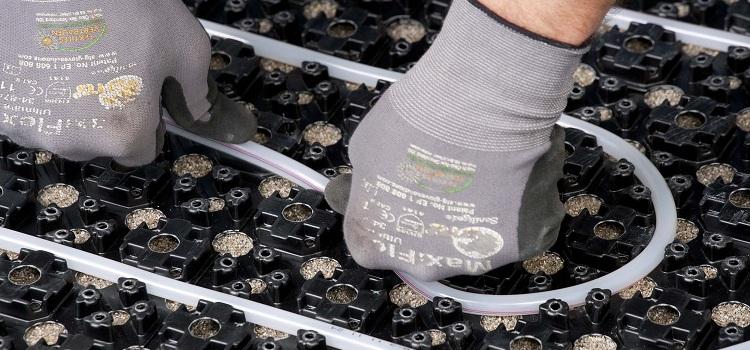
Profile polystyrene mats are highly plastic, equipped with special bosses, pipes are laid between them.Also, the bosses serve as a retainer for the heating elements. In them, the contour is attached in increments of 50 mm. The use of mats greatly simplifies the installation process, but at a cost they are higher than polystyrene foam insulation. The thickness of the plates is from 1 to 3 mm, and they are 500 by 1000 or 600 by 1200 mm in size.
If there is a heated room under the floor, a layer 3-5 mm thick is sufficient. If there is a cold room below, the layer is increased to at least 20 mm. If this is the first floor and there is soil below the floor, the insulation layer should be 70-80 mm.
Along the perimeter of the room, the walls are glued with damper tape. It serves to compensate for thermal expansion of the screed. If the expansion is not taken into account, the screed may crack or swell. The height of the tape usually does not exceed 10 cm. It must be glued to the wall. After the bay, the screeds are cut off.
After laying the thermal insulation, draw the contours of the pipe laying on the surface. This will facilitate the installation process and help identify design errors in advance.
Pipe installation
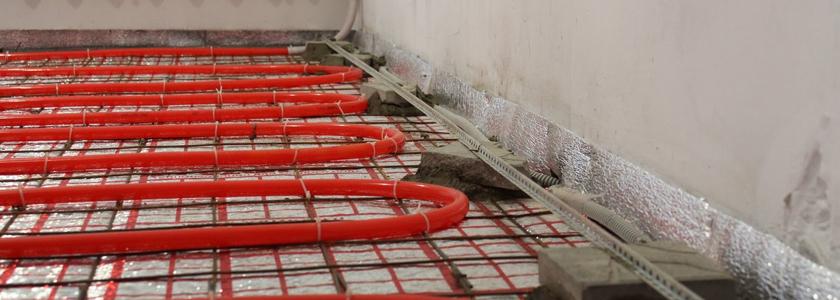
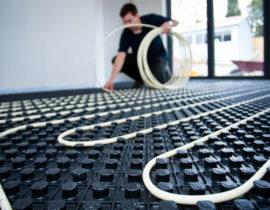
The most acceptable base for laying pipes is a special mounting mesh made of metal or plastic with 100 mm cells. It is spread on thermal insulation, pipes are pulled from above, along predetermined contours, and fixed with wire or plastic clamps.
The advantage of using mesh is additional reinforcement of the base for laying pipes. The disadvantages include the complexity of the installation process. But the end result offsets this shortcoming.
Pipes can also be laid on polystyrene mats. They are specially designed for water floor heating. Mats are a kind of rugs with protrusions on the front side, in which pipes are fixed.Economically, this is a more expensive method, but installation on mats is much easier and faster. In addition, polystyrene acts as an additional insulation.
During installation, try not to step on the pipes or drop heavy objects on them. Even microscopic damage can cause leakage when pressurized. Cut the pipe only after it has fully rested on the floor and returned to the manifold. Don't skimp on stretching the material. Saving in the future will lead to the formation of leaks.
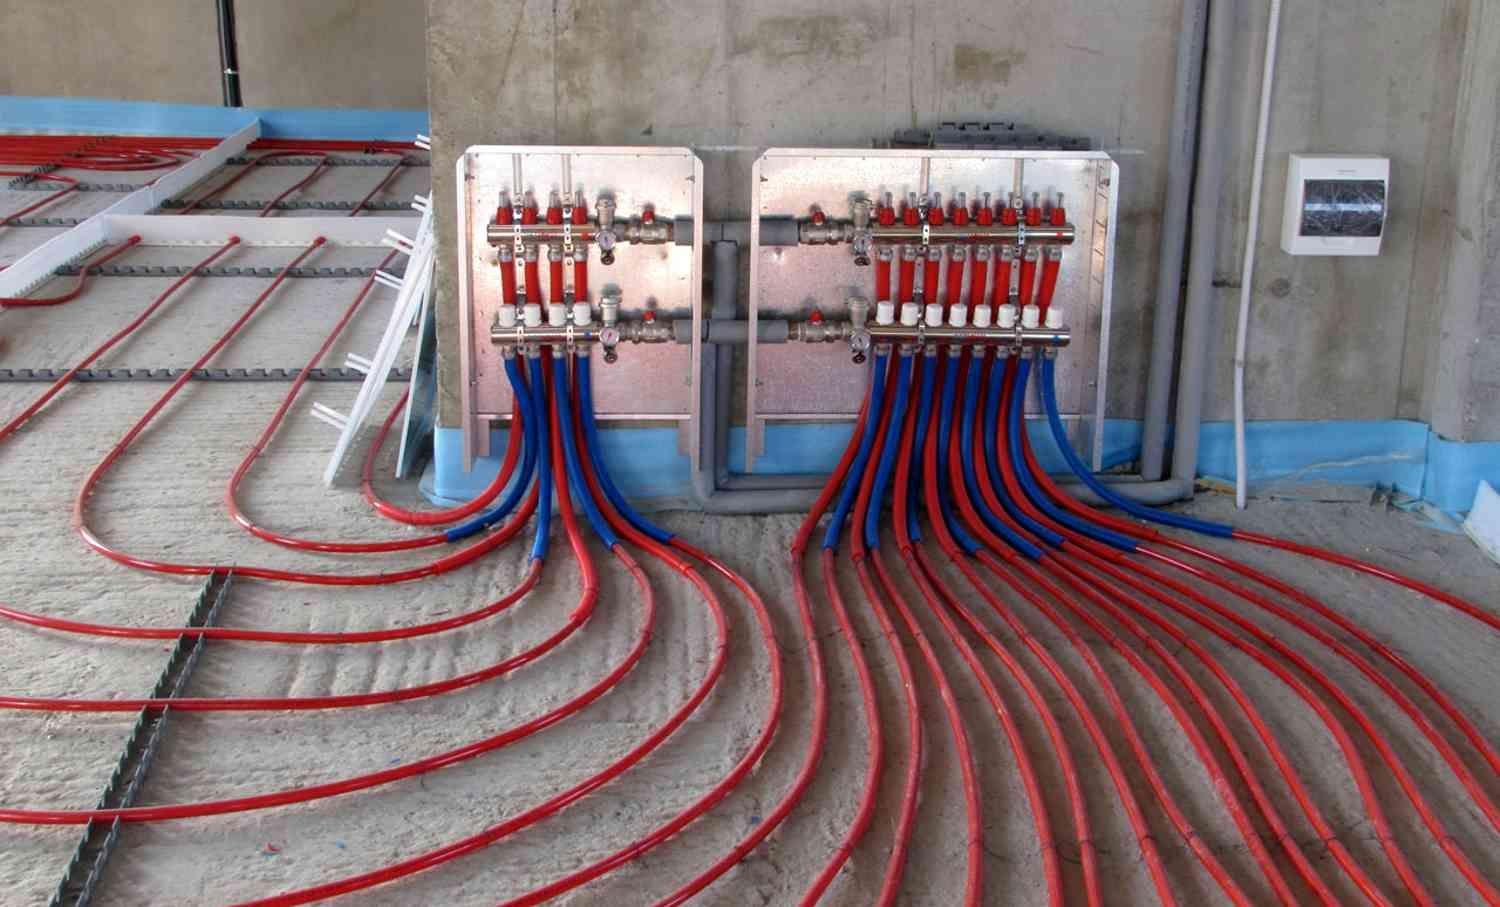
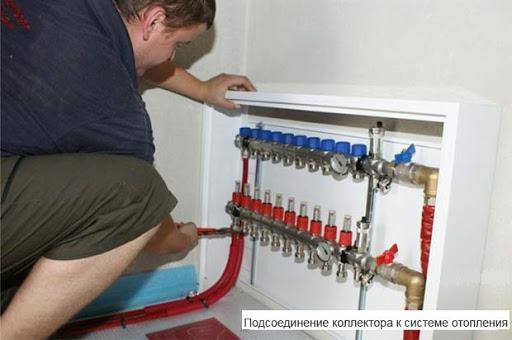
Connection
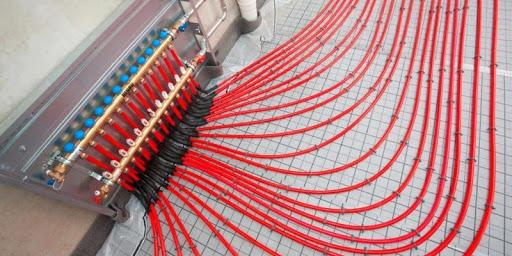
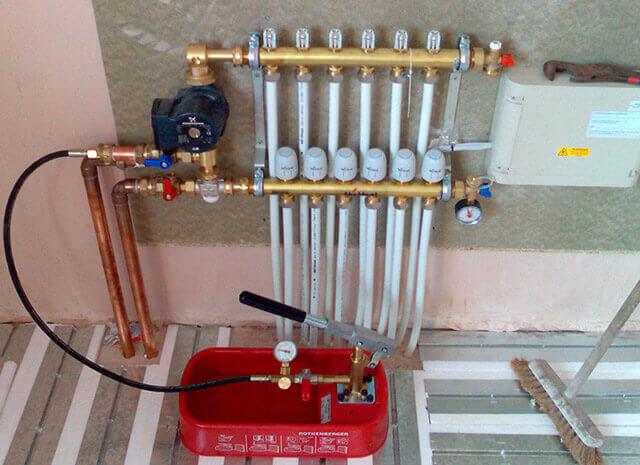
The most common way to connect a water heated floor is a distribution unit. Its purpose is to increase pressure, implement temperature adjustment and uniform supply of coolant to several circuits. There are different devices - with manual or automatic adjustment.
Connecting the system consists in connecting both ends of the pipe to the manifold wiring with clamp fittings. With the help of a collector, the warm floor is connected to the main heating system or to a specially equipped boiler.
When choosing a heating boiler, it is important to take into account its power, it should equalize the power of all sections of the floor with a small margin. The boilers have an inlet and outlet for water, which are equipped with shut-off valves.
Also, for the circulation of the coolant, it is required to equip the pump. Most often it is included with the boiler. But if you plan to heat a large area, you will need to install an additional pump.
After connecting the pipes, it is possible to fill the system with coolant. The collector responsible for supplying the coolant is equipped with a ball valve, water is connected to it.And a pressure test pump is connected to one of the outlets connected to the underfloor heating circuit.
The process of filling the system is as follows:
- Close all channels except for one. Open all air vents at the same time.
- Supply water. Use the drain hose to monitor the degree of its purity and the release of air from the system.
- When all the air is out and the water is completely clean, close the drain cock.
- Then close the filled system. If there are several circuits, do the actions with each.
- After flushing and filling all circuits, close the tap.
Hydraulic tests
Concrete can only be poured after a trial run of the system. Fill the pipes with coolant at elevated pressure and maximum temperature. Make sure all pipes are filled and heated evenly.
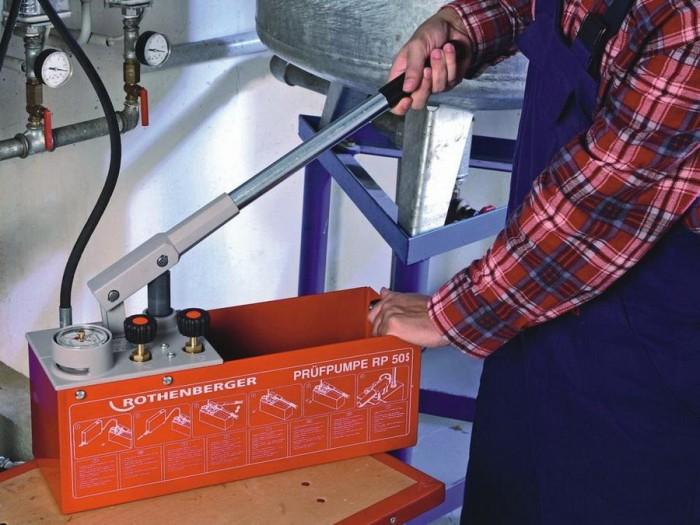
The next step is pressing. To carry it out, you need a special pump.
Procedure:
- Increase the pressure to 5 bar and wait until it drops to 3 bar.
- Then increase again to 5 bar. Repeat the cycle 4-5 times. At the same time, inspect the circuits for leaks.
- At a pressure of 2 bar, leave the system running for 12 hours. If the pressure does not drop, proceed to the final tests:
- Set the maximum temperature and turn on the circulation pumps to reach the maximum pressure. If there are radiators in the system, set the mixing unit controls to working levels.
- Wait for the entire system to warm up, including the batteries (if any).
- Make sure that all circuits and radiators are heated evenly.
- Leave the heating on for a day. If the status does not change, you can turn off the boiler and start concreting pipes.
When the pressure rises in the pipes, they try to straighten up. If their fixation is not made firmly, then unpleasant surprises will arise during the test. After pouring the pipes with concrete, this can not be feared.
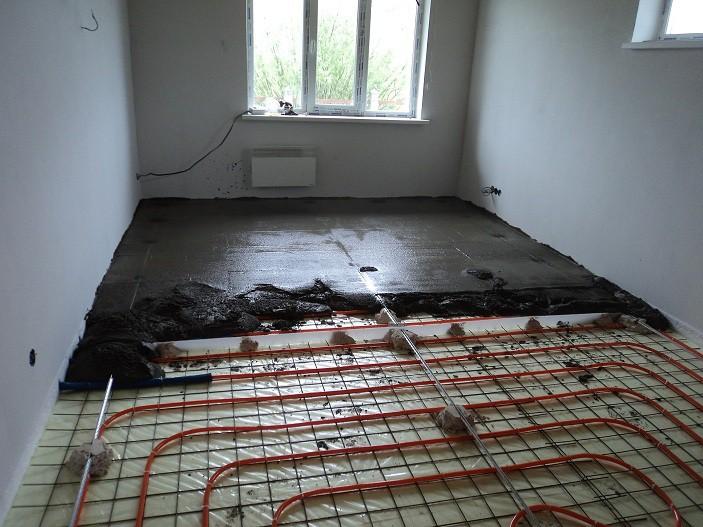
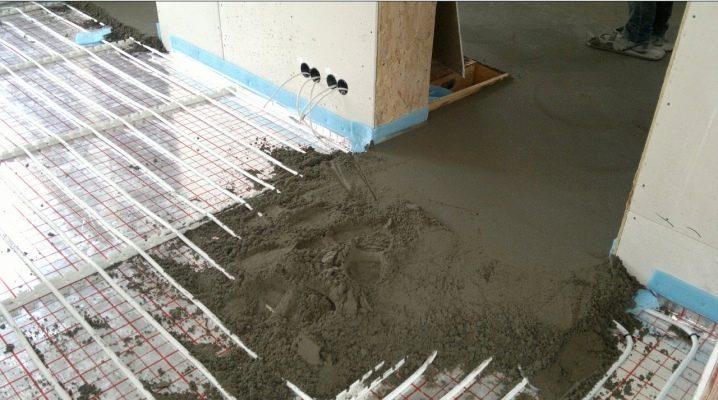
Bay screed
You can concrete pipes that have cooled down to 25 degrees. Use a special mixture to prepare the solution. It has the best coefficient of thermal conductivity and will provide uniform heating. The thickness of the concrete layer for living rooms is 20 mm, in utility rooms - 40 mm.
There are special requirements for the screed solution. The surface will be subjected to mechanical and thermal stress, which can lead to deformation. Therefore, plasticizers and fiber are added to the cement-sand mixture.
Plasticizers will give the solution elasticity and increase mobility. This is important for the free penetration of concrete between the pipes. Fiber will increase the strength of the base and, in addition, eliminate the formation of cracks in the screed. For warm water floors, fiber made of polypropylene and basalt is intended. The standard rate of fiber per square meter is 500 grams.
The solution is kneaded mechanically. Before pouring pipes, the surface is cleaned of dust. The pouring of the concrete screed must be carried out in one step, without interruptions in work. 4 hours after concreting, cover the floor with a film to uniformly set the mortar and prevent premature evaporation of moisture.
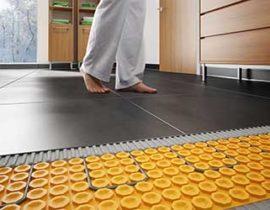
Finish coat
As a finishing material for a water-heated floor, it is recommended to use porcelain stoneware or tiles. Laminate, linoleum or carpet is acceptable only if there is a corresponding marking on the packaging.
Installation errors and their consequences
Strict adherence to the recommendations of specialists when laying a warm floor on their own is an important condition for the successful functioning of the system.
Most often, beginners make the following mistakes:
 Height difference between the beginning and end of the pipe. If it exceeds half the diameter of the pipes, air pockets will form inside. As a result, the circulation of the coolant will be difficult and the quality of heating will decrease. To prevent this from happening, it is important to place the pipes strictly parallel to the floor.
- Connection of pipes within the same circuit. Mounting a circuit of 2 pipe sections and pouring it with concrete is not worth it. This may lead to leakage. Each circuit must consist of a whole piece of pipe. Connections must only be with a manifold group.
- Neglect of hydraulic test. The control start of the system at maximum pressure must be carried out before pouring the pipes with concrete. Otherwise, it will be almost impossible to find a leak, if any.
- Pouring screed on empty pipes. Concrete pushes through the material of the pipes and the circulation of the coolant will subsequently be difficult.
- Premature start of heating. Heating the pipes until the concrete sets the fortress will lead to cracking of the screed.
Questions about the installation and operation of underfloor heating
If we are talking about VT.COMBI (COMBIMIX), then this arrangement of the mixing unit is acceptable.
No. The solution is kneaded only from sand, cement and plasticizer.
Your doubts are correct. The corrugated casing should only be in places where the pipes are connected to the manifold and at the intersections of the damper joint in the screed.
In the VT.COMBI (COMBIMIX) pumping and mixing unit, two flows are mixed - supply from the boiler and "return" from the underfloor heating. Use the balancing valve to set the correct ratio. Most likely, too much cooled coolant is supplied.
Subject to all recommendations for installation and the right choice of materials, a water-heated floor will function perfectly for a long time and will make the room cozy and comfortable.
Video tips for installing a warm water floor


