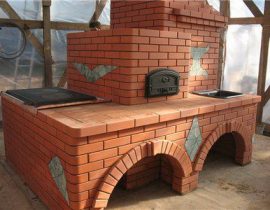
Despite the technological progress in the heating equipment industry, home stoves are still very popular. They allow you to heat houses in areas remote from civilization. Where electricity and gasification is not provided. The construction of any furnace begins with the construction of the foundation. We will talk about how to make the foundation for the oven correctly in this article.
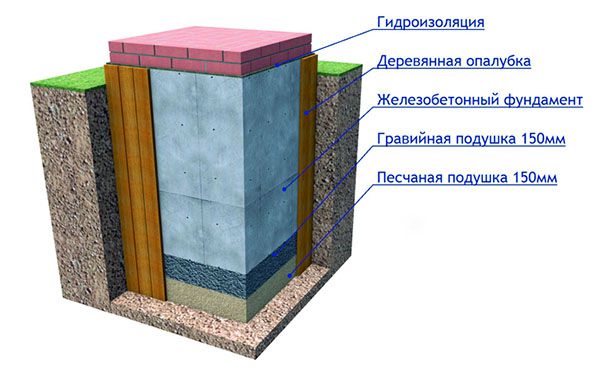
The foundation for the furnace in the context
Making a furnace, of course, requires a lot of work, experience and knowledge of technology. Thinking about building a stove in the country and building a foundation, you can, of course, hire specialists. But in fact, the arrangement of the foundation for the furnace can be easily done on your own.
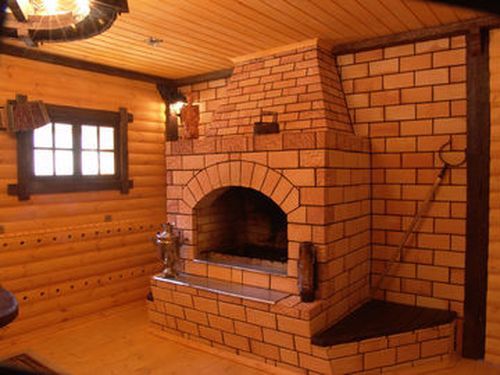
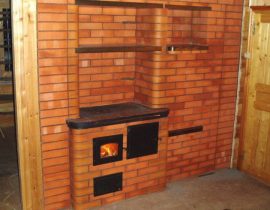
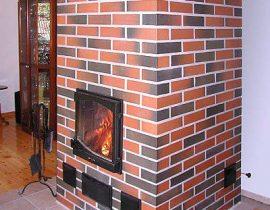
oven for home
This business is not so costly and complicated, but the pleasure of a self-built structure will more than pay for all the trouble.
Content
- Basic rules for laying the foundation
- Foundation types
- Tools and materials for building a foundation
- We begin to pour the foundation for a brick oven with our own hands
- We make the foundation for a metal furnace with our own hands
- Option to create a rubble concrete foundation for a furnace
- Installation of a pile foundation with a slab
- Video: How to make a foundation for the oven
Basic rules for laying the foundation
Whatever version of the foundation for the furnace you choose, and whatever size you decide to implement, there are a number of basic rules that you should not ignore:
- The foundation for the stove must be made independent, in no way connected with the foundation of the whole house. Why? The fact is that during operation, the house can shrink a little. When descending, he should not pull the furnace along with him, as this can lead to its deformation, deterioration of traction and violation of technical properties.
The foundation for the furnace is separated from the general
In some cases, it is possible to partially combine two bases by connecting them with one wall.
- If both foundations (for the house and for the stove) are located close to each other, a 50 mm thick sand backfill must be made between them.
- If the foundation for a common house is strip, then the base for the stove should in no case come into contact with this foundation with the walls.
- When choosing a place for a furnace and, accordingly, a foundation, one should not only rely on wishes, but also on such factors as: the location of doors, windows and roof beams. The location of the chimney should be taken into account so that the pipe does not fall into ceilings and beams during the construction of the furnace.
- When calculating the size and depth of the foundation, be sure to take into account the severity of the floors and the weight of the stove along with the chimney.
The dimensions of the foundation are influenced not only by the dimensions of the furnace, but also by the density of the soil on which it is built. The main load in the furnace is usually created by the chimney, therefore, when designing the furnace, it is necessary to carry it closer to the center of the base. This will help to avoid asymmetric loading and premature improper shrinkage of the furnace.
Sometimes, when designing a very large and massive stove with a stone chimney, stove-makers make a separate base for the chimney.
Also, the choice of foundation depends on the material of the furnace. For a metal structure and a stone one, it will be different in depth, the entire mass of a brick oven is at least 400-500 kg, while a metal oven weighs about 150 kg.
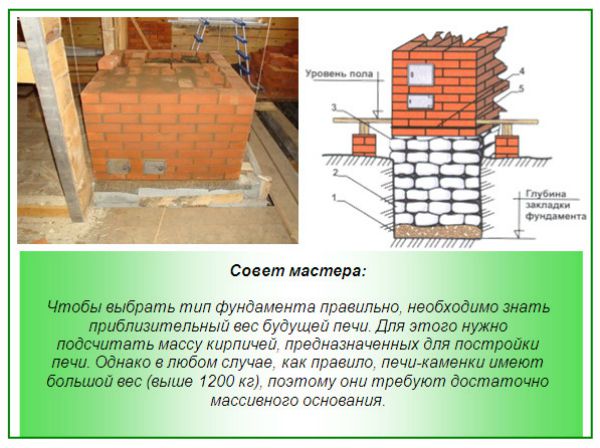
How to calculate the weight of a stone oven
In principle, for a small metal furnace, it is possible not to equip the foundation separately, especially if it is being built in a house that stands on a tiled monolithic base.
Important! Before equipping the foundation for the furnace, it is necessary to determine the type of soil on the site.
The density of the soil and the degree of its freezing play an important role in determining the size of the foundation. The climate in Russia is accompanied by rather severe winters almost throughout its entire territory. Therefore, the foundation for the furnace should be laid to the entire depth of soil freezing.
Soil type is also important.

Soil types
It is of three types:
- clay;
- sandy loam;
- loam.
In places where a large number of rivers, reservoirs, lakes prevail, as a rule, sedimentary types of soil are found. Here, it is better to entrust the construction of the foundation for the furnace and the house to professionals, so the calculations of the point of passage of water should be carried out.
In Central Russia, a very common type of soil is loam, which is a mixture of sand and clay. Clay predominates in it, so such soil is less plastic.

Loam
The construction of a foundation on such soil is usually associated with troubles and additional problems, since in the dry state the loam is crumbly, when frost sets in it begins to “swell”, and with a large amount of sediment it becomes viscous.
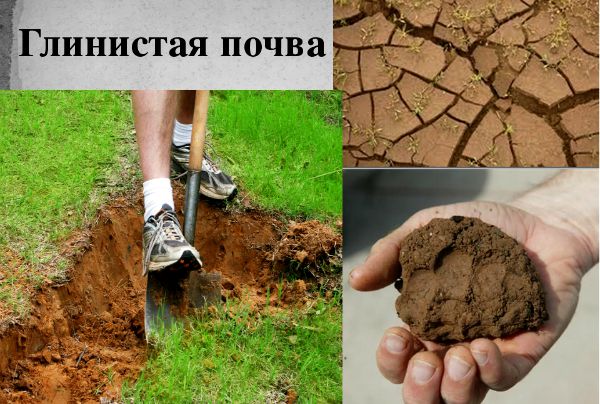
clay soil
Therefore, in this case, the depth of laying the foundation for the furnace must be made above the freezing point.
But in forest areas, on the contrary, it is necessary to lay the foundation for the furnace below the freezing point of the soil and equip the foundation on a sand cushion, 60-90 cm thick.
One of the most reliable types of soil for building a foundation is gravelly and rocky, but, unfortunately, sometimes you have to build a house and a stove on an unstable one. Proper construction of a reliable foundation will help level this fact.
Foundation types
There are three main types of foundation for a brick oven:
- cement;
- rubble concrete;
- on piles.
What is their main difference, and which foundation is better to choose for the furnace?
We will consider in detail several options for the construction, which will allow you to choose the best option for yourself.
Many are also interested in the question, but how deep is it worth digging a foundation pit?
It all depends on the density of the soil and the weight of the heating structure, but you should not overdo it either. The best option is a pit depth of 80-100 cm. Some craftsmen take the path of less resistance and remove only the vegetation layer of the earth, build a formwork 20 cm high and fill it with concrete. But this is a bad choice.
The foundation is under pressure of several hundred kilograms, especially the load will increase in winter, when the soil will freeze. Therefore, do not be lazy and save money on arranging the foundation, on which the strength and reliability of the operation of the furnace entirely depends.

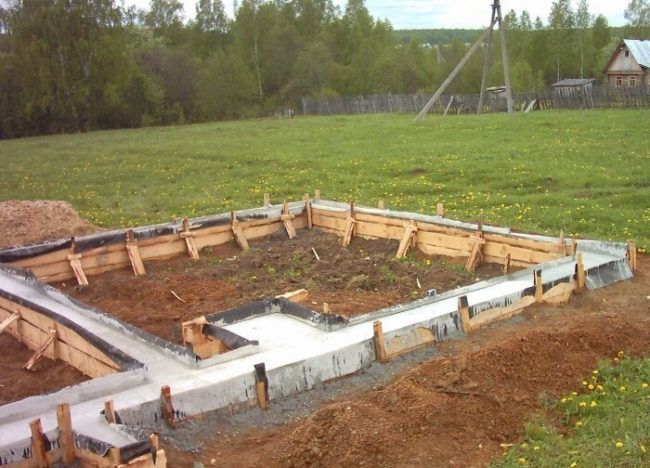
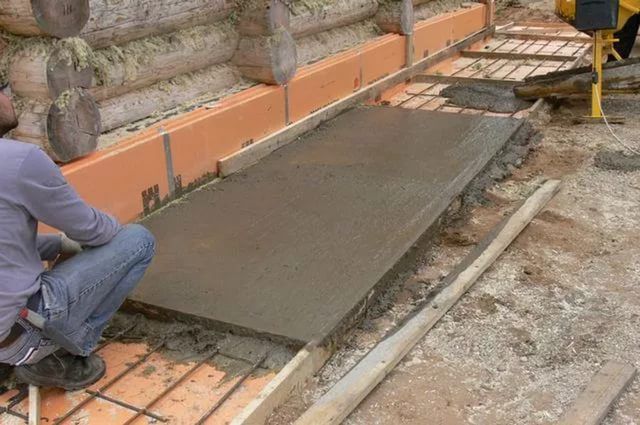
Finished Foundation
Tools and materials for building a foundation
The first thing to do before starting construction work is to stock up on the necessary set of tools.
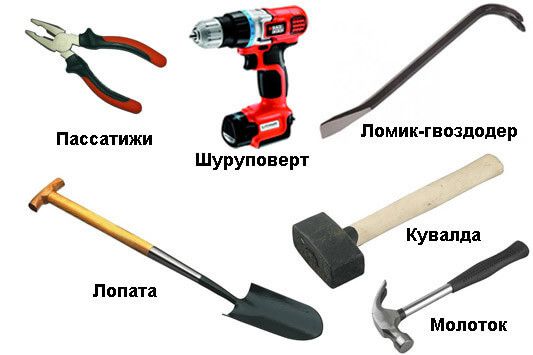
Work will have to be carried out not only earthwork, but also carpentry, so prepare the following tools:
- Bayonet shovel (needed to dig the main pit).
- Scoop shovel (it is convenient to prepare a sand-cement mortar).
- A hammer.
- Hacksaw or saw.
- Sieve for sifting cement (mesh size 1*1 mm).
- Sieve for sifting sand (mesh size 2*2 mm).
- A bucket for water (for the preparation of a cement-sand mortar).
- A metal trough in which we will prepare the solution.
- Building level.
- Roulette and pencil.
- stapler.
- Concrete mixer.
From the materials you will need:
- Boards (for the manufacture of formwork).
- Polyethylene (for formwork waterproofing).
- Sand.
- Cement.
- Gravel.
- Reinforcing mesh or bars.
We begin to pour the foundation for a brick oven with our own hands
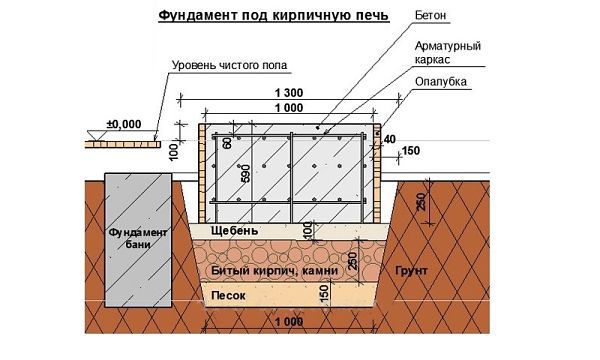
Foundation for a brick oven
Step 1. Marking for the foundation and pit
- After you have decided on the location of the future furnace, you need to correctly calculate its dimensions, based on power. It depends on the area of the room, the number of doors, windows, etc.

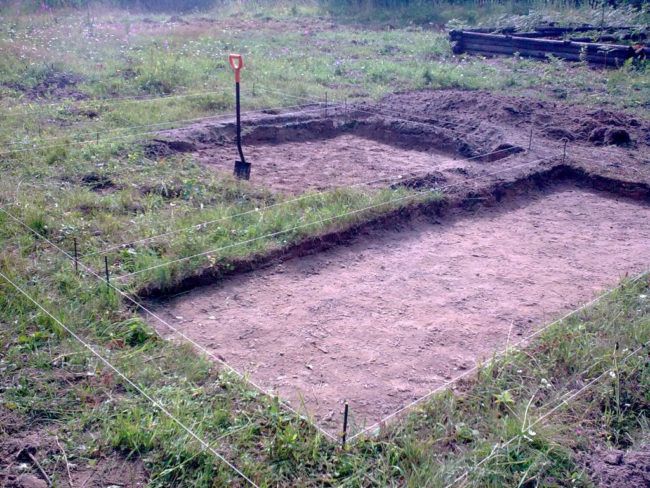
Marking on the ground under the foundation
- On the ground we draw the required size of the furnace. The foundation should be 15-20 cm larger than the heating structure. Make a markup and install pegs that will mark the boundaries of the pit for the pit.
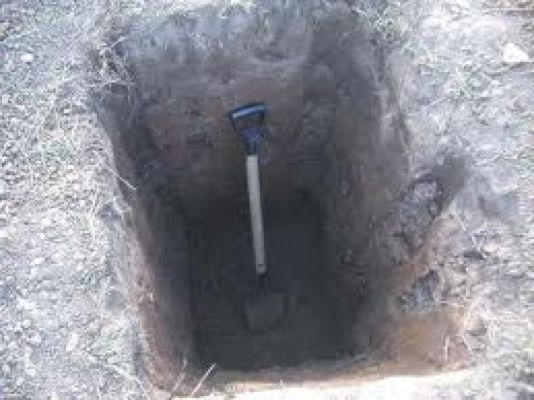
- Using a bayonet shovel, dig a hole 70-100 cm deep, depending on the density of the soil and the climatic zone (see above).
Digging a pit
- We lay a sand cushion 10-15 cm thick at the bottom of the trench. We compact it tightly with a shovel and pour a layer of medium fraction gravel to a height of 30 cm.Pour a bucket of water on the surface of the sand and gravel cushion and tamp tightly.
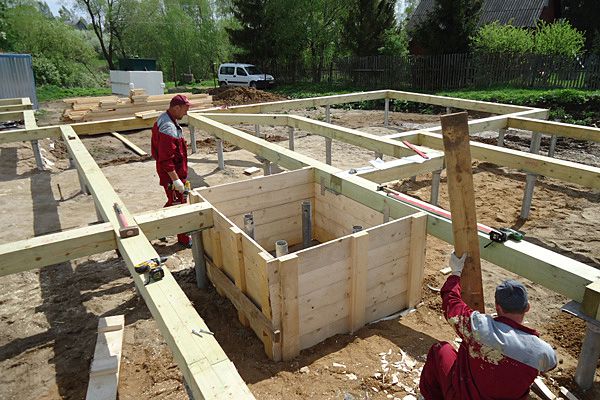
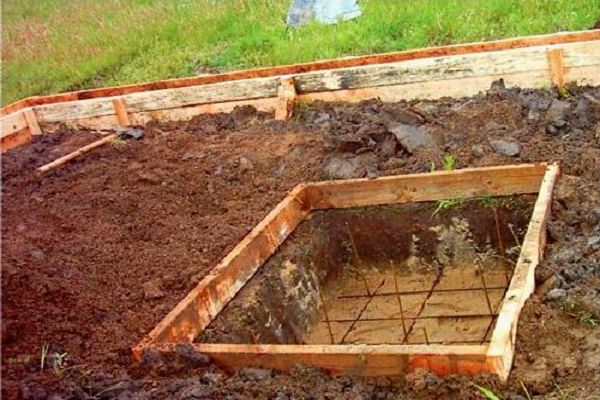
Step 2. Formwork installation and reinforcement
- We start building formwork from boards. For formwork, in principle, any old boards or plywood that are on the farm are suitable. This does not affect the technical properties of the foundation in any way.
Formwork for oven
The formwork is a wooden box, which, for reliability, is fastened at the corners with metal corners. Connect the boards to each other with nails.
- We lower the finished formwork to the bottom of the pit.
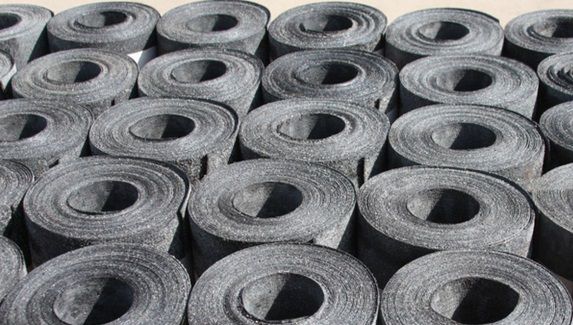
Ruberoid for waterproofing
- After the pillow is tightly packed, it is necessary to waterproof the base. To do this, we measure the size of the pit on polyethylene, cut it out and attach polyethylene to the walls along the perimeter of the formwork using a construction stapler.
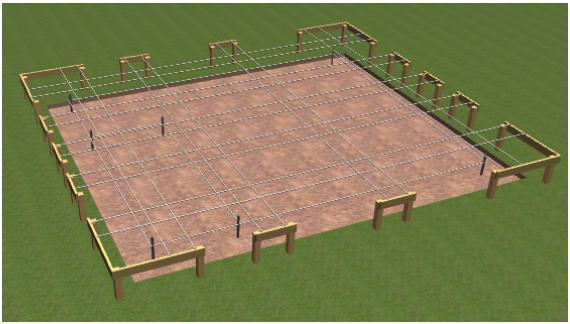
Reinforcement tools
- Reinforcement of the foundation is necessary in order to give rigidity to the entire structure. We will reinforce with steel bars with a cross section of 12 mm, which must be connected to each other by welding in the form of a frame or metal wire with a cross section of 0.8 mm.
Formwork and reinforcement
- Finishing work on the construction of the foundation is the docking of the floor with the foundation. This is best done by laying an even row of bricks.
Step 3. We prepare the concrete mixture for pouring the foundation
We prepare a mixture of the following proportion: for 4 parts of sand we take 1 part of cement + 3 parts of crushed stone of the middle fraction.
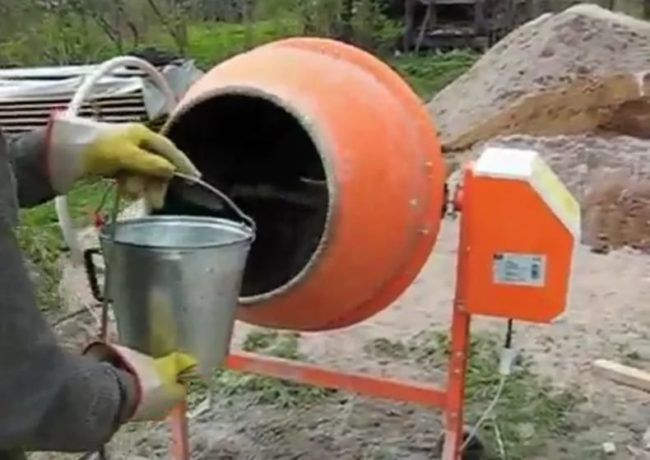
Concrete mixer
Stir the dry mixture well with a bayonet shovel and add water. We mix the solution well with a concrete mixer. By consistency, it should resemble thick sour cream.
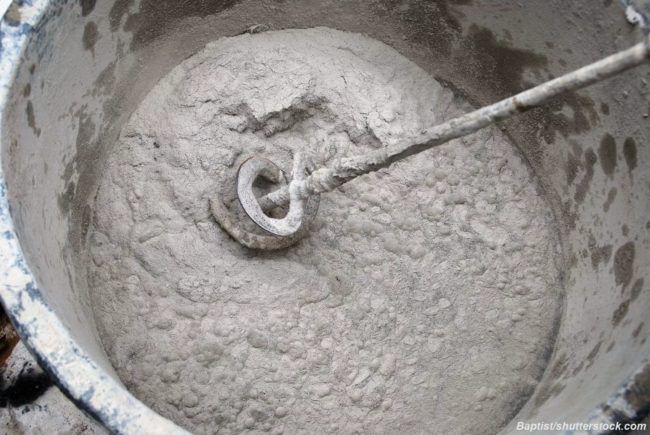
We prepare a concrete solution
We fill a part of the pit with this mixture, not reaching the level of the base floor by 8 cm. These works must be done within a day. The concrete solution must be integral, and not lay down in layers.
Load and wait 2 weeks
After you fill the entire pit with concrete, you need to check the level of the coating again with a building level. After the solution has completely dried, it will be more difficult to correct your errors.
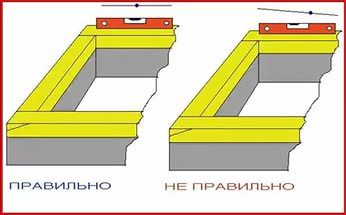
we check the horizontal level of the foundation with a building level
Cover the foundation with a layer of polyethylene or roofing material and leave for 2 weeks until completely dry.
We remove the upper part of the formwork only after complete drying, beating the boards with a hammer. Pour crushed stone with sand into the gap formed and compact it well.
We make the foundation for a metal furnace with our own hands
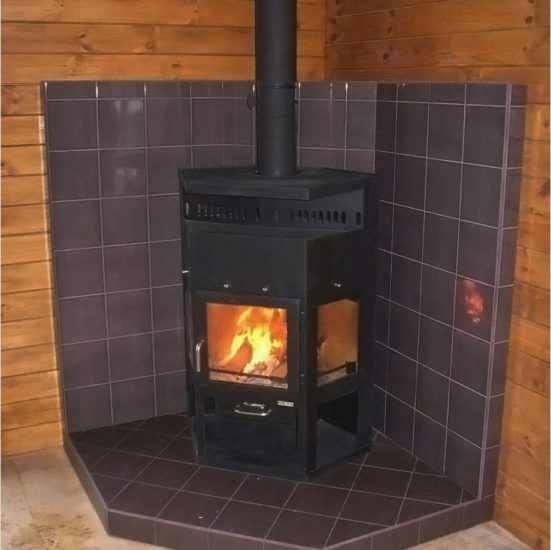
metal oven
If the stove is being installed in an already finished house, where this device was not previously intended and wooden floors are already laid, then the construction of the foundation will have to begin with the partial dismantling of the floor covering.
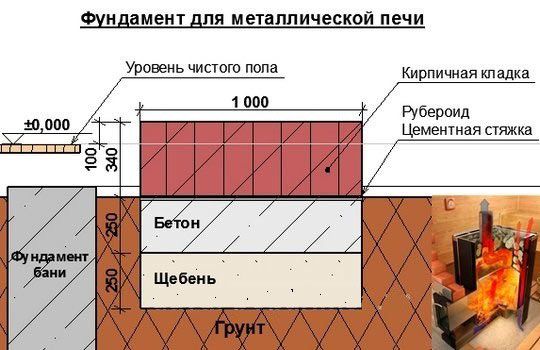
Foundation for a metal furnace
- We make markings on the floor with a construction marker, depending on the size of the furnace. The base should exceed the oven by 7-10 cm on each side.
- Using a grinder, we cut a rectangle in the floor.
- We dig a hole with a bayonet shovel 50 cm deep.
- We pour gravel and sand at the bottom of the pit, compact it tightly and pour some water.
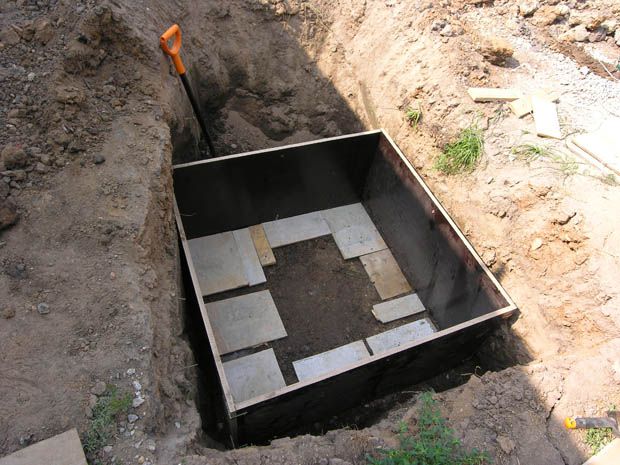
- We create formwork from boards or plywood sheets and lay 1 layer of roofing material around the perimeter.
formwork
- We fill the pit with a solution of sand and crushed stone (for 4 servings of sand we take 1 serving of crushed stone). We do not reach the floor level by 10 cm.
- We level the solution with a shovel and check the horizontal level with a building level.
- Technological break 2 weeks until complete solidification.
- We lay out 2 layers of brickwork on top of the cement mortar, reaching the level of the finished floor.
As you can see, this is an easier way to build a foundation that does not require such careful preparation and laying of a reinforcing mesh. The small weight of a metal structure of 150-170 kg does not require such a powerful foundation.
To avoid critical mistakes when building a foundation for a furnace, we recommend watching this video.
Video: Foundation for the furnace, basic rules
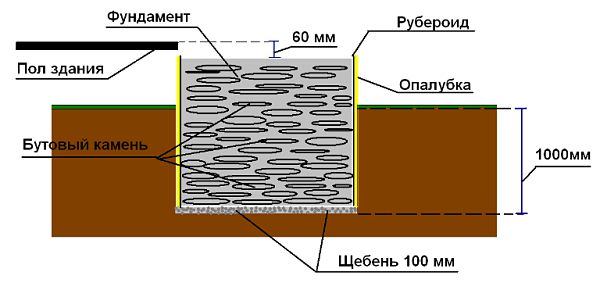
Option to create a rubble concrete foundation for a furnace
- The first steps are carried out similarly to the previous method: a pit breaks out, formwork is installed and waterproofed with polyethylene (or roofing material).
Scheme of concrete foundation
- Next, you need to tamp the bottom of the pit well and fill the bottom with a rubble layer (the diameter of large stones should exceed 16 cm).
- We pour a layer of crushed stone of the middle fraction by 10 cm, level it.
- We pour the cement mortar for 10-15 and take a technological break for several days until the mixture hardens well.
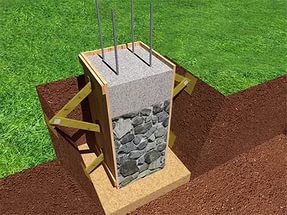
An example of a concrete foundation
- We repeat the layer of crushed stone of the middle fraction, and then pour the solution again, filling it almost to the end, not reaching 8 cm to the level of the finished floor.
- We level the solution and check the evenness of the coating with a building level. We make a technological break for a few days. We cover the foundation with a layer of polyethylene.
- Thus, we get a reliable foundation, consisting of four layers.
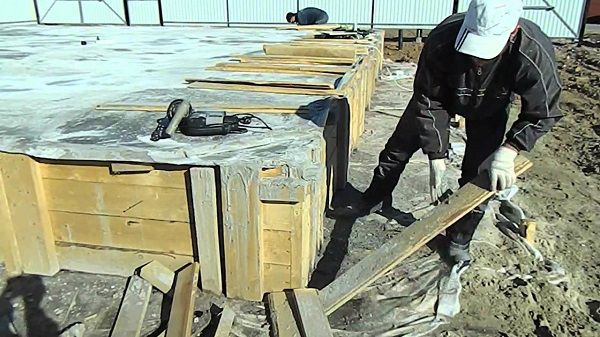
- We remove the upper part of the formwork with a hammer.
Formwork removal
- We bring the foundation to the level of the finishing floor with the help of two rows of red burnt bricks.
- Depending on which brick you took, immediately calculate its height and do not bring the pouring of the concrete mixture to exactly 2 brick heights. The top row of bricks must completely coincide with the level of the finished floor.
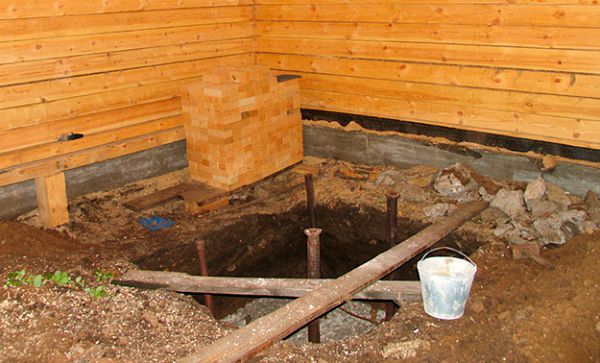
Installation of a pile foundation with a slab
One of the varieties of the foundation for the furnace is a pile structure, which is distinguished by good reliability and ease of installation.
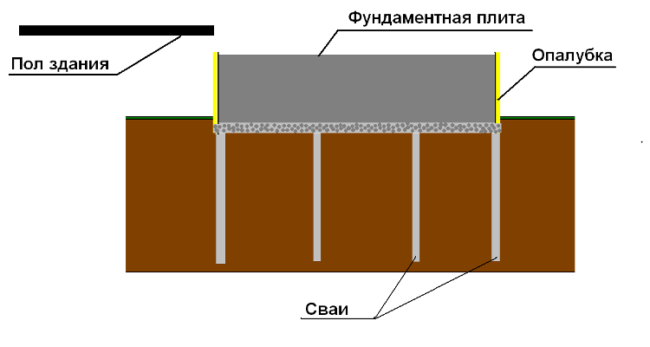
Foundation on piles
- We make markings on the ground according to the dimensions of the future furnace and measure 10 cm in each direction - this will be the size of the foundation.
- We remove 20 cm of the plant layer of the earth with a bayonet shovel.
Removed the vegetation layer of the earth
- We put pegs and pull the rope.
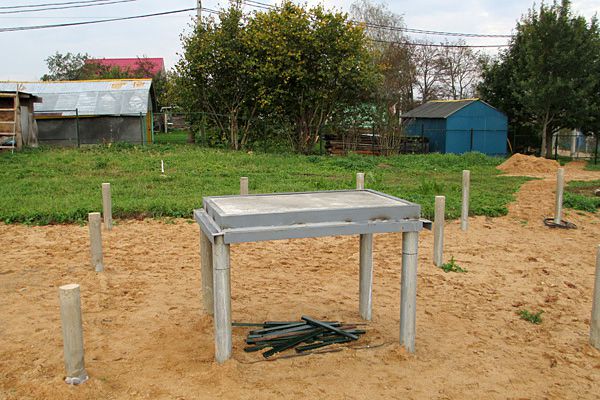
- In each part of the peg, we drill holes with a diameter of 20 cm to a depth of 50 cm.
Pile foundation for the oven
- We make formwork from wooden boards, fastening them together with nails, and set them according to the size of these pits. The formwork is a wooden box without a bottom.
- We make waterproofing using polyethylene, which we attach along the perimeter with a stapler to the formwork walls.
- We pour sand at the bottom, tamp it well and fill it with gravel for 15 cm. Fill with water.
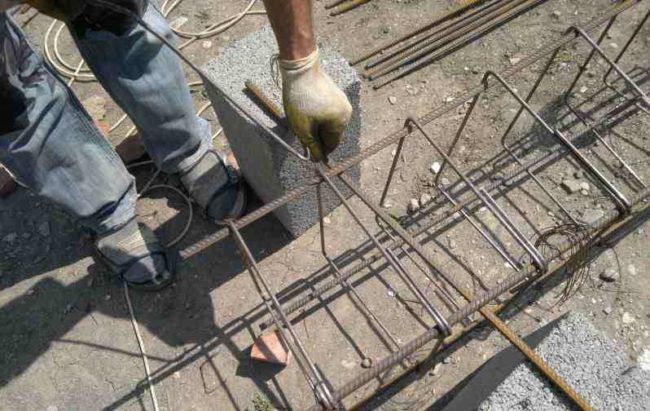
- We knit reinforcing bars with a wire of 0.8 mm and twist well.
Reinforcing mesh knitting
We install a reinforced frame.
Foundation reinforcement
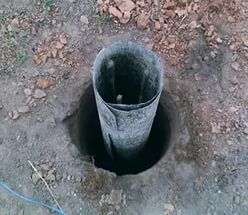
- We roll up tight sleeves from roofing material and insert such piles into the pits. Asbestos pipes can be used as piles.
Sleeves from roofing material
- We fill the piles ready and inserted into the pit with a concrete mixture.
- We are taking a break for 2 weeks.
- Now you can fill the entire foundation with concrete mix.
- We cover with polyethylene and let the foundation harden for at least 2-3 weeks.
Video: How to make a foundation for the oven