In this article, we will consider options for how to make heating for a garage with your own hands. Garage for car owners - the holy of holies. Here they spend time gathering in a company and discussing the latest news, and at the same time sorting out the next part of the car, bringing it to perfection. In summer, in heating garages, but with the advent of autumn, slush and coolness interfere with a comfortable stay in the walls of the garage, and also negatively affect the condition of the “iron horse” itself and other items, I just want to say if you are interested, how to make a garage oventhen read this article on our website.
The purchase of gas and electric heating appliances significantly hits the pocket. You can solve the problem with heating with the help of a boiler that runs on practically free fuel - "working out».
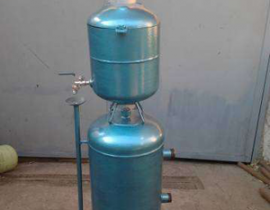
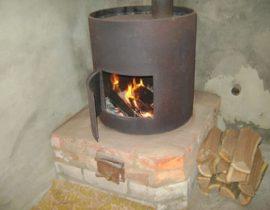
A stove with a water circuit is attractive for its compactness, mobility, low cost, simplicity, in addition, hot water is always useful to wash your hands after repair or other work. Smoke and ash are not formed during combustion, it is not required to allocate space for storing solid fuels. And to clean the chimney, you just need to disconnect it from the stove, put it in a bucket and “knock” the pipe with a hammer.
Content
Preparation of equipment and materials for garage heating
To make a stove with your own hands and connect it to a water circuit, you will need:
- angle grinder / hacksaw, file, sandpaper;
- welding machine and electrodes;
- pipes of various diameters (for the furnace itself and for the heating system), radiators;
- a simple pump and another, circulation;
- burner;
- compressor;
- expansion tank;
- profile metal;
- boiler;
- drill, drills;
- heat-resistant paint to further protect the metal from corrosion;
- valves, tape measure, level.
If you do not know the welding machine too well, entrust this business to a professional, because the safety and operation of the entire heating system depends on the tightness of the seams.
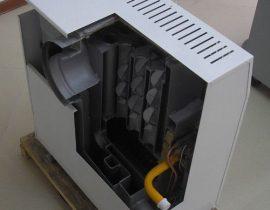
The principle of operation of a waste oil heating boiler

Scheme of a heating boiler for a garage using waste oil
- Pour the used oil into the supply container at number 6.
- From there, with the help of an oil pump, number 5, fuel through a flexible hose, number 10, enters the chamber number 17.
- This chamber is designed to vaporize fuel. Ignition is carried out through the hole at number 11.
- The chamber is made of a pipe with thick walls. During combustion, a temperature of about four hundred degrees is maintained here.
- Under the influence of temperature, the oil evaporates from the bottom and fuel vapors rise into the combustion chamber, number 13, in the center of which there is a pipe with many holes.
- This pipe, in turn, is connected to a blower fan, number 4, which pumps the air necessary to maintain the combustion process.
- The fan is connected to the power supply, number 3, and the control panel, number 2.
- When burning oil vapors, a large amount of thermal energy is released, which is spent on heating the water circuit, number 14.
- To reduce heat loss, the combustion products are not discharged directly into the chimney, but pass through a gas-tube heat exchanger, number 15, located together with a water jacket.
- Only after that, the gases, having completely given up their energy, enter the chimney, number 20, equipped with a valve - draft regulator, number 19, through which they are released into the atmosphere.
- Number 16 shows the inlet pipe for cold water, which is heated in the boiler and discharged into the system through the outlet pipe, number 12.
Video - do-it-yourself garage heating oven
How to ignite and maintain
- We open the fuel supply valve and wait until the bottom of the combustion chamber is covered with a thin layer of "mining" (about 1 cm). Pour a little gasoline on top to speed up the ignition process.
- We fold the paper in the form of a wick, moisten it in gasoline, lower it to the bottom of the chamber with “working off”.
- Turn on the blower fan.
- We are waiting for the fuel to ignite and boil. This usually takes two to five minutes. After that, the boiler begins to gradually heat up and enter the operating mode.
To turn off the garage heating, it is necessary to close the valve on the hose through which fuel is supplied. After the oil burns out, the combustion and heating of the water circuit will stop. If it is necessary to urgently stop the operation of the furnace, the fuel is extinguished with a carbon dioxide fire extinguisher or sand.
Important! Fuel before pouring it into the boiler must be defended in order to eliminate the contained water and antifreeze, which cause unstable combustion or even can stop it.
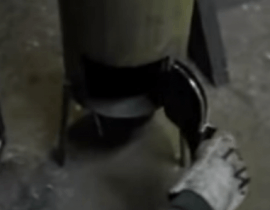
It is no secret that any fuel contains non-combustible impurities. They remain in the form of plaque on the chamber in which combustion occurs. This must be eliminated with an improvised tool (shovel). In addition, at least once a month, you need to disconnect the chimney from the stove and clean it from plaque.
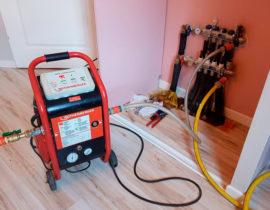
We assemble a water heating system for the garage

Water garage heating system
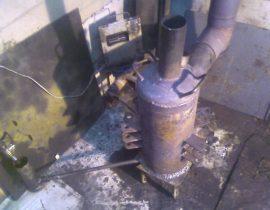
We assemble the furnace structure from pipes and metal sheets, connect it to the chimney, install a blower fan, and proceed to assemble the system. We install the furnace on a metal sheet, the distance from the walls is about half a meter.
We will need a pump, fittings, radiators, taps, expansion tank, pipes.

Drawing of a garage water heating system
We make a drawing of the system based on the dimensions of the garage.
We cut the main pipes to the desired length. In the places where the radiators are attached, we drill holes in the wall and fasten the brackets to the dowel-nails. The distance from the floor to the radiators should be about fifteen centimeters. We connect radiators and pipes. At the joints we use fittings.
We connect an expansion tank (open or closed type) to the supply pipeline with nozzles in order to avoid emergency situations in the event of a change in the volume of water in the system. The tank itself should be located in the attic of the garage.
For forced circulation of water to the system, we connect a pump.

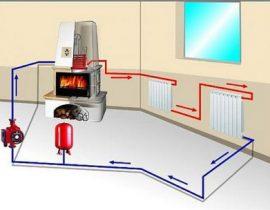
Scheme of the movement of water with single-strand wiring
Be sure to install taps so that it is possible to stop the circulation of water when the garage heating is turned off.
If heating is used periodically, with long breaks, the water must be drained from the system. And to prevent freezing and corrosion of pipes, antifreeze is poured instead of water.
A working furnace with a water circuit can successfully heat not one, but two or more neighboring garages, it is better to cooperate with their owners in order to further reduce the cost of heating, it is also recommended to insulate the walls of the garage and the chimney.