For many, a garage is a non-residential premises where a personal car is sent to the parking lot, spare parts for it, various liquids, tools, and many other useful things in the household are stored there, which are a pity to throw away.

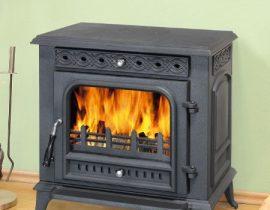
garage oven
Often, a cellar is built under the garage for storing pickles and vegetables, which are so nice to see on the table in winter. But if the garage is not heated, then you may encounter freezing of its walls, as a result - corrosion on the car or the inability to start the engine in severe frost. In a frost of minus 15 degrees, a car battery can be discharged in just two days of inactivity.
The temperature norm for garages is 5 degrees. However, this is not enough to carry out repair or other work. A more comfortable temperature for a long stay in the garage is 18-20 degrees. From this follow garage stove requirements:
- safety;
- the ability to control the temperature;
- the possibility of quick installation of the furnace and ease of maintenance;
- low cost of construction and fuel used;
- high efficiency and heat transfer;
- non-volatility, that is, interruptions in water / gas / electricity should not affect the operation of the heating elements.
Content
Types of furnaces for the garage
The choice of stoves is great. Each of the furnaces can be additionally upgraded, choosing the best option.
According to the fuel used, furnaces are divided into:
- electrical;
- gas;
- solid fuel;
- operating on liquid fuel.
The design of the furnaces is made of brick, metal, or a combination of these materials (iron casing and refractory brick firebox). Brick ovens have better heat dissipation, cool down longer, warm up more evenly and safer than metal ones. But they take up more space. If the garage is small, metal mobile stoves are being built. All designs are subject to safety rules and equipping the garage with fire fighting equipment
- non-combustible foundation;
- insulating materials on the walls and in the place where the chimney pipe passes;
- screen - reflector;
- good room ventilation.
For solid fuel stoves, it is additionally necessary to equip a firewood shed or a place for storing coal, sawdust or fuel briquettes.
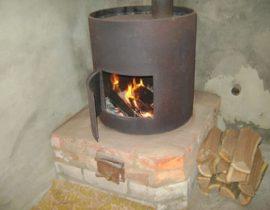
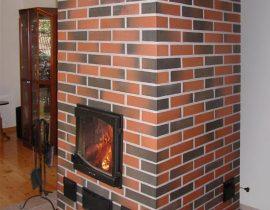
Brick ovens for the garage
Such stoves work on wood, coal, sawdust or briquettes. Fuel is inexpensive, stoves are very durable, and combustion products can be used in the garden. For a garage brick oven are required:
- refractory brick;
- oven clay;
- fine sifted sand;
- cement;
- containers for mixing the solution;
- shovel;
- tools for laying and jointing seams;
- Bulgarian;
- sandpaper and file;
- roulette;
- level;
- plumb lines;
- waterproofing;
- fittings;
- plastic metal wire;
- door for the firebox (ash pan);
- chimney damper.
The clay mortar is prepared in advance, while the bricks are immersed in water immediately before laying, so that during the laying process they do not take excess liquid from the clay and dry it out, which will make the mortar unsuitable for laying!
The simplest brick oven for a garage with direct-flow modules

Brick oven for garage
The stove is small in size, the masonry is very simple, without cutting the bricks and bandaging them. Disadvantages: the absence of a grate makes it difficult to clean the oven; draft is regulated only by the size of the gap of the open furnace door.
The foundation will be a sheet of thick steel laid on the flooring. Before work, it is necessary to prepare a clay solution, drill several holes in the furnace door for oxygen access, make sure that the surface on which we will lay is horizontal.
First two rows bricks are laid horizontally. AT third we begin to form the walls of the firebox and install the door. We fasten it with the help of metal fastening plates and wire, fixing it on the door and clamping it between the brick rows.

Laying the first rows for a brick oven
FROM third to sixth rows we lay out the camera where we will lay firewood. We close the door, completely fixing it between the bricks.

We lay the chamber for the firebox
Important! We check each laid out row for possible distortions. To do this, we use plumb lines, tape measure and level. The numbering of the rows will allow you not to get confused in the process and avoid mistakes.
Further (row number seven) it is necessary to lay out the bricks in such a way that there is a hole in the center the size of one brick.

We lay out a brick oven for the garage
Important! If you want the stove to not only heat the room, but also decorate it - between the rows of brickwork, from the outside, it is necessary to lay thin wooden slats of the same thickness. This will allow you to make a neat stitching. We remove the slats as the solution "seizes".
Eighth row we lay out the bricks “flat”, creating a kind of expansion.

Laying the eighth row
In the next (ninth) row again put the bricks on the edge.

Masonry of the ninth row of the furnace
And again we make a narrowing, laying “flat” (tenth row). In the eleventh row put the bricks on edge. In this case, one brick must be installed across the hole.

Eleventh row masonry
We lay out the subsequent rows in the same way, repeating the alternation of laying bricks flat and “on edge”.

Laying subsequent rows
To connect the stove to the chimney, it is necessary to narrow the chimney, leaving a hole for the metal pipe. We cover all cracks and voids with a solution of oven clay and insulate with insulating materials (mineral wool).

Chimney outlet
Before starting a fire in the oven and heating the garage, we must wait for the solution to dry completely. We check the draft by burning a small amount of paper or rags in the firebox.
In addition to the stove, we equip a firewood shed so that firewood and coal are protected from moisture, precipitation and theft. The firewood rack can be made from curved metal rods, a leather basket, wooden floors, etc.
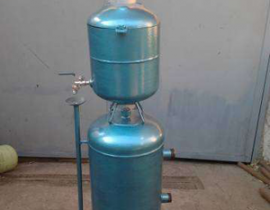
Liquid fuel garage oven

Liquid fuel garage oven
Liquid fuel refers to oil (machine, furnace, etc.), diesel fuel or "working out" - oil refining products formed during their operation. Every garage accumulates similar products that are not always properly disposed of. Often, car owners save them in cans in summer, and in winter they heat their garage with this substance.
Waste oil furnace without nozzles and drip fuel supply, you can do it yourself from a used gas cylinder or a thick-walled pipe (metal thickness should be at the level of 4-5 mm) or welded metal sheets. To do this, you will need the skill of owning a grinder and a welding machine and access to a source of electricity.
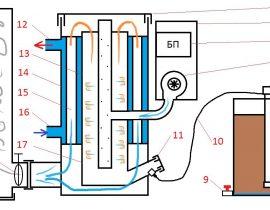
Furnace "in development" consists of four main parts:
- the lower chamber into which fuel is poured;
- burner in the form of a perforated pipe;
- upper heating chamber;
- chimney and chimney (mandatory presence, since the combustion of oil produces elements and gases that are harmful to health).
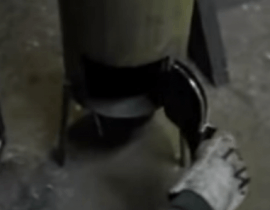
lower chamber we make it collapsible (upper and lower parts) and equip it with a hole for pouring “working out”. This hole must be closed with a metal cover, which at the same time serves to regulate the draft.

Tray for oven
Both parts of the chamber must be tightly and hermetically inserted into each other.
This part of the furnace can be made by cutting out the necessary parts from sheet metal and bending, or using a pipe / gas bottle. Steel thickness 4 mm. The legs of the furnace are welded metal corners or another profile.
For burners we use a pipe in which we drill about fifty holes. By welding, we connect it to the upper part of the lower tank.

Drilling 50 holes in the pipe
Upper tank made of steel 6 mm. The technology is similar with the difference that this part is non-separable. To increase heat transfer, a set of small metal plates or fittings can be welded to the structure.

The upper tank is made of steel 6 mm
To remove smoke, we weld a short piece of pipe (diameter about 100-120 mm).To this "glass" we will connect the chimney with clamps.
We mount the chimney itself inclined, with an angle of 45 degrees. The length of the chimney from its upper part to the floor level is 4-7 meters.
Modification of the furnace for the garage for testing

Furnace in production
- We use thick-walled pipes. From them we cut out the walls for the chamber with "working off". We cut out the bottom and upper part of the chamber from sheet metal, weld it to the legs and walls by welding. You should get a collapsible tank with a hole for filling fuel.
- We make a burner from a pipe. We make a narrowing at the bottom and top of the segment. To do this, we make vertical cuts with a grinder / hacksaw, bend the parts of the pipe inward and weld them. With a drill we make holes on the surface of the pipe. Oxygen necessary for burning oil vapors will flow through them.

Furnace for working out for a garage
- We connect the stove to the chimney and chimney.

To heat the garage space more quickly and evenly, you can install a fan and direct the air flow to the working furnace.
During operation, it is necessary to observe safety rules, check the elements for defects and beware of water getting into the fuel.